How to make healthy smoothies

Hey Awesome Friend! Let’s Make Some SUPER Yummy Healthy Smoothies!

https://sportsariseencyclopaedia.com/eb8i04p74?key=a13aad7d62fc71345a2bad80620f621e

Okay, check this out! Get ready for something seriously cool we can do right in your kitchen. No need for fancy gadgets or anything, just us and some yummy ingredients. We’re going on a mission, my friend: to figure out how to make healthy smoothies that taste AMAZING – like, dessert-level amazing – but are secretly packed with awesome stuff to make you feel strong and energized. Like a superhero fuel-up!

Honestly, I’m super excited to walk you through this because making smoothies? It’s like being a mad scientist (the fun kind!) mixed with an artist. You get to experiment, mix things up, push a button, and BAM – you’ve created something totally new and delicious. Trust me, it’s way easier than it sounds, quicker than baking cookies (and hey, I love cookies!), and just… really FUN. Forget boring snacks, we’re about to blend up pure happiness in a glass! You ready to become a smoothie whiz? Alright, let’s dive in!

How to make healthy smoothies

Wait, Hold Up… What EVEN is a Smoothie?!

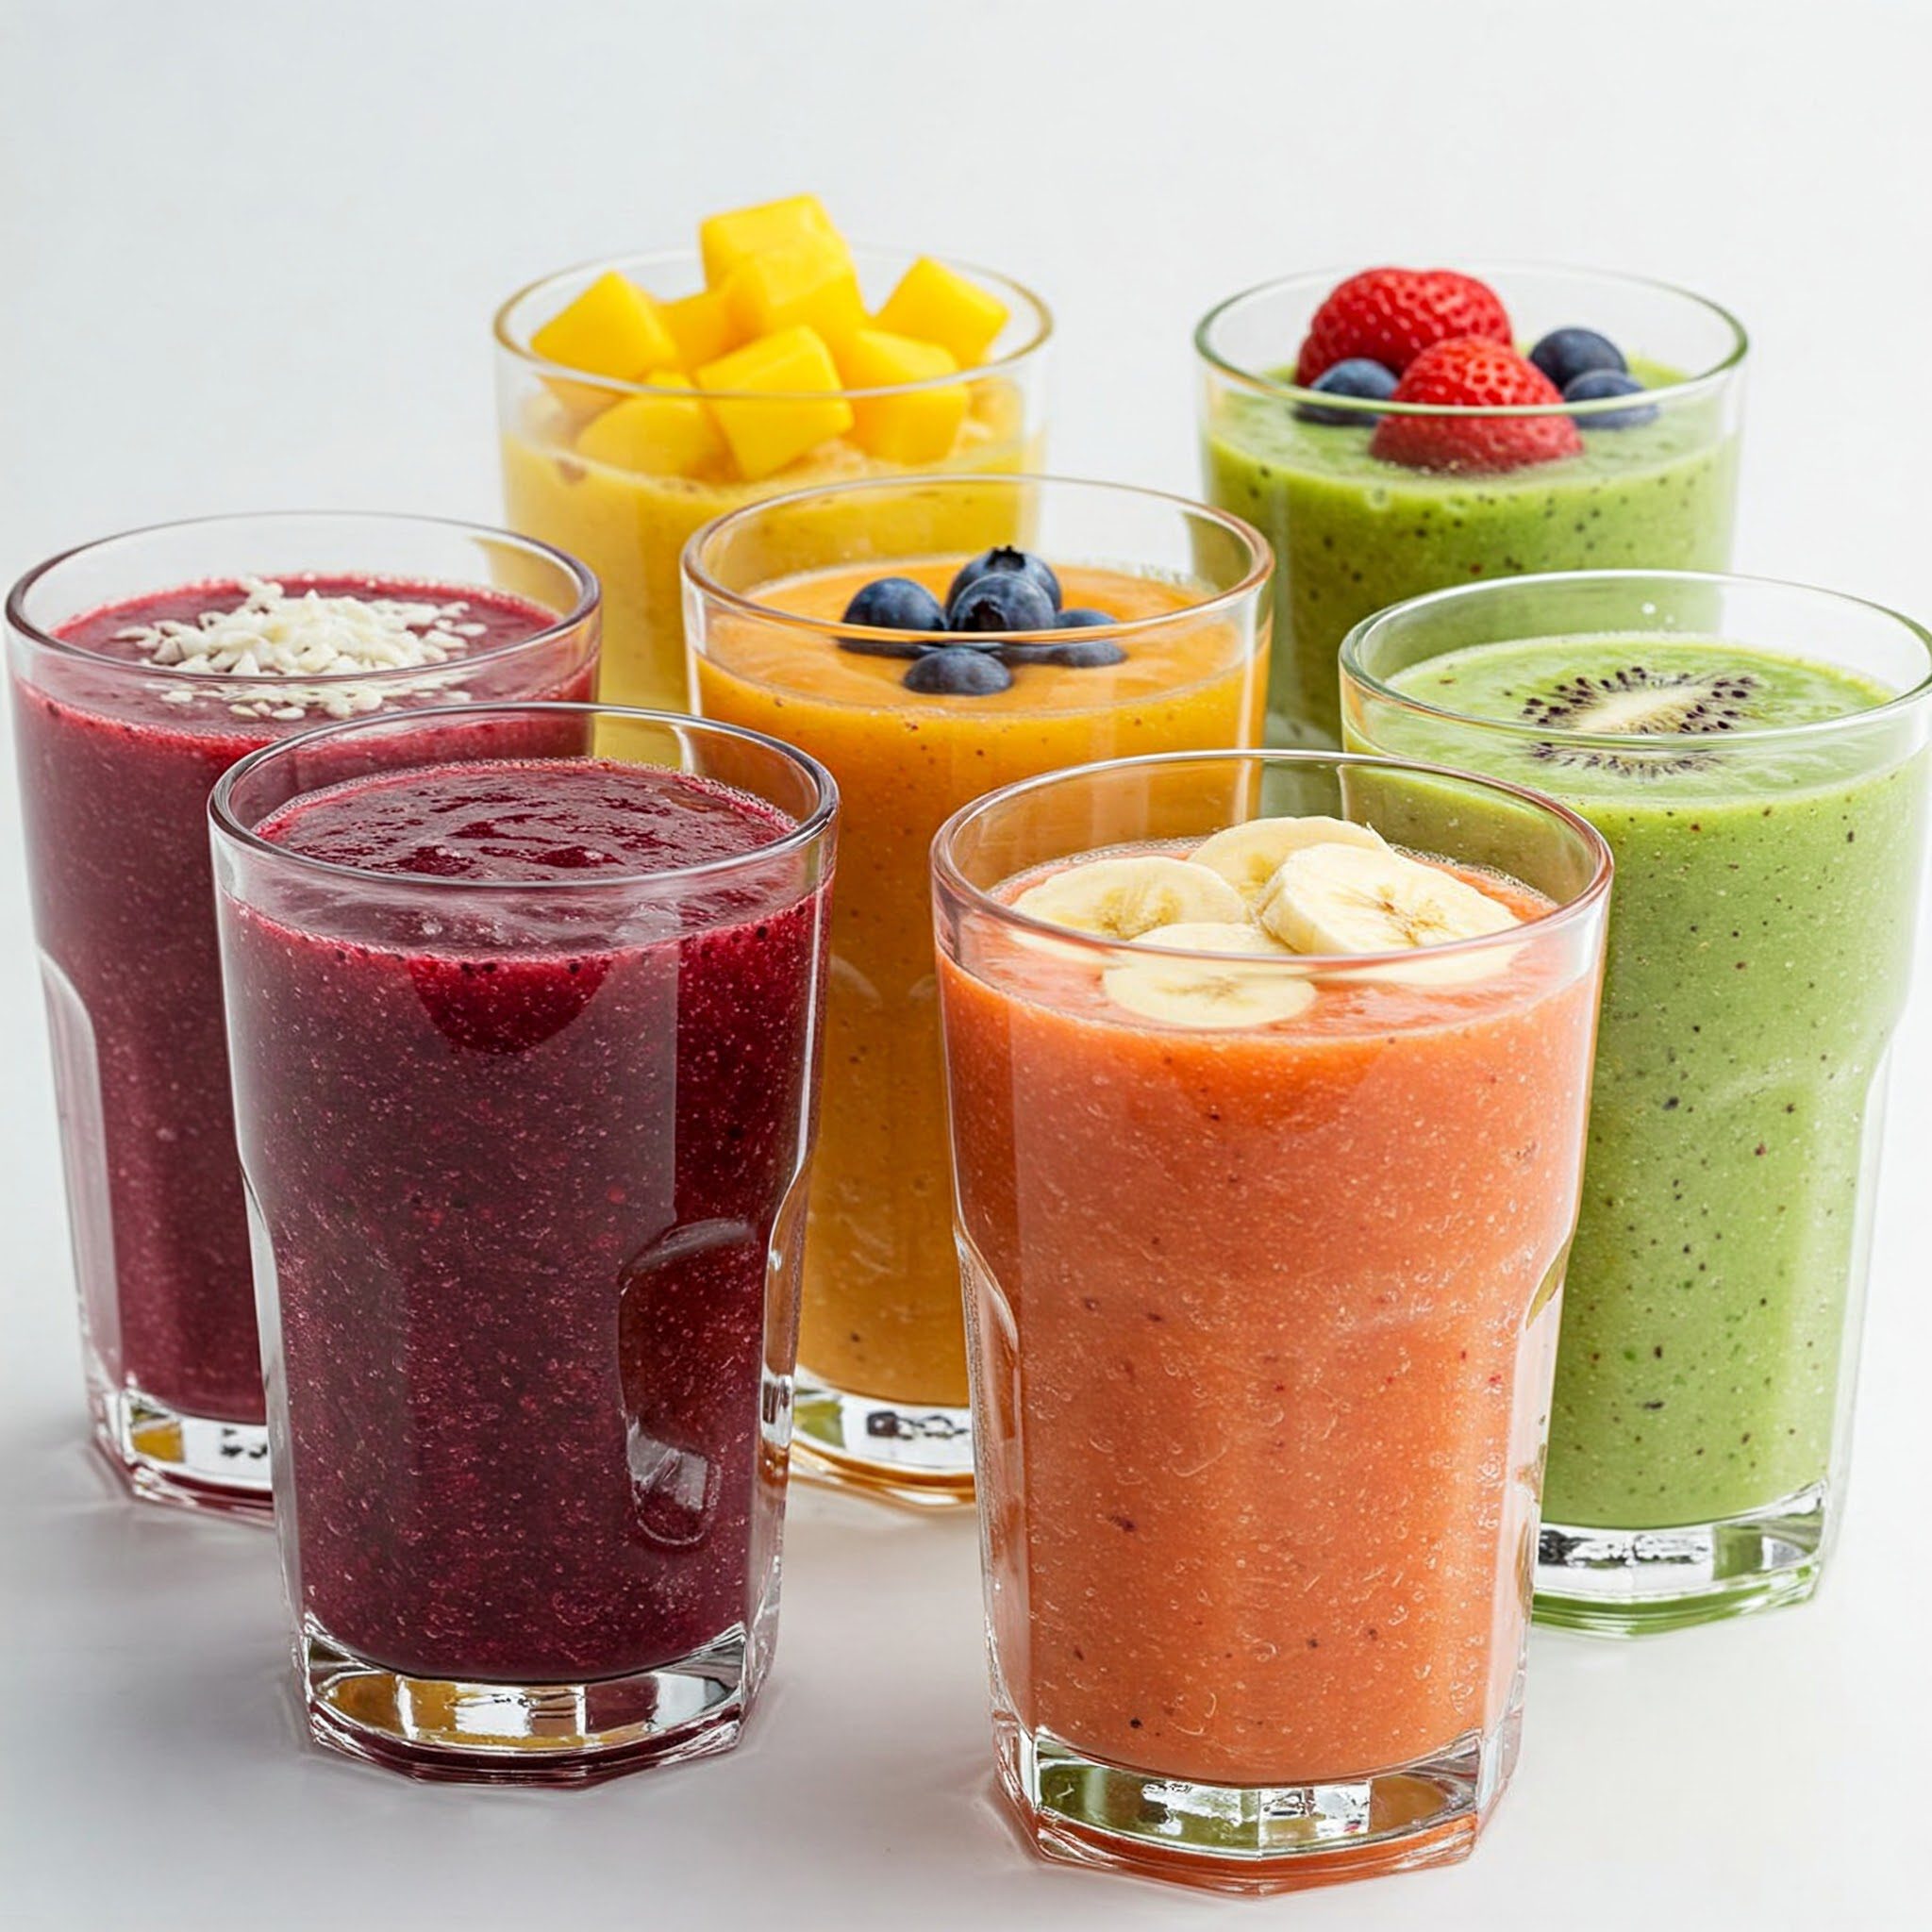
Alright, first things first. What the heck is a smoothie anyway? Picture this: grab your favorite fruits, maybe some creamy yogurt, maybe even a veggie hiding in there (don’t worry, I’ve got tricks for that!), and whizz it all up in a blender. Everything gets chopped up super fine until it’s smooth, creamy, and totally easy to drink. It’s kinda like a milkshake, but think of it as its super cool, super healthy cousin.

It’s a bit like playing with building blocks, you know? You pick your favorite flavorful blocks (like strawberries, bananas, yummy liquids), put them together in the special machine (that’s the blender!), give it a whirl, and ta-da! You’ve built yourself an awesome drink!

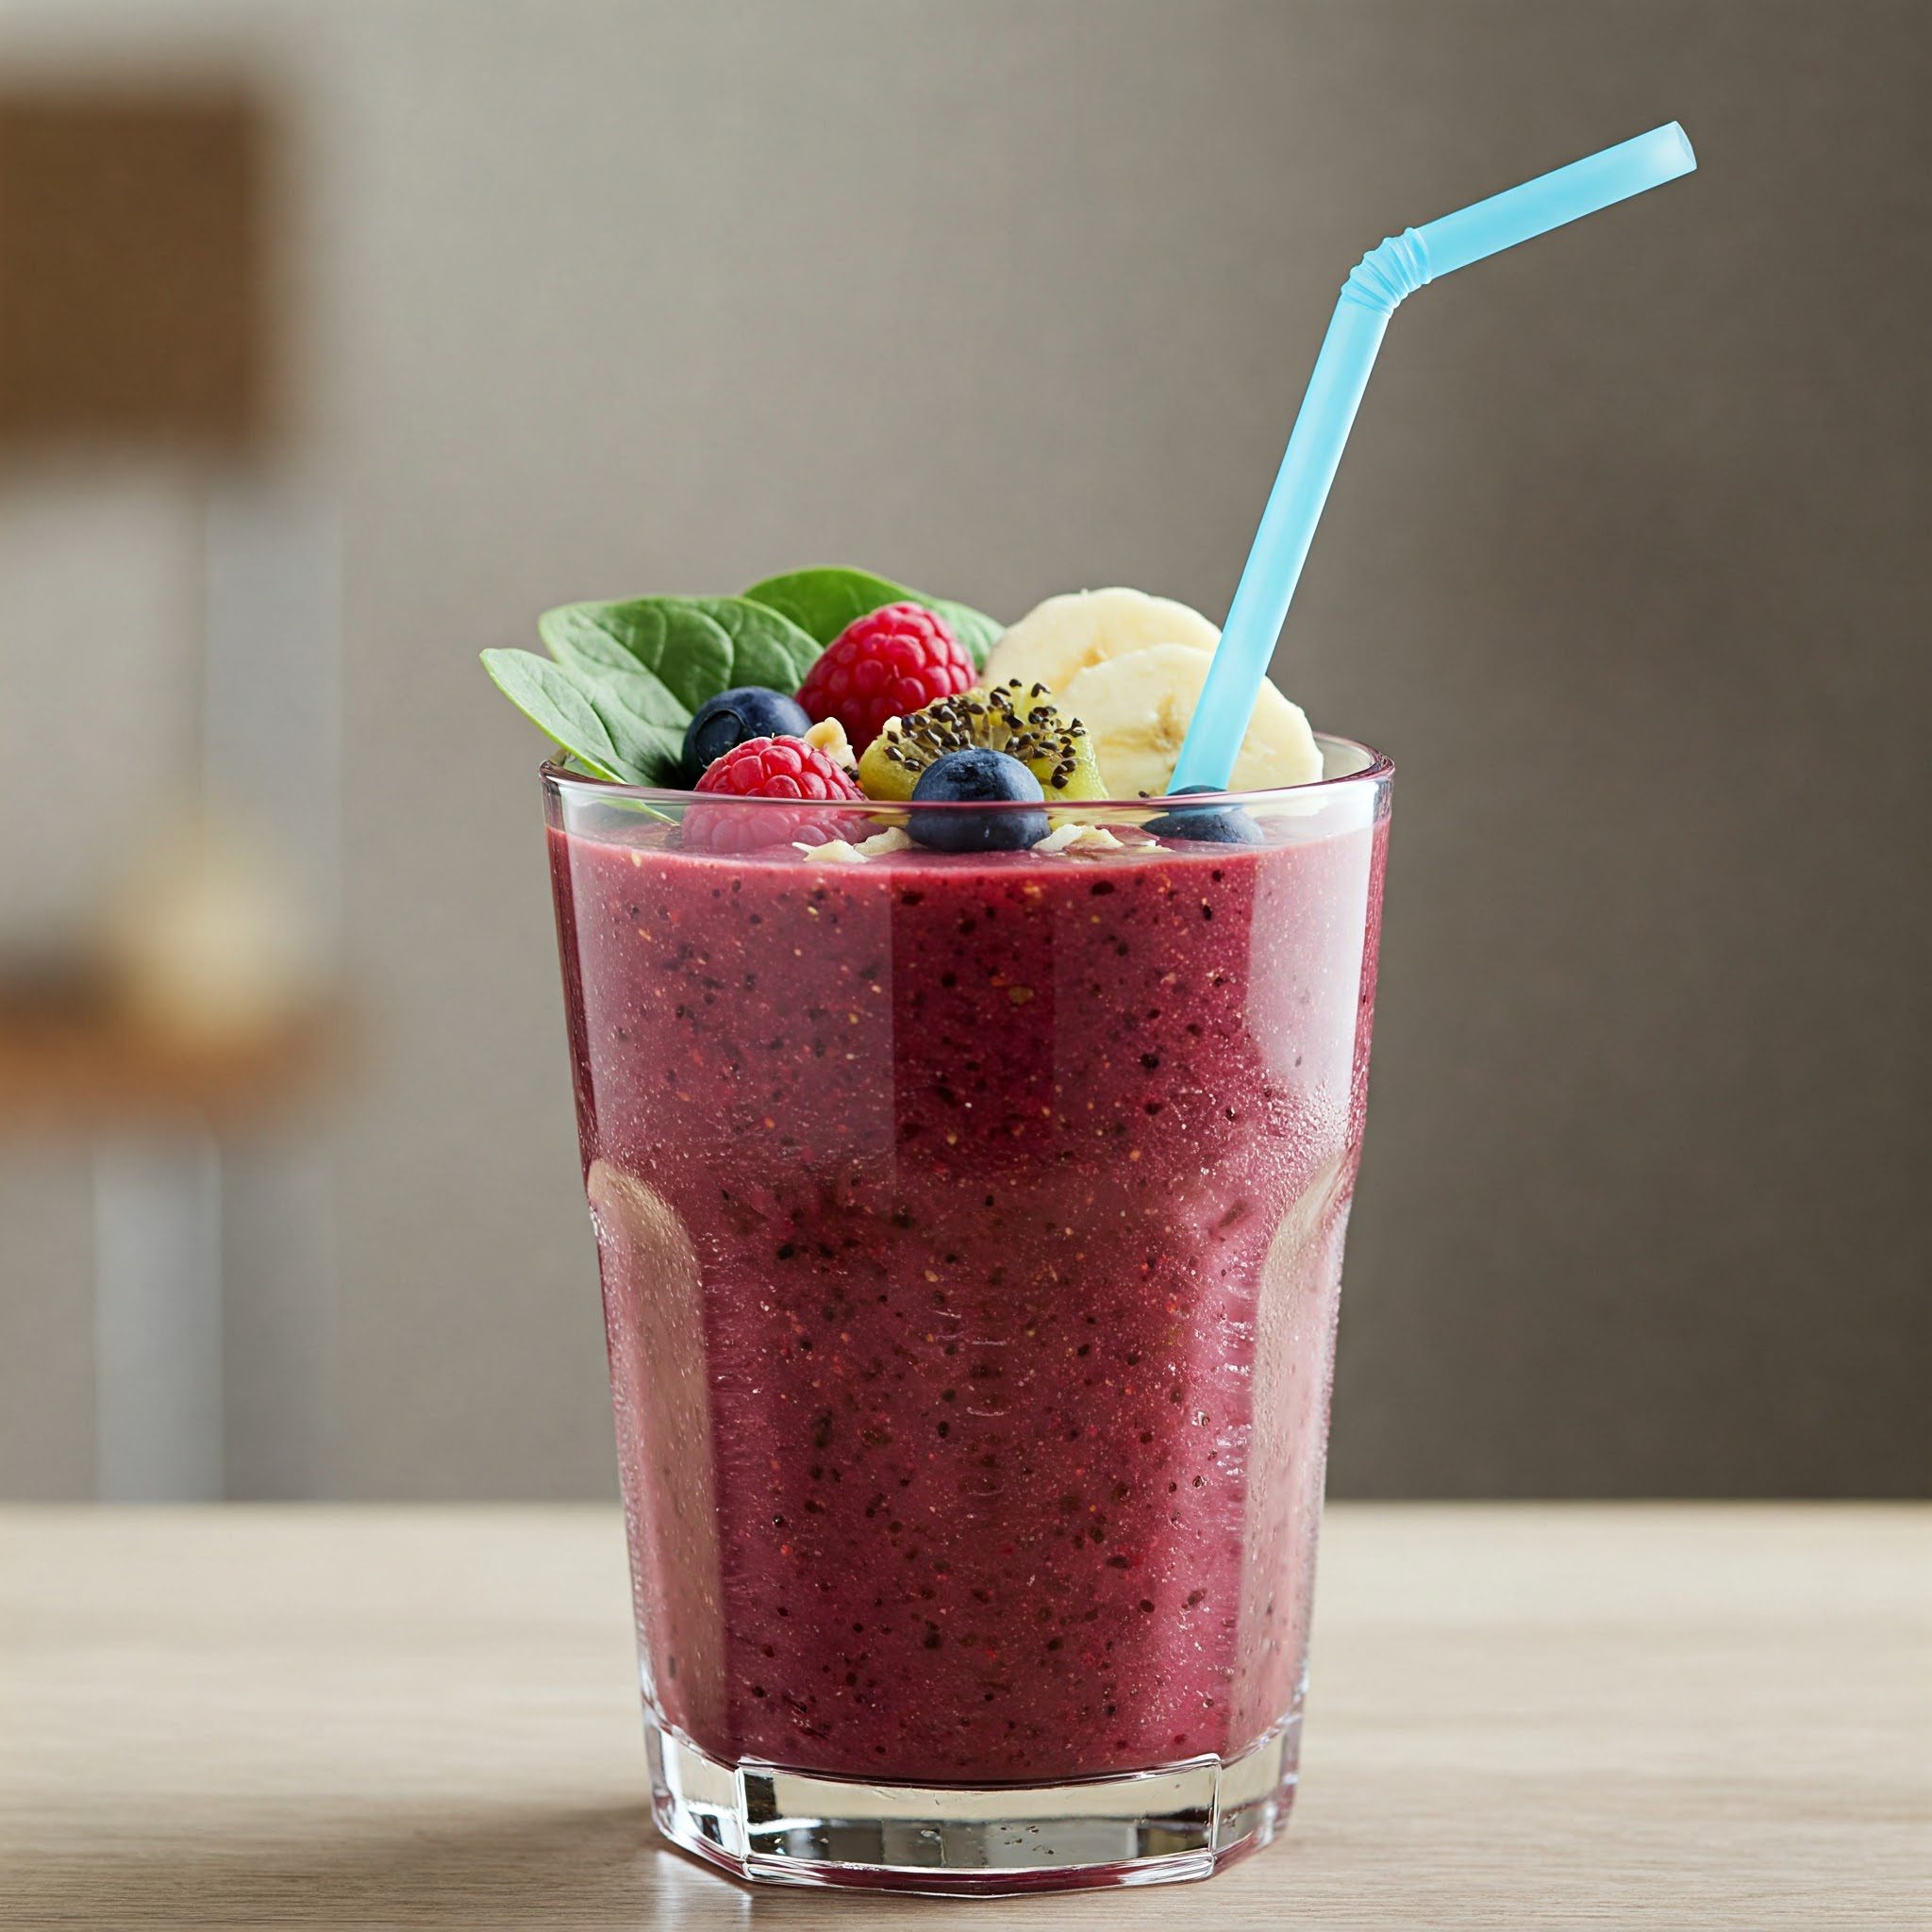
It’s not chunky like a fruit salad (which is good too, just different!), and it’s usually thicker and creamier than juice. It’s… well, smooth. See? SMOOTH-ie! Makes sense, right? 😉 The whole idea is that it’s quick, easy to slurp down, and packed with flavor and goodness. Learning how to make healthy smoothies is basically unlocking a secret level of deliciousness!

What EVEN is a Smoothie

Seriously Though, Why are Healthy Smoothies SO Awesome?

Okay, let me tell you why figuring out how to make healthy smoothies is like getting a cool new power-up in a video game. It’s not just about making something taste good (though, believe me, they taste GREAT). It’s about whipping up something that actually does awesome things for your body!

Here’s the real scoop:

  1. Instant Energy! Zoom! You know that feeling after school or running around when you’re just kinda… blah? A healthy smoothie can snap you right out of it! The natural sweetness from fruit gives you a quick energy burst, but it’s the good kind, way better than sugary junk. It’s like refueling your personal energy tank so you can play longer, think clearer, and just feel more… well, awesome!
  2. Vitamin Overload (The Good Kind!) Fruits and veggies are bursting with these things called vitamins and minerals. Think of them like tiny little mechanics and bodyguards for your body. They help you grow strong, fight off pesky colds, keep your eyesight sharp – all the important stuff! Smoothies are like a sneaky shortcut to gulp down a whole team of these helpers at once, sometimes without even tasting them! Pretty clever, huh?
  3. Taste Bud Party! Let’s be real – if healthy stuff doesn’t taste good, you’re not gonna want it. But smoothies? They nail it! Because fruit is naturally sweet and bursting with flavor, smoothies are automatically delicious. You can make ’em taste like a berry explosion, a tropical beach, or even chocolatey goodness (yep, healthy chocolate!). Learning how to make healthy smoothies puts YOU in charge of the flavor adventure.
  4. Crazy Easy to Make! Seriously, making a smoothie is probably one of the easiest things you can learn in the kitchen (with a grown-up nearby at first, obviously!). You basically wash stuff, maybe chop a little (or not!), drop it in the blender, hit a button, and pour. Done! It’s super fast, perfect for rushed mornings or when you need a snack like, right now.
  5. Keeps Your Tummy Happy! Ingredients like fruit, veggies, yogurt, and oats often have something called fiber. Fiber is like a gentle cleaner for your insides, keeping everything moving along nicely and helping you feel full and satisfied. Happy tummy = happy kid!
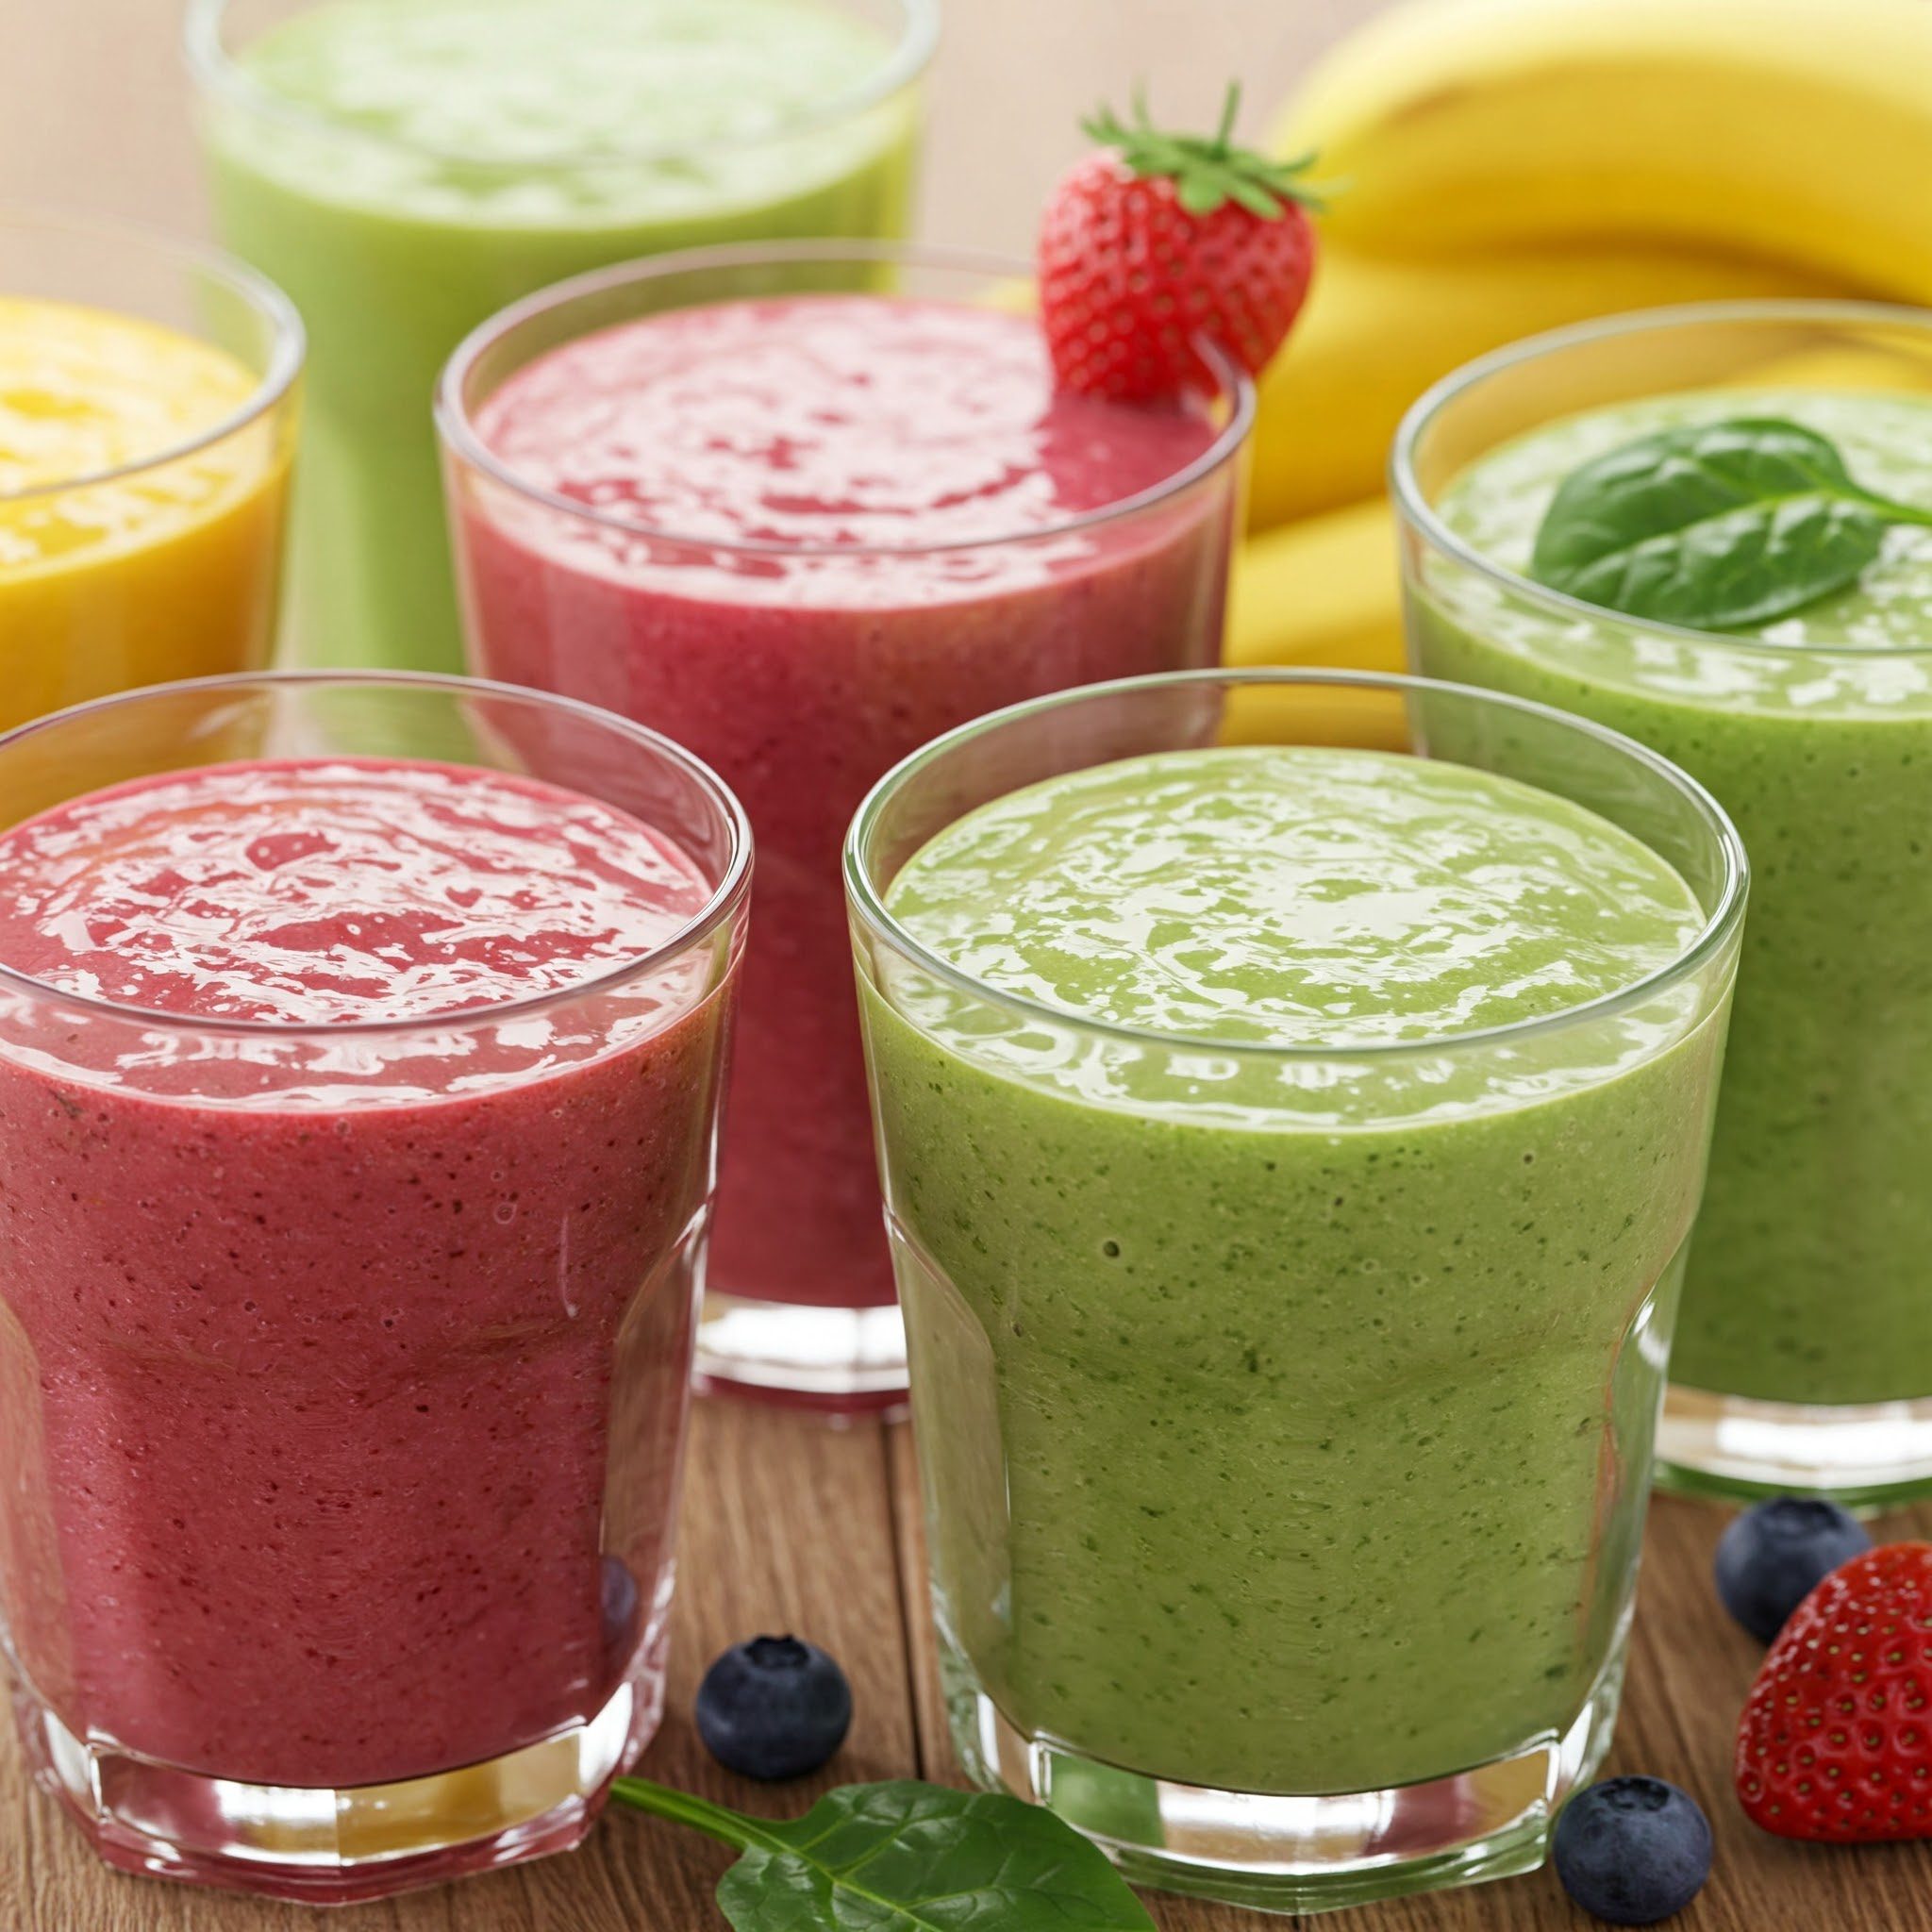
  6. Drink the Rainbow! Ever heard grown-ups say “eat the rainbow”? It means eating foods with different colors because different colors usually mean different kinds of vitamins and good stuff. Smoothies make this super fun! You can have red ones, orange ones, green ones, purple ones… it’s like drinking a vibrant painting of health!


Why are Healthy Smoothies SO Awesome

So, yeah. Smoothies? Total rock stars. Tasty, good for you, quick, and fun. What’s not to love?!

Let’s Get Ready: Your Smoothie Mission Kit!

Alright, future Smoothie Master, before we unleash the blending magic, we gotta gather our tools. Like a knight needs armor or an artist needs brushes, a smoothie maker needs a few key things. Don’t sweat it, it’s all pretty simple stuff!

Here’s what you’ll need on your quest for how to make healthy smoothies:

  1. The Main Event: A Blender! This is the magic machine. It’s got tiny, super-fast spinning blades inside that chop and mix everything until it’s perfectly smooth. Blenders come in a few shapes and sizes:

    • Big Jug Blenders: These sit on the counter and usually have the most power. Great for big batches or tough ingredients like ice.
    • Personal Blenders: Smaller ones where the cup you blend in is the cup you drink from! Super handy.
    • Stick Blenders (Immersion): These look like a wand you stick right into a cup. They work, but might struggle a bit with really frozen stuff.
    • Does it matter which one? Nope! As long as it blends, you’re golden! Just check with your grown-up which one you’ll be using. The biggest thing is using it safely.
  2. The Yummy Stuff: Ingredients! This is where it gets really fun. We’ll dive deep into this in a sec, but basically, you need:

    • Something Liquid: To help it all blend (water, milk, yogurt, etc.).
    • Fruit: The flavor stars! (Berries, bananas, mango – fresh or frozen!).
    • Maybe Veggies: Sneaky greens like spinach (trust me!).
    • Optional Extras: Fun stuff like seeds or peanut butter for a boost.
  3. Measuring Things (Kinda Optional): Cups and spoons can be helpful, especially for the liquid at first, so your smoothie isn’t too watery or too thick like cement. But honestly? Once you make a few, you’ll get a feel for it and can just eyeball it. Part of the fun of how to make healthy smoothies is winging it a bit!

  4. Cutting Board & Knife (Definitely a Grown-Up Job!): If you’re using big chunks of fresh fruit or veggies, they might need to be cut smaller. Listen up, this is important: Sharp knives are ONLY for grown-ups. No exceptions! Always, always, always ask an adult for help with cutting. Safety first, smoothie hero!

  5. A Cup: To pour your masterpiece into! Maybe a cool reusable straw too?

  6. Your Secret Weapon: A Grown-Up Sidekick! Okay, this is NON-NEGOTIABLE, especially when you’re starting. Blenders are electrical gadgets with fast parts. Having an adult there to help you use it safely, supervise the plugging-in, handle any tricky bits (like stuck lids or sharp blades), and help with cutting is super, super important. They’re your smoothie co-pilot!


Your Smoothie Mission Kit


Got your kit assembled? Awesome! Let’s take a closer look at that blender

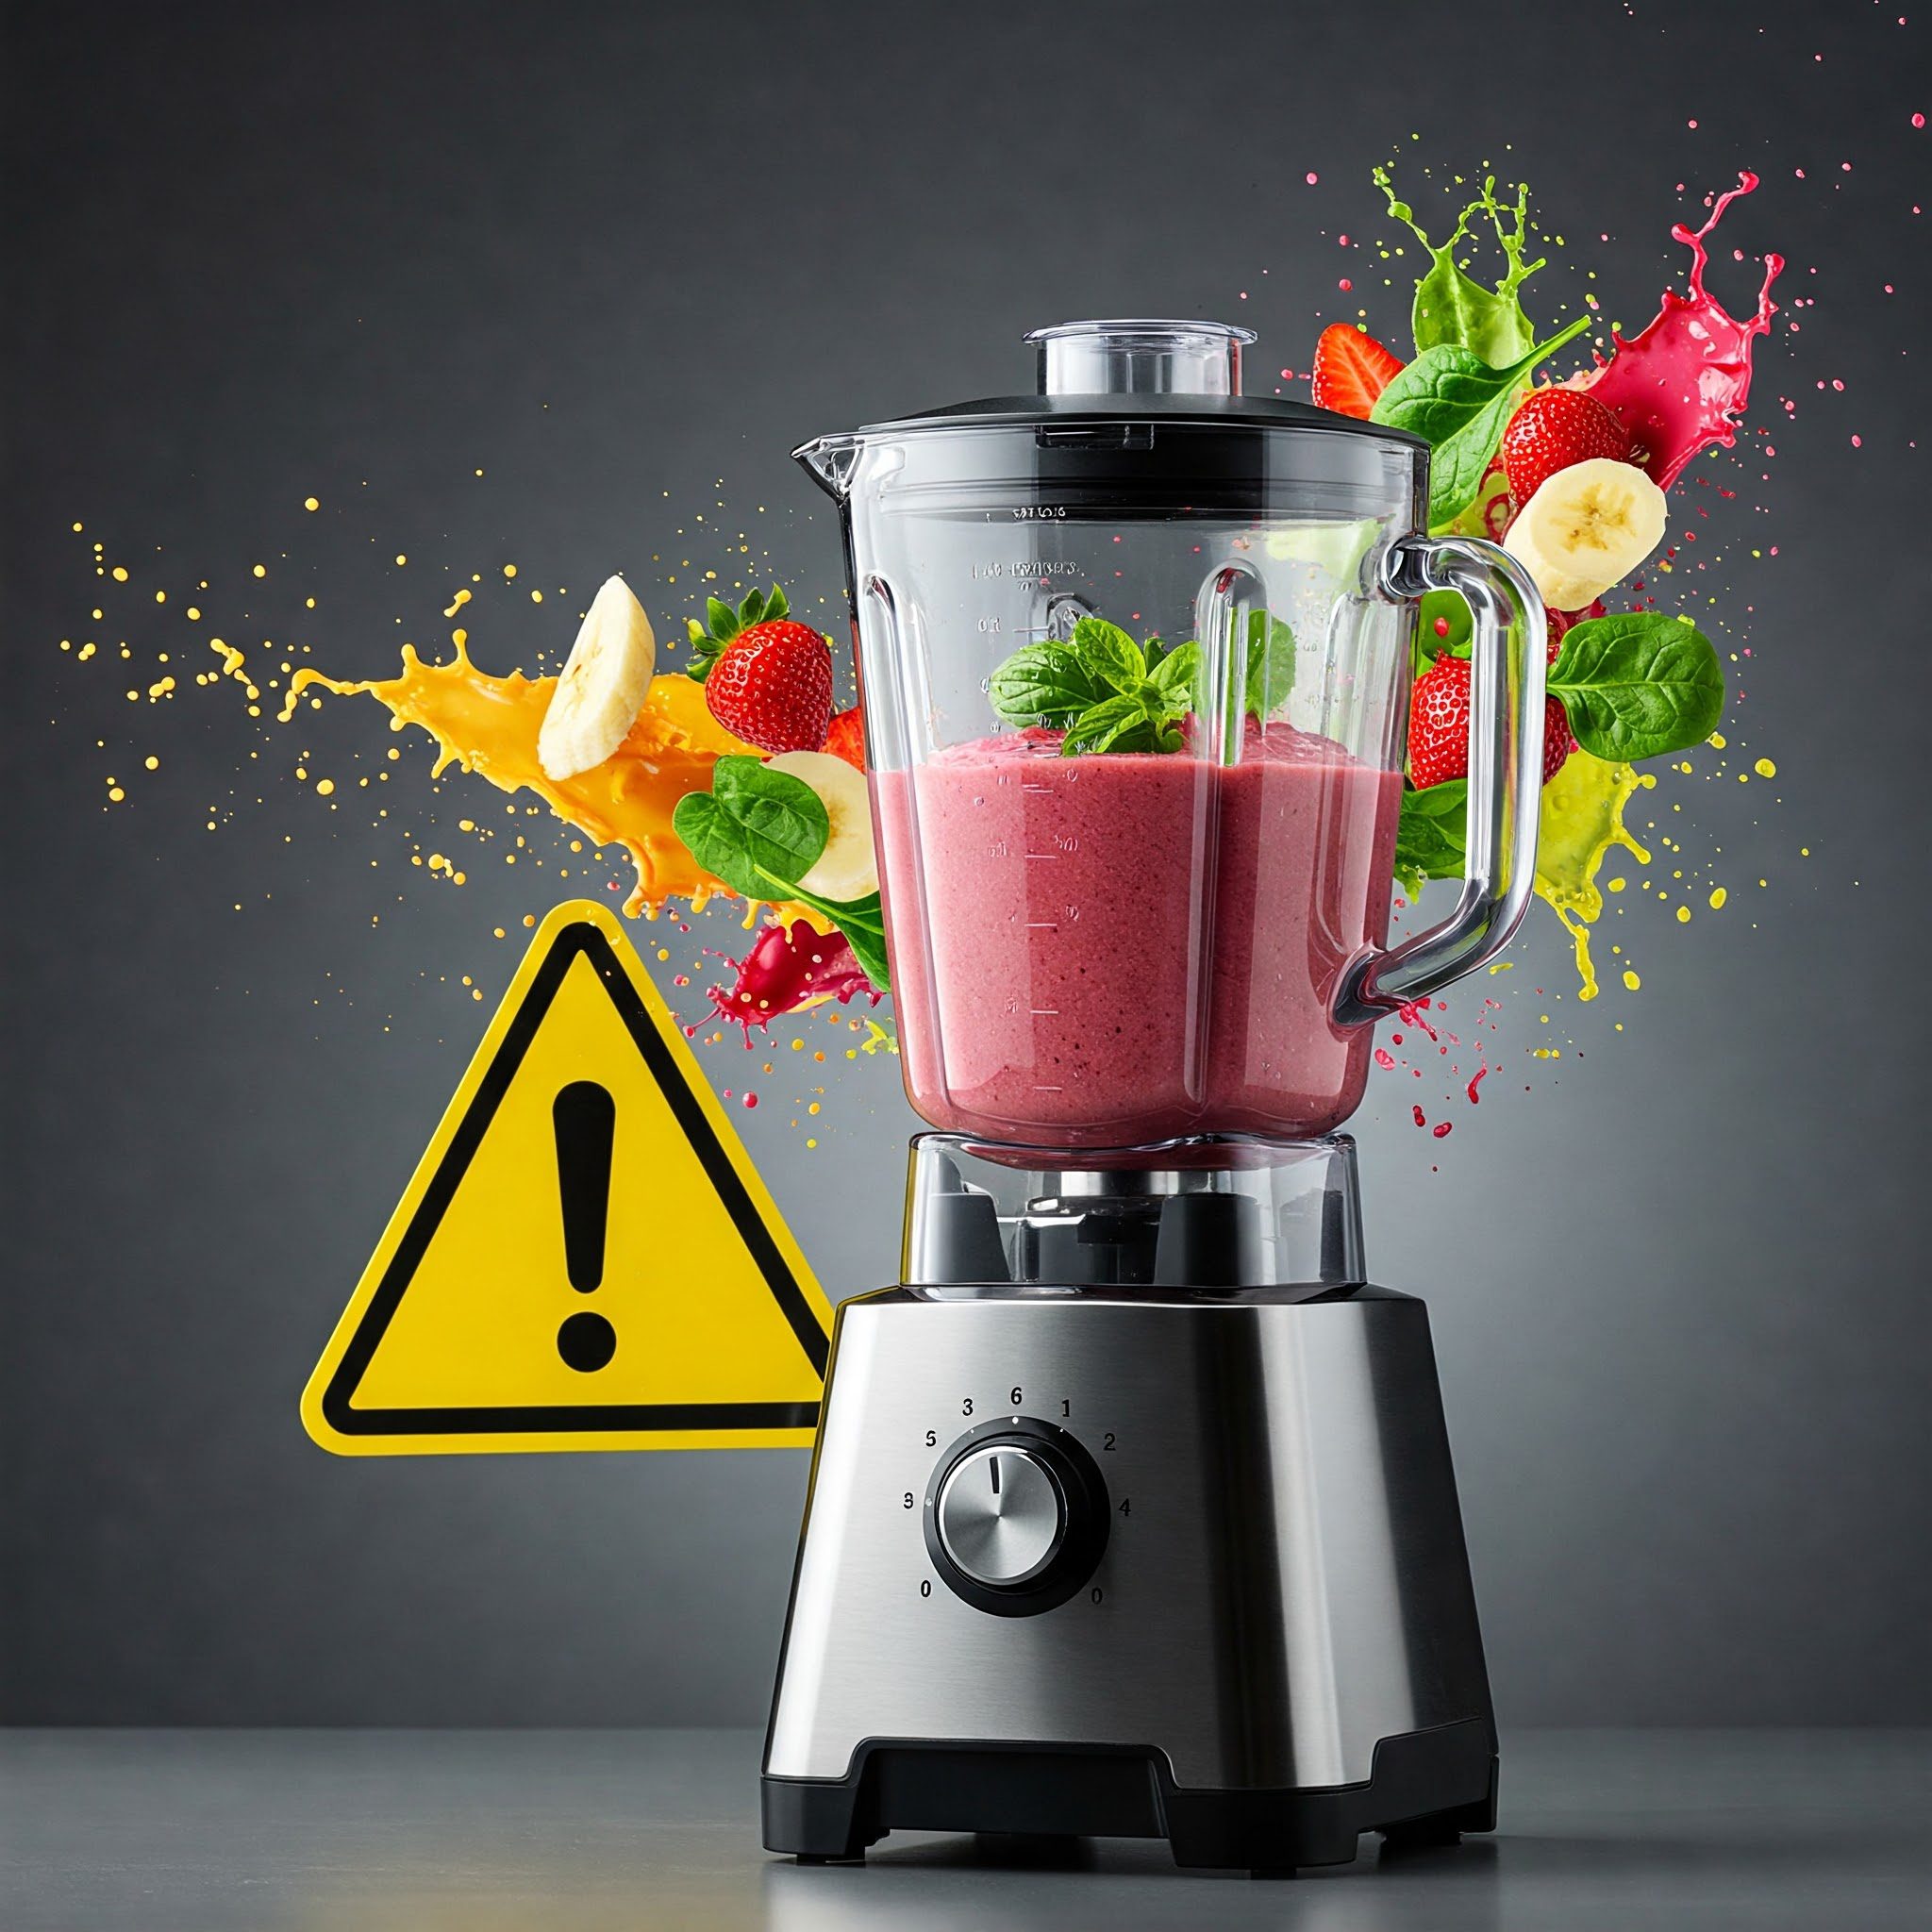
The Blender: How Does That Thing WORK?!

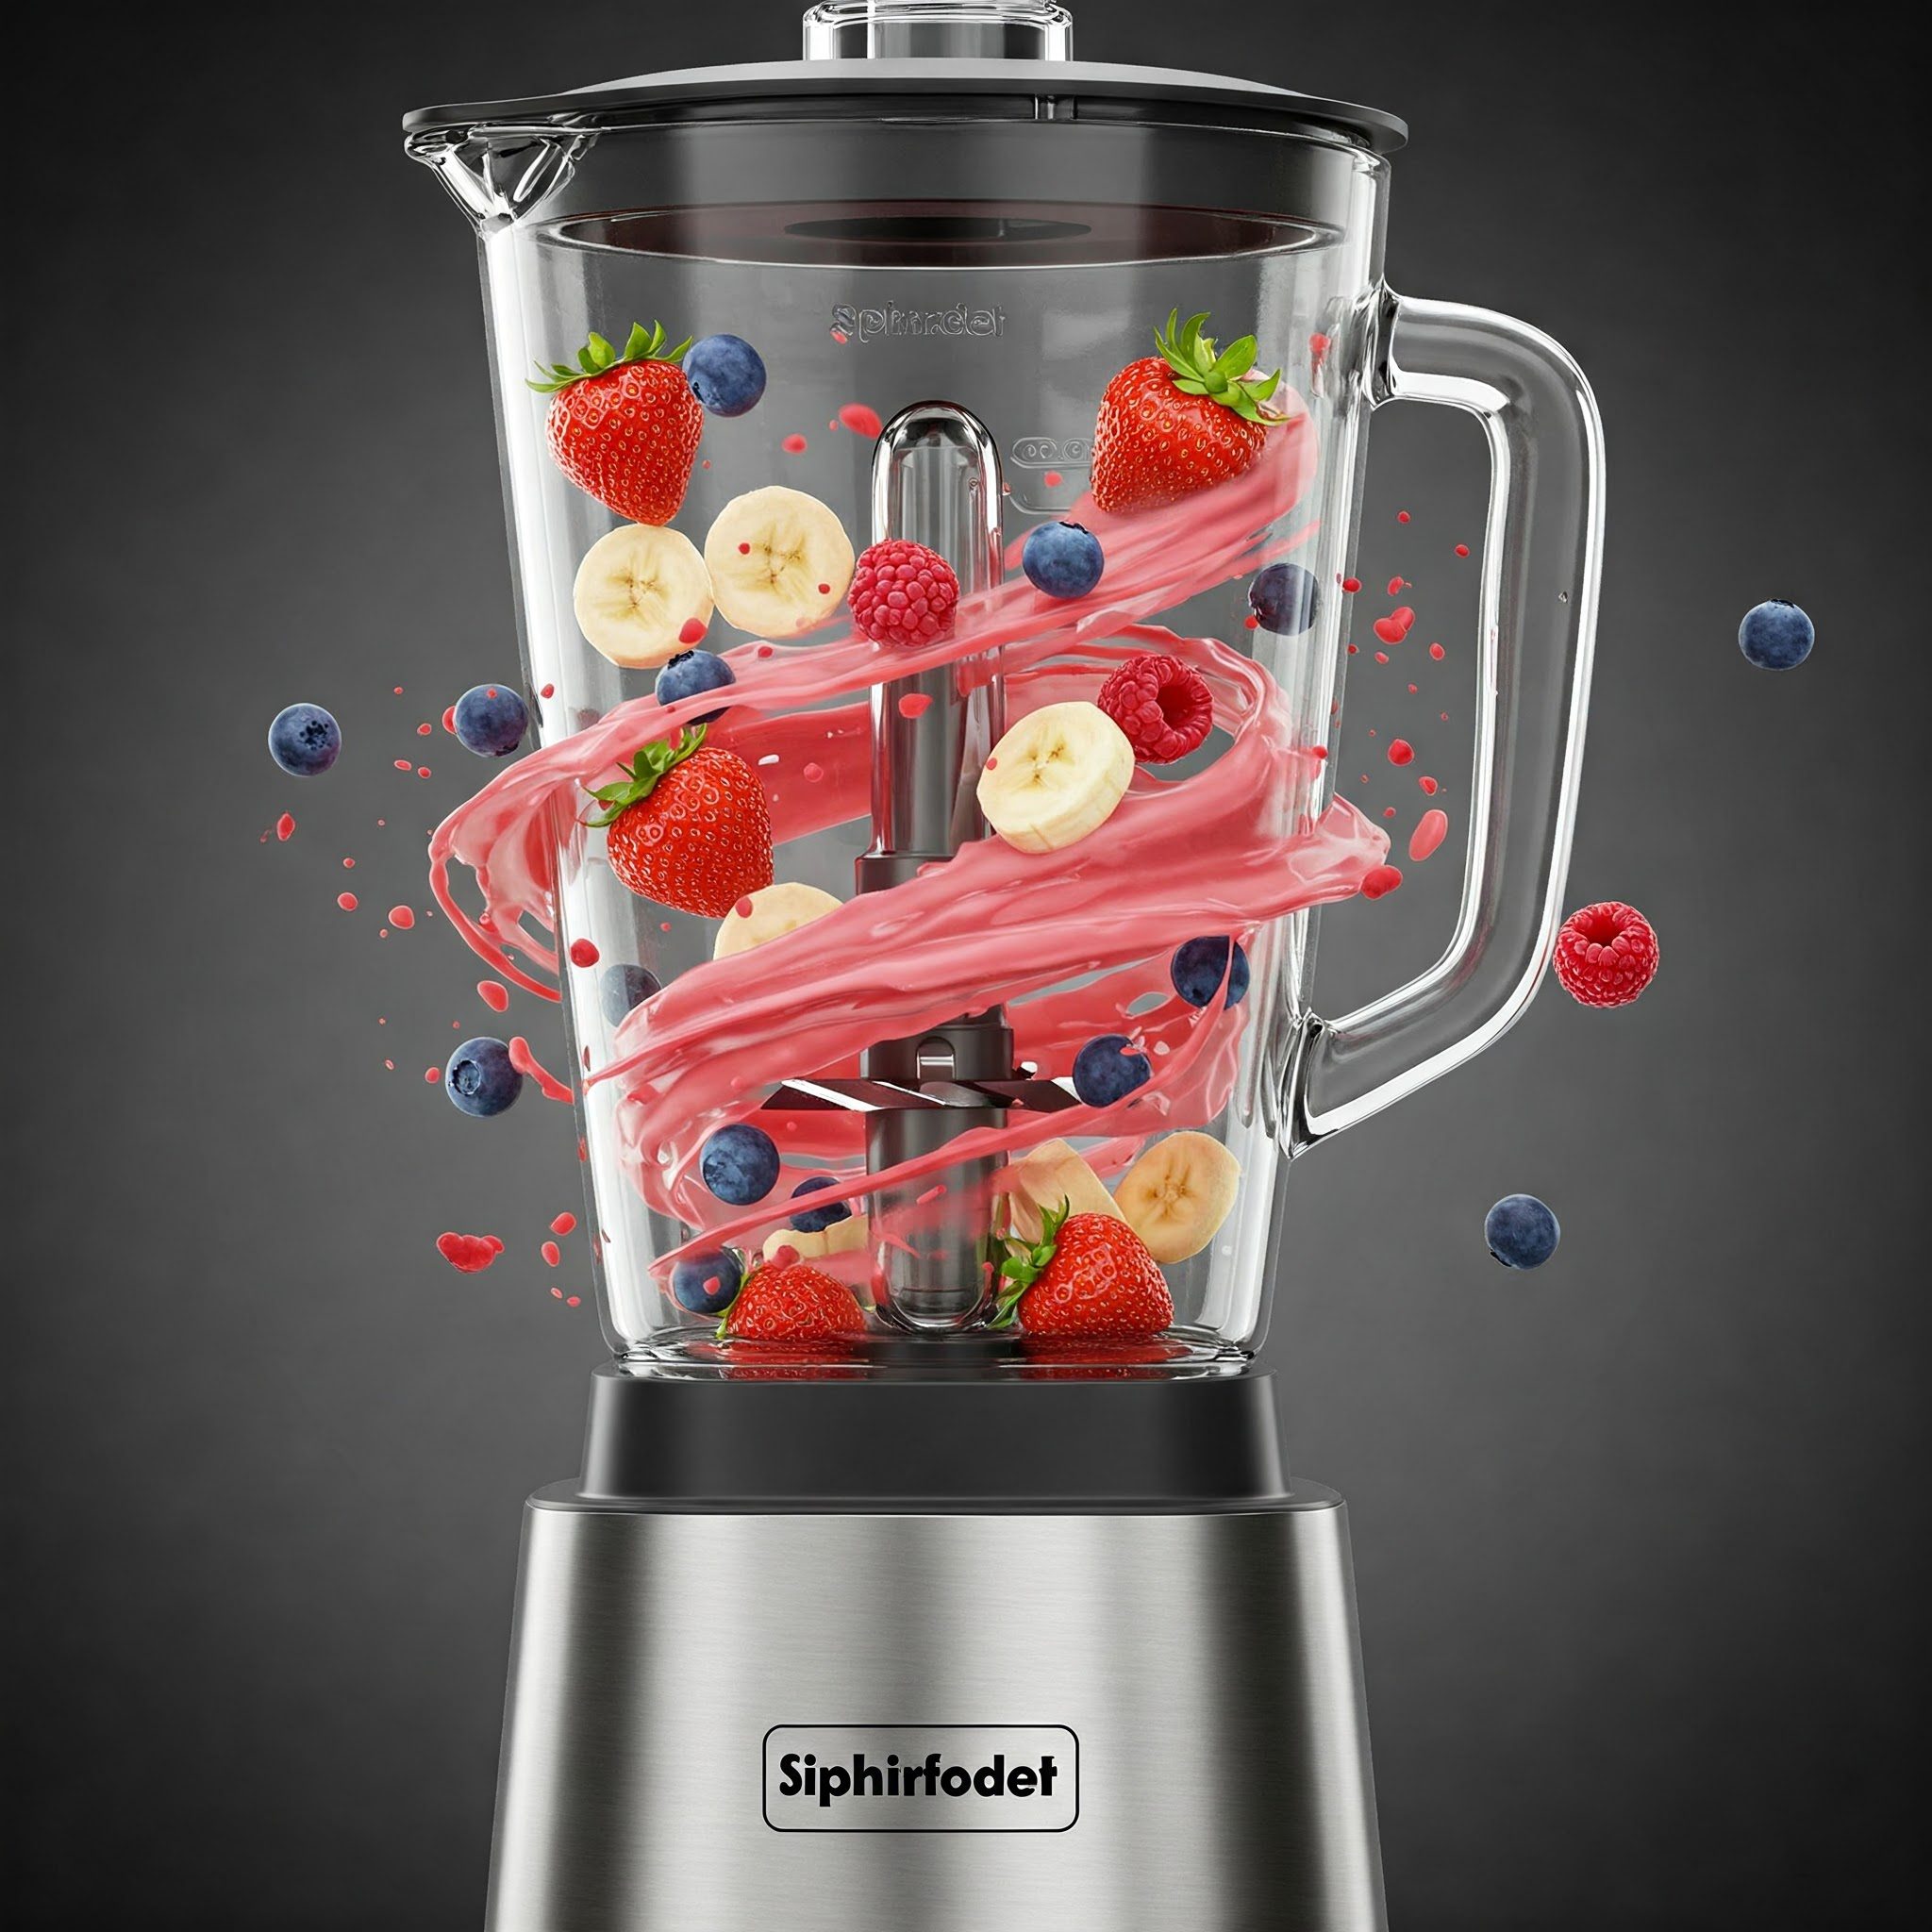
Seriously, how does it turn lumpy fruit into a smooth drink? It seems like magic, right? You toss in chunks, press a button, there’s a loud WHIIIRRR, and suddenly it’s totally different!

It’s actually pretty clever, but simple. Down at the bottom of the blender jug are these little metal blades. They might look small, but they’re sharp! When you hit the power button, a motor hidden in the base makes those blades spin incredibly fast. Like, super-hero-running fast!

This super-fast spinning creates a swirl inside the jug, kind of like a tiny tornado or whirlpool. This vortex pulls the chunks of food down towards the spinning blades. The blades then chop everything into tinier and tinier pieces. They keep spinning and chopping and mixing until there are no chunks left, just one smooth, delicious mixture. Pretty neat tech, right?

The Blender How Does That Thing WORK

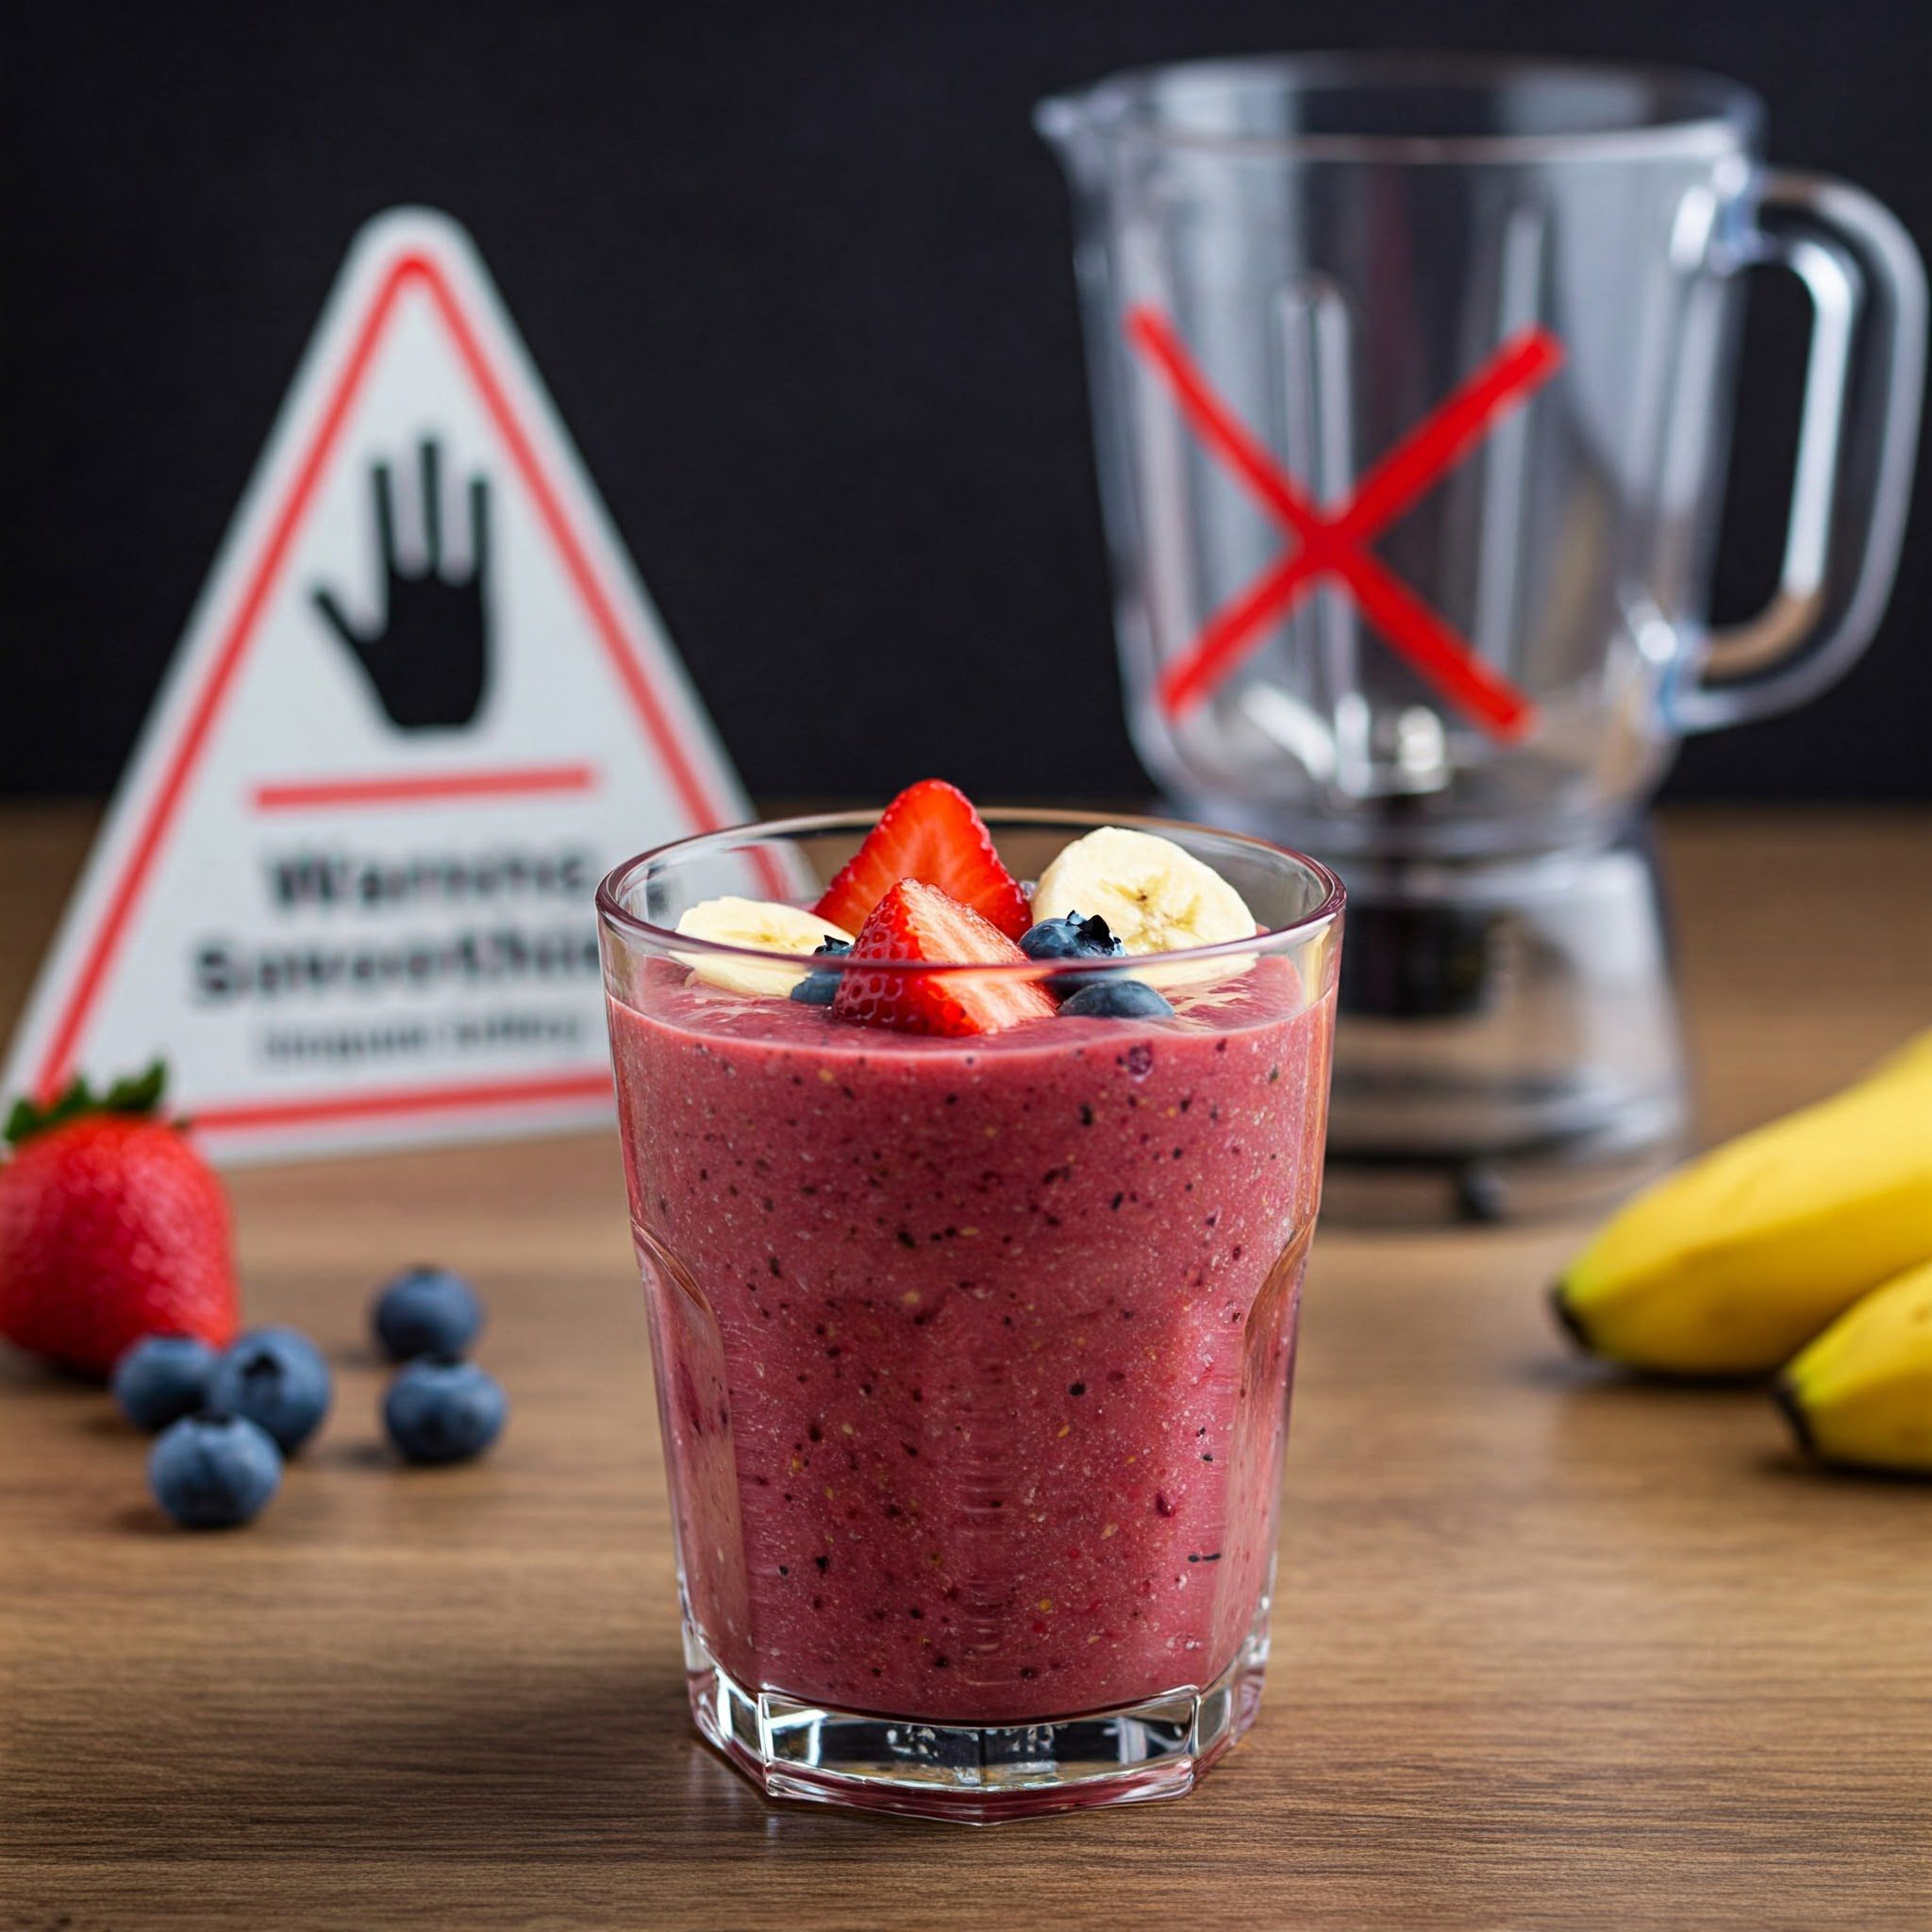
Your Super Important Blender Safety Briefing:

  • Hands OFF! Never, EVER stick your fingers, a spoon, or anything else into the blender jug when it’s plugged in or running. Seriously. Those blades mean business.
  • Lid On Lockdown! Make SURE that lid is on tight before you hit the power. Smoothie flying across the kitchen sounds funny for a second, but trust me, the cleanup is NOT fun! Most blenders won’t even start if the lid isn’t locked on properly.
  • Grown-Up Check-in! Always have your adult sidekick there to help, especially with plugging it in, taking the jug off, or washing the sharp blade part later.
  • Start Slow, Go Fast! It’s usually best to start the blender on a low speed for a few seconds to get things moving, then crank it up higher to really smooth things out.

The blender is your best pal for learning how to make healthy smoothies, but you gotta treat it with respect, okay?

Your Super Important Blender Safety Briefing

Why Your Grown-Up Sidekick is Key

I get it, you want to do it ALL yourself! You’re learning and getting independent, which is awesome. But for smoothie making, especially at the start, having a grown-up partner is the smartest way to go. Here’s why:

  • Safety Captain! Like we just covered, blenders and knives need careful handling. Adults have the experience to keep things safe and teach you properly.
  • Muscle Power (Sometimes!): Blender jugs can be heavy, and sometimes getting them on and off the base, or getting a stuck lid off, needs a little extra oomph.
  • Prep Chefs: They can handle the washing and any tricky chopping, so you can focus on the fun parts.
  • Problem Solvers: Smoothie too thick? Too thin? Blender making a weird noise? Your grown-up co-pilot can help figure things out.
  • It’s Just More Fun! Honestly, making and sharing food together is a great way to hang out! It’s a team effort!


Why Your Grown-Up Sidekick is Key


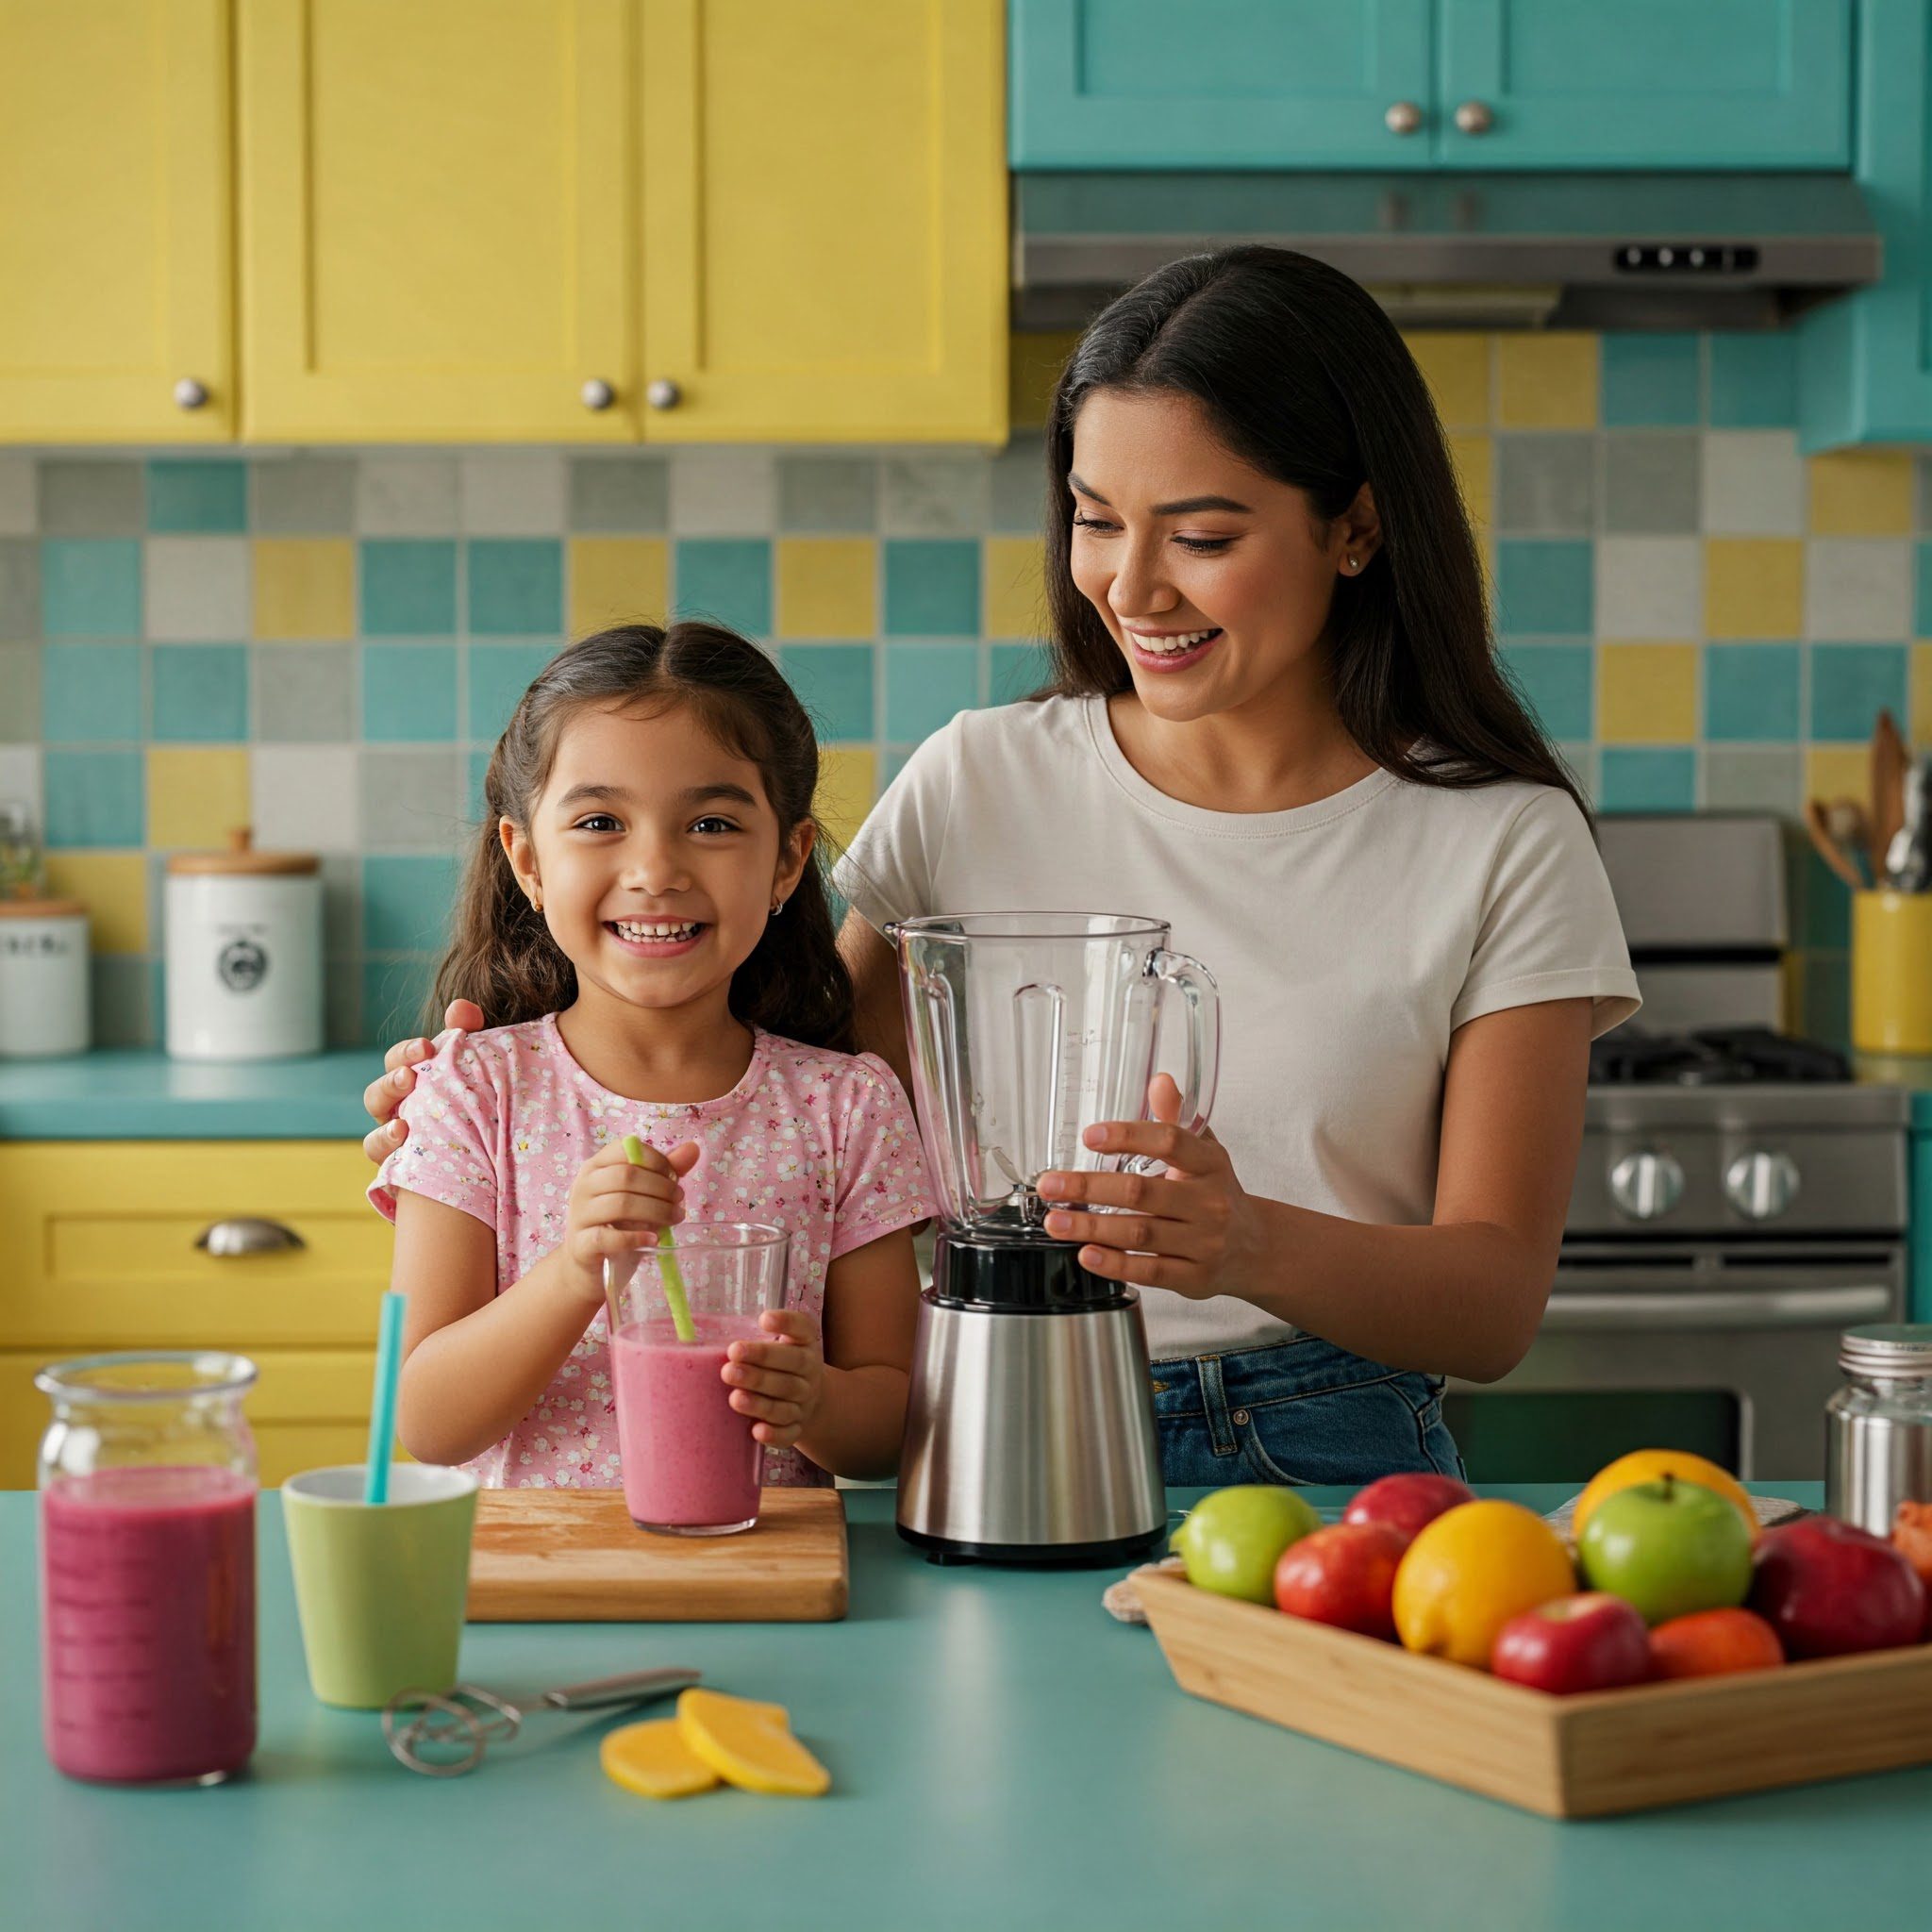
Think of them as your mission control. They handle the potentially tricky stuff so you can focus on being the creative genius behind the delicious smoothie!

The Secret Smoothie Formula (It’s Easier Than You Think!)

Okay, team, lean in close. Ready for the secret code? The master plan? The super simple, can’t-fail formula for how to make healthy smoothies that rock every single time? It’s less like a strict recipe and more like a super flexible game plan.

Here it is, the magic combo:

Liquid Base + Main Flavor Star (Usually Fruit!) + Optional Power-Ups (Think Veggies/Boosters!) = YOUR AWESOME HEALTHY SMOOTHIE!

Let’s unpack that. Think of it like building with blocks again:

  1. The Liquid Base: This is the foundation. It makes everything blend smoothly and gives your smoothie its drinkable texture. No liquid = blender traffic jam!
  2. The Main Flavor Star (Fruit Power!): This is where the deliciousness comes in! Fruit brings the sweetness, the main flavor profile, and tons of those awesome vitamins.
  3. Optional Power-Ups: This is your chance to get creative and add extra goodness! Maybe some hidden veggies for health points, or cool boosters like seeds or nut butter for more energy or flavor twists. You don’t have to add these, but they can level up your smoothie game!
The Secret Smoothie Formula


That’s basically it! Pick something from each category (or just the first two to keep it simple!), pop ’em in the blender, and you’re golden! Let’s explore the options for each part…

Step 1: Choose Your Liquid Base! (Gotta Get Things Flowing!)

First things first, we need liquid! This helps the blender blades do their job and turns solid stuff into a sippable smoothie. You’ll generally want about 1 cup (think a regular glass size) to start, but you can always tweak it.

Check out these awesome base options:

  • Plain Old Water: Simple, free, no extra flavors. Perfect if you really want the fruit taste to be the star. Makes for a lighter, more refreshing smoothie.
  • Milk (The Moo Kind): Regular milk adds creaminess, calcium (hello, strong bones!), and some protein. Whole milk makes it richer; lower-fat milk keeps it lighter.
  • Plant Milks (Cool Alternatives!): Great if you don’t do dairy or just want different flavors!
    • Almond Milk: Usually mild, a bit nutty, often lower in calories. Pretty popular!
    • Soy Milk: Creamy, good protein boost.
    • Oat Milk: Super creamy these days, naturally a little sweet. A current favorite for many!
    • Coconut Milk (Carton Kind): Adds a subtle tropical vibe. Make sure it’s the drinkable kind, not the thick canned stuff for cooking!
  • Yogurt: Okay, technically not just liquid, but yogurt is a smoothie superstar! It adds amazing thickness and creaminess. Plain yogurt is best so you control the sweetness. Greek yogurt is even thicker and packed with protein! Plus, yogurt often has probiotics – friendly little gut buddies.
  • Fruit Juice (Use Wisely!): Things like OJ or apple juice bring big flavor. BUT, juice has a lot of sugar (even natural sugar) without all the fiber of whole fruit. So, maybe use just a splash for flavor, or mix it with water/milk, rather than making it the only liquid. It’s just a little tip for keeping it extra healthy when learning how to make healthy smoothies.


Choose Your Liquid Base


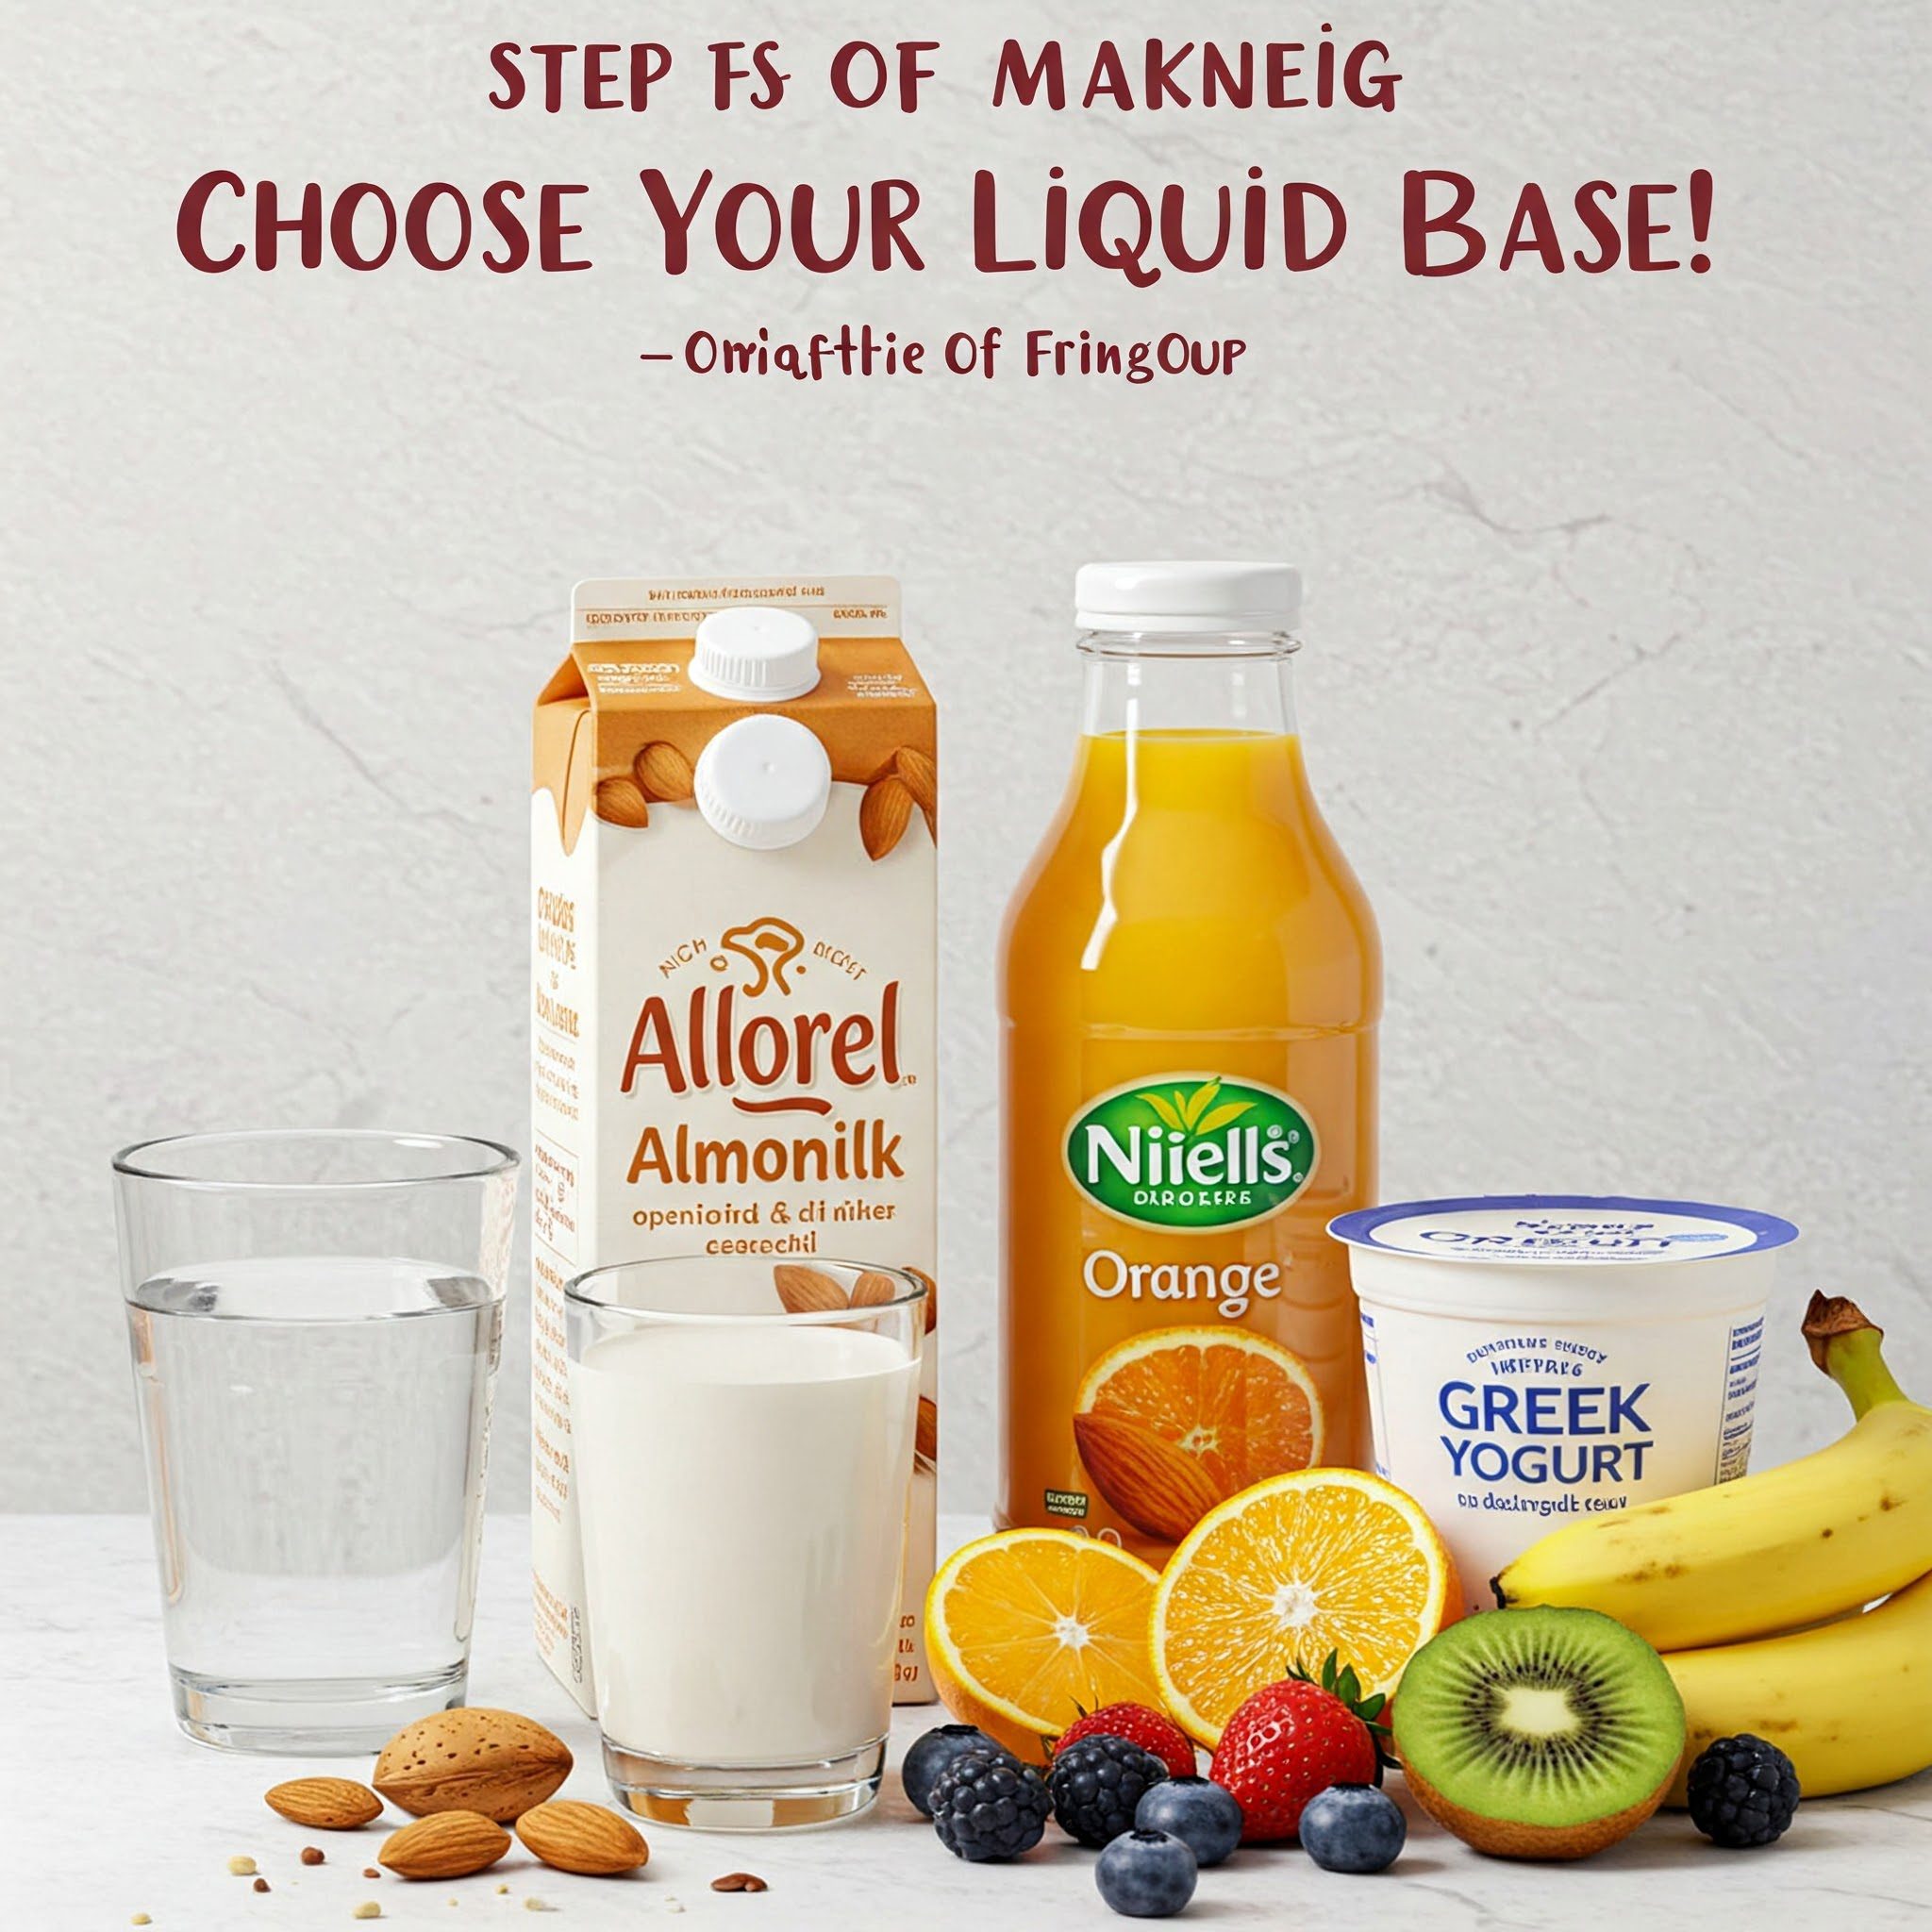
Good Rule of Thumb: Start with roughly 1 cup of whatever liquid you choose. If your smoothie seems too thick later, you can easily add a tiny bit more.

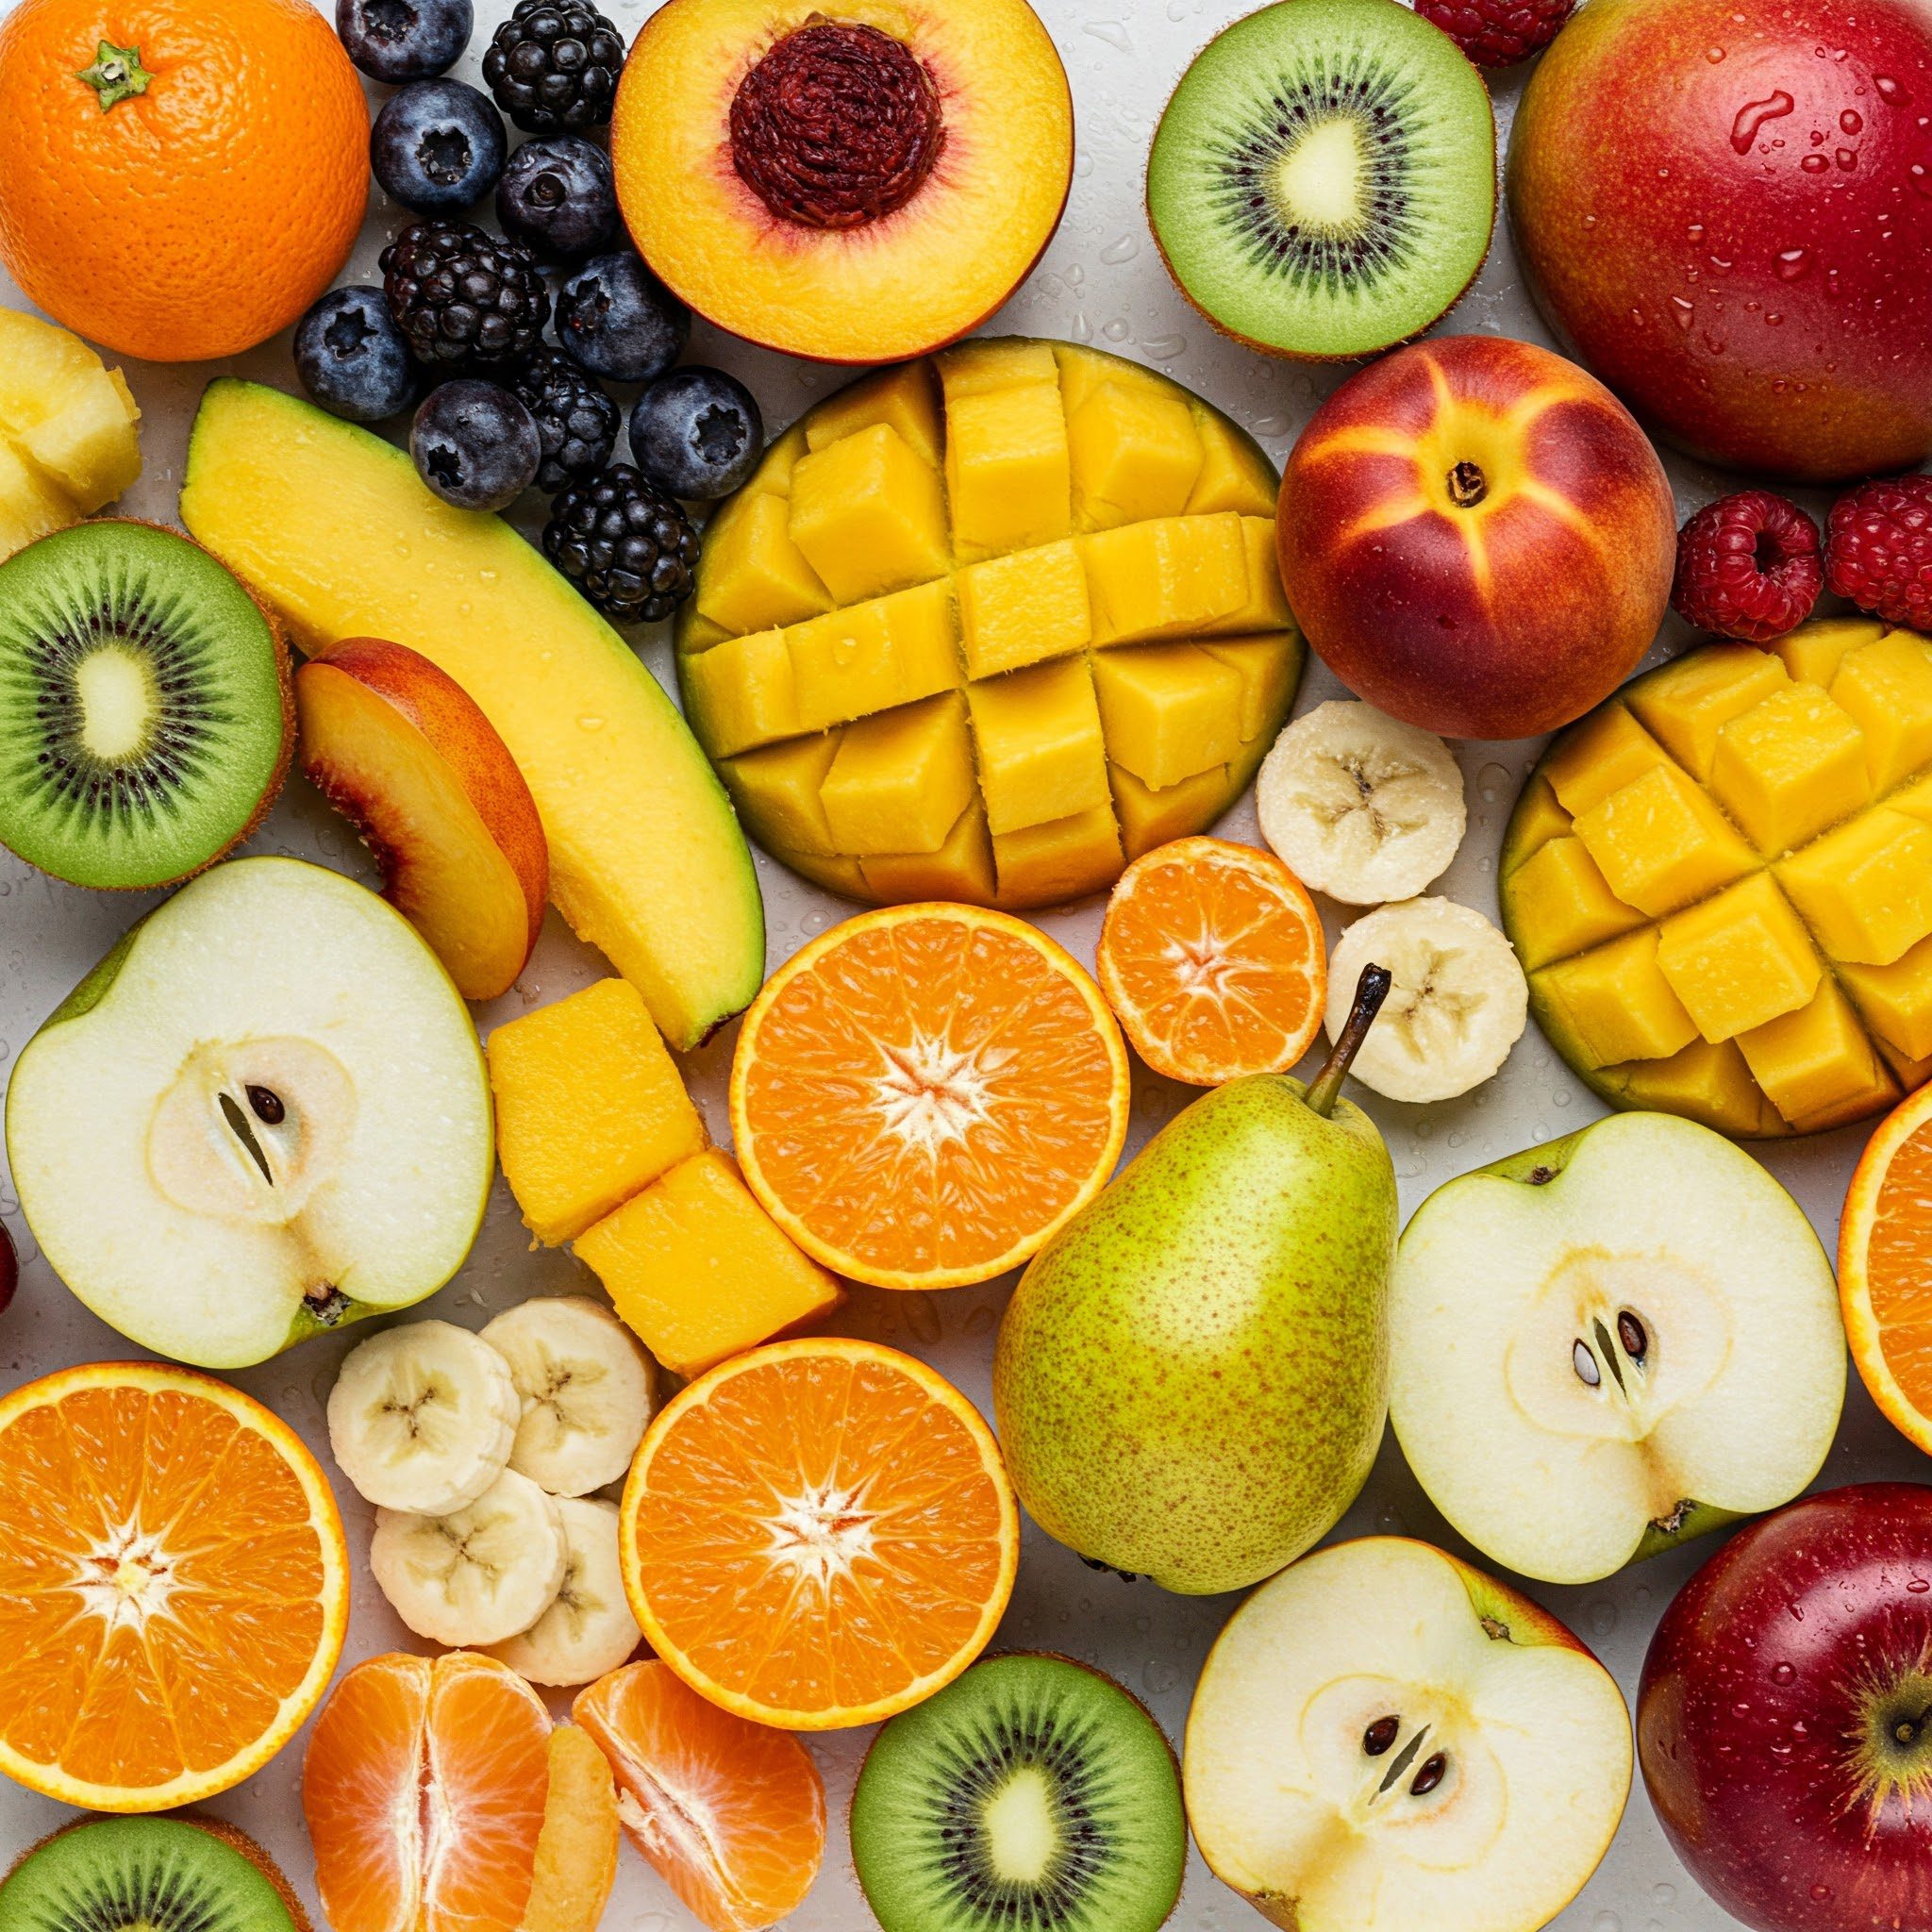
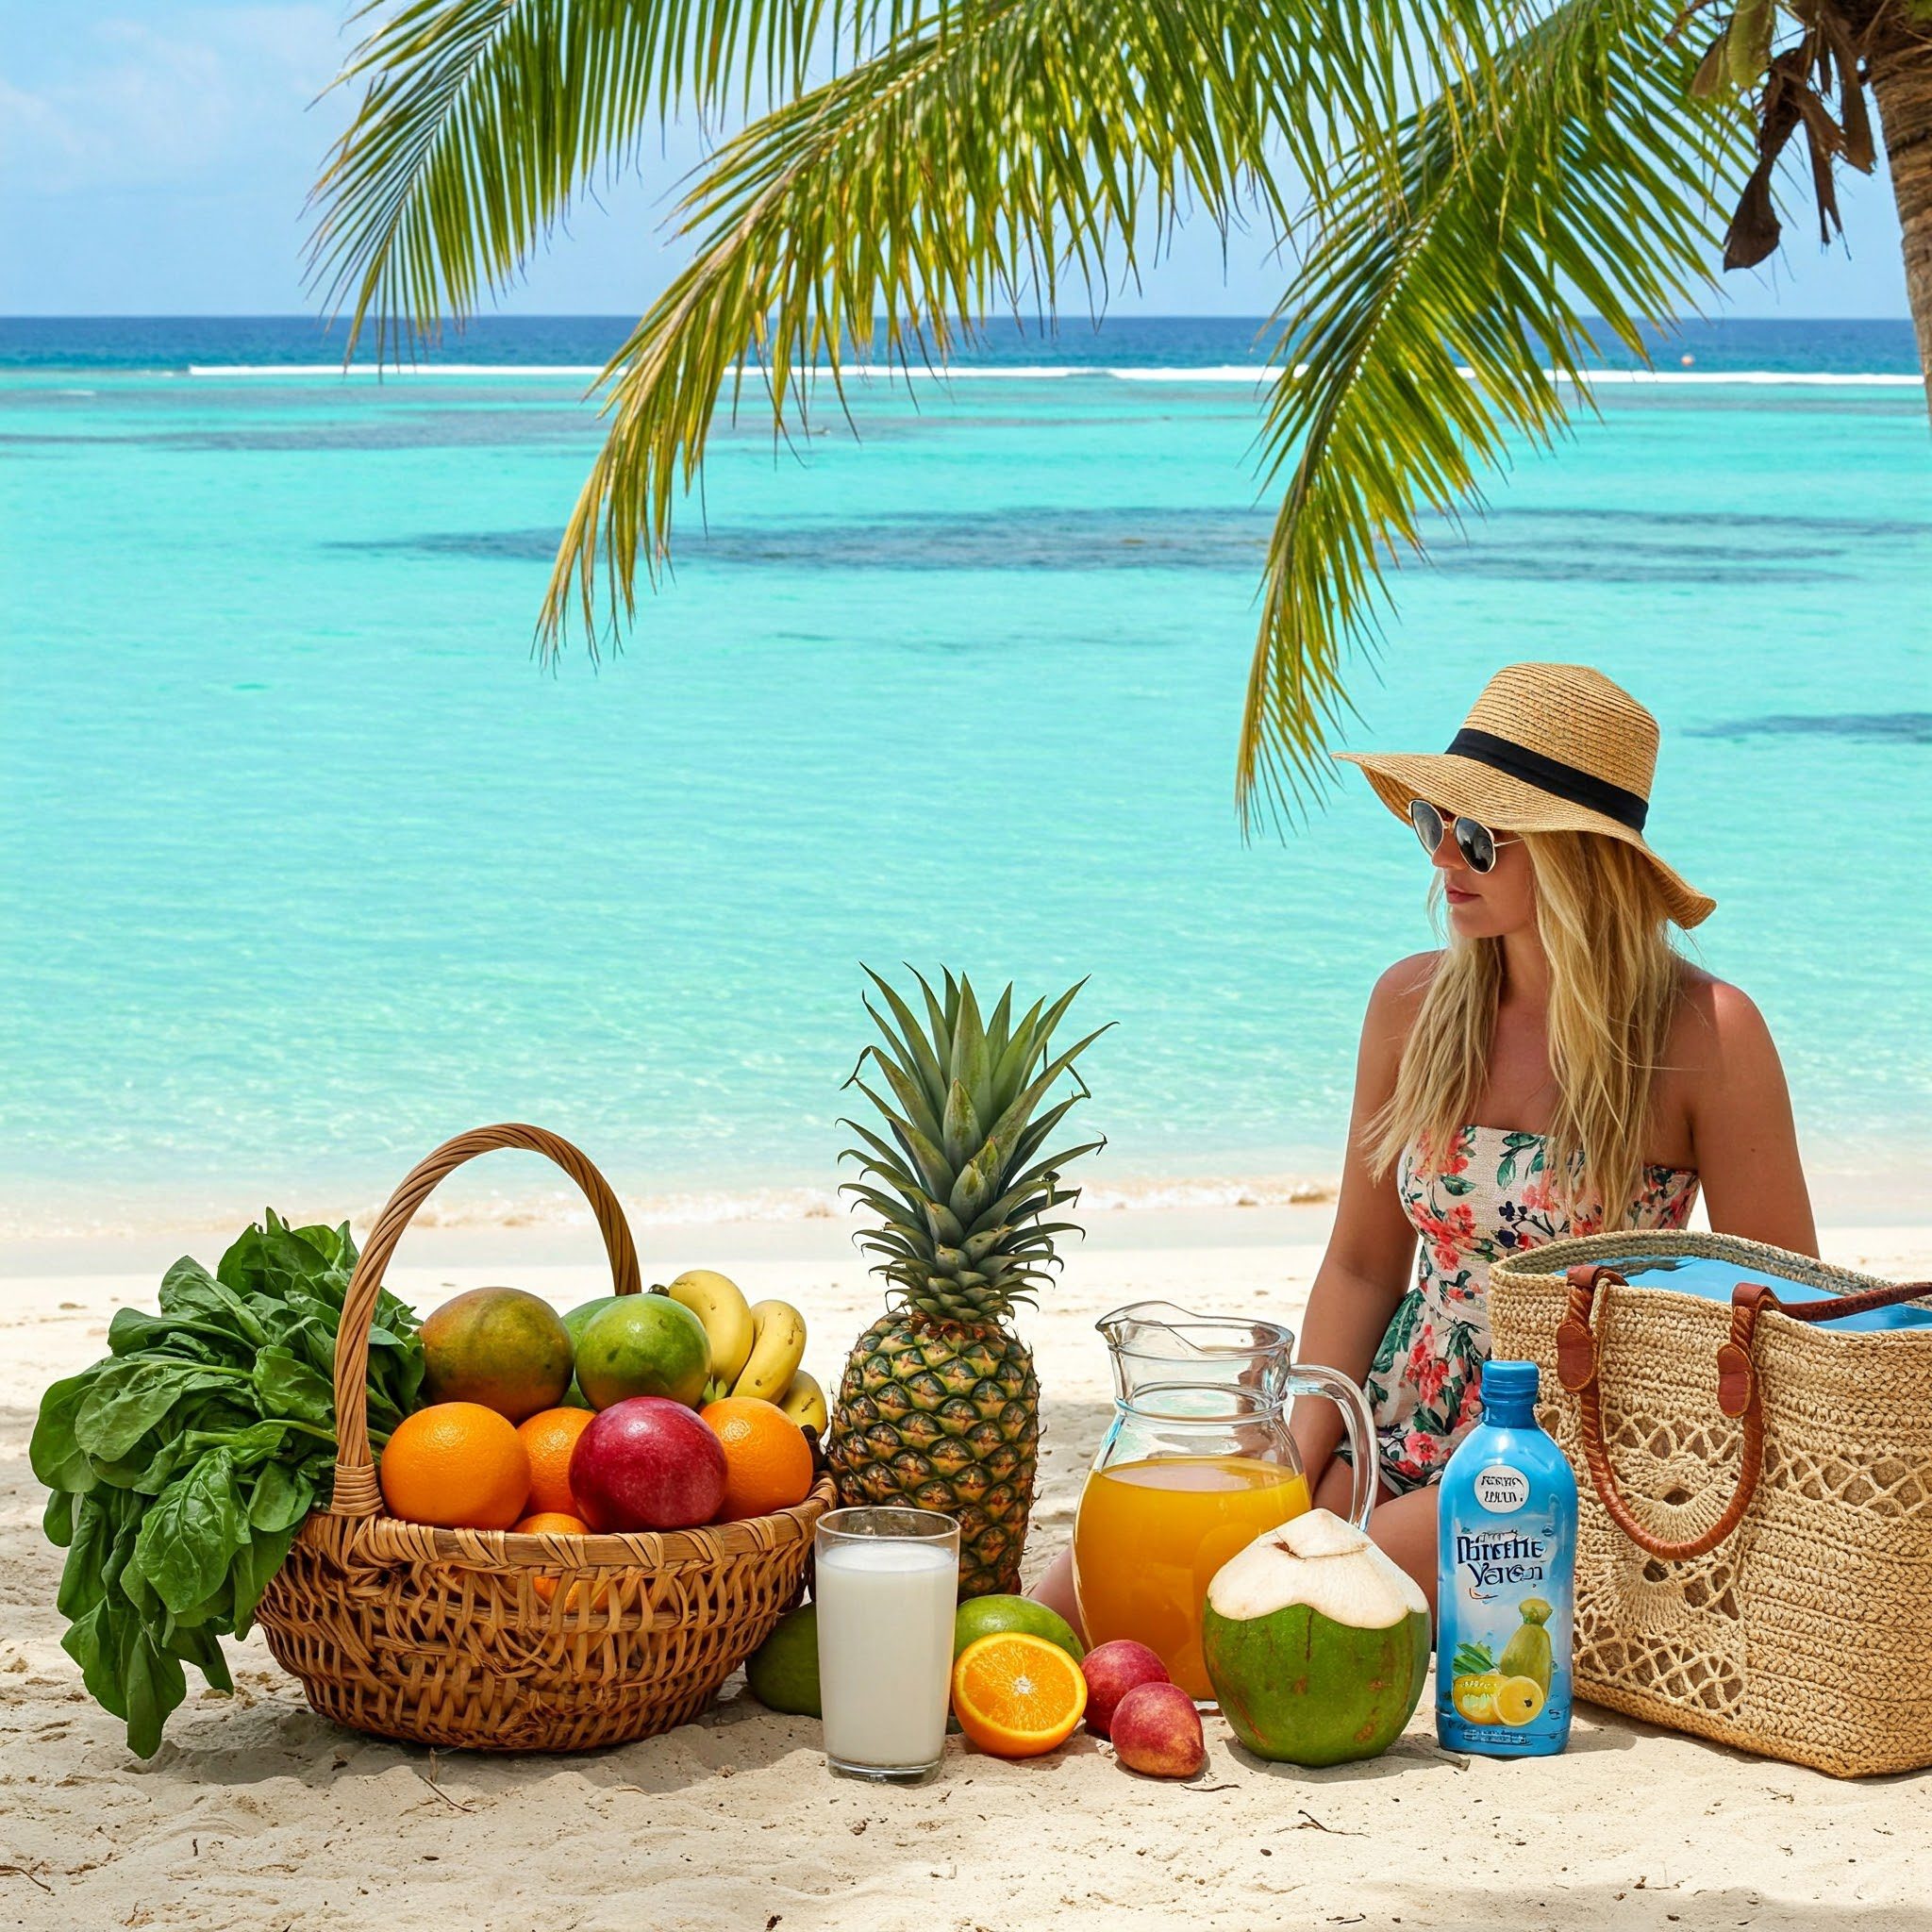
Step 2: Pick Your Power Fruits! (Bring on the Flavor!)

YES! This is where the magic really happens! Fruits are nature’s candy – sweet, delicious, and bursting with goodness like vitamins and antioxidants (those cell bodyguards!). Aim for about 1 to 1.5 cups of fruity goodness.

You can use fresh fruit… OR… (drumroll please)… FROZEN fruit!

Why Frozen Fruit is a Smoothie Superhero:

  • Instant Chill & Thickness: Using frozen fruit makes your smoothie icy cold and super thick without needing to add actual ice (which can water down the taste). It’s like magic!
  • Ready Whenever: Frozen fruit lasts ages in the freezer, meaning you’ve always got smoothie ingredients ready for action!
  • Peak Goodness Locked In: Often, fruit is frozen right after picking when it’s perfectly ripe and packed with nutrients. Win-win!

Awesome Fruits to Try:

  • Berries (All Kinds!): Strawberries, blueberries, raspberries, blackberries… they’re all amazing! Packed with flavor and antioxidants. Blueberries are like brain fuel! A bag of frozen mixed berries is super convenient.
  • Bananas (The MVP!): Seriously, bananas are smoothie royalty. They make things incredibly creamy and naturally sweet. Pro Tip: Peel ripe bananas, break ’em into chunks, and keep a bag in the freezer just for smoothies!
  • Mangoes: Taste like sunshine and tropical beaches! Super sweet, gorgeous orange color. Frozen mango chunks are the best.
  • Pineapple: Tangy, sweet, tropical goodness. Also great for your digestion! Frozen tidbits are perfect.
  • Peaches & Nectarines: Sweet, summery flavor. Use fresh when they’re around, or grab frozen slices.
  • Oranges/Clementines: Add a bright, zesty kick! Just peel ’em and get rid of seeds first.
  • Kiwi: Tangy, green, fun little black seeds! Adds a cool color.
  • Pears: Milder sweetness, nice smooth texture.
  • Apples: Need to take the core out first. Might need a stronger blender if using raw. Unsweetened applesauce is an easy way to add apple flavor!


Pick Your Power Fruits


Don’t Be Shy – Mix It Up! Combine flavors! Strawberry-banana is a classic for a reason. Mango-pineapple takes you to the tropics. Berry-banana-spinach? Yep, totally works! Finding your perfect mix is a huge part of mastering how to make healthy smoothies.

Step 3: Sneaky Veggie Power! (Shhh… It’s Good for You!)

Okay, okay, don’t freak out! Veggies? In a smoothie? I know it sounds weird, but trust me on this one. It’s a super ninja trick to make your smoothie even healthier, and honestly? A lot of the time, you can’t even taste them! It’s like hiding secret health treasures in your drink.

Why bother? Veggies are like the ultimate health superheroes – loaded with vitamins, minerals, and fiber your body craves. Just a little bit gives your smoothie a major power boost.

Veggies That Hide Well:

  • Spinach: The absolute KING of smoothie greens! A big handful of fresh baby spinach basically disappears. It adds tons of good stuff (like iron for energy!) but has almost no taste when blended with sweet fruit like banana or mango. It will turn your smoothie green, but green means go-go-go power!
  • Kale: Another leafy green champ! It’s a bit stronger tasting than spinach, so maybe start with just a few leaves (take the tough middle stem out). Also makes things green!
  • Carrots: Raw carrots can be tough unless your blender is super powerful. Cooked or steamed carrots blend easily, add a nice sweetness, and give you Vitamin A (great for seeing in the dark… well, almost!). Might turn your smoothie orange!
  • Cooked Sweet Potato or Pumpkin Puree: Sounds odd, right? But a scoop of plain cooked sweet potato or pumpkin puree (NOT pie filling!) adds amazing creaminess, fiber, vitamins, and a subtle sweetness. Think fall flavors!
  • Cucumber: Super refreshing! Adds water and nutrients without much flavor. Good in green combos.
  • Avocado: Okay, technically a fruit, but we use it like a veggie sometimes! Half an avocado makes smoothies unbelievably creamy and adds healthy fats (brain food!). Doesn’t taste like much, just adds texture.


Sneaky Veggie Power
Sneaky Veggie Power


How Much? Start small! One big handful of spinach is easy. For others, try maybe 1/4 cup. You can always add more next time if you’re feeling adventurous. This sneaky step is a total pro move in learning how to make healthy smoothies.

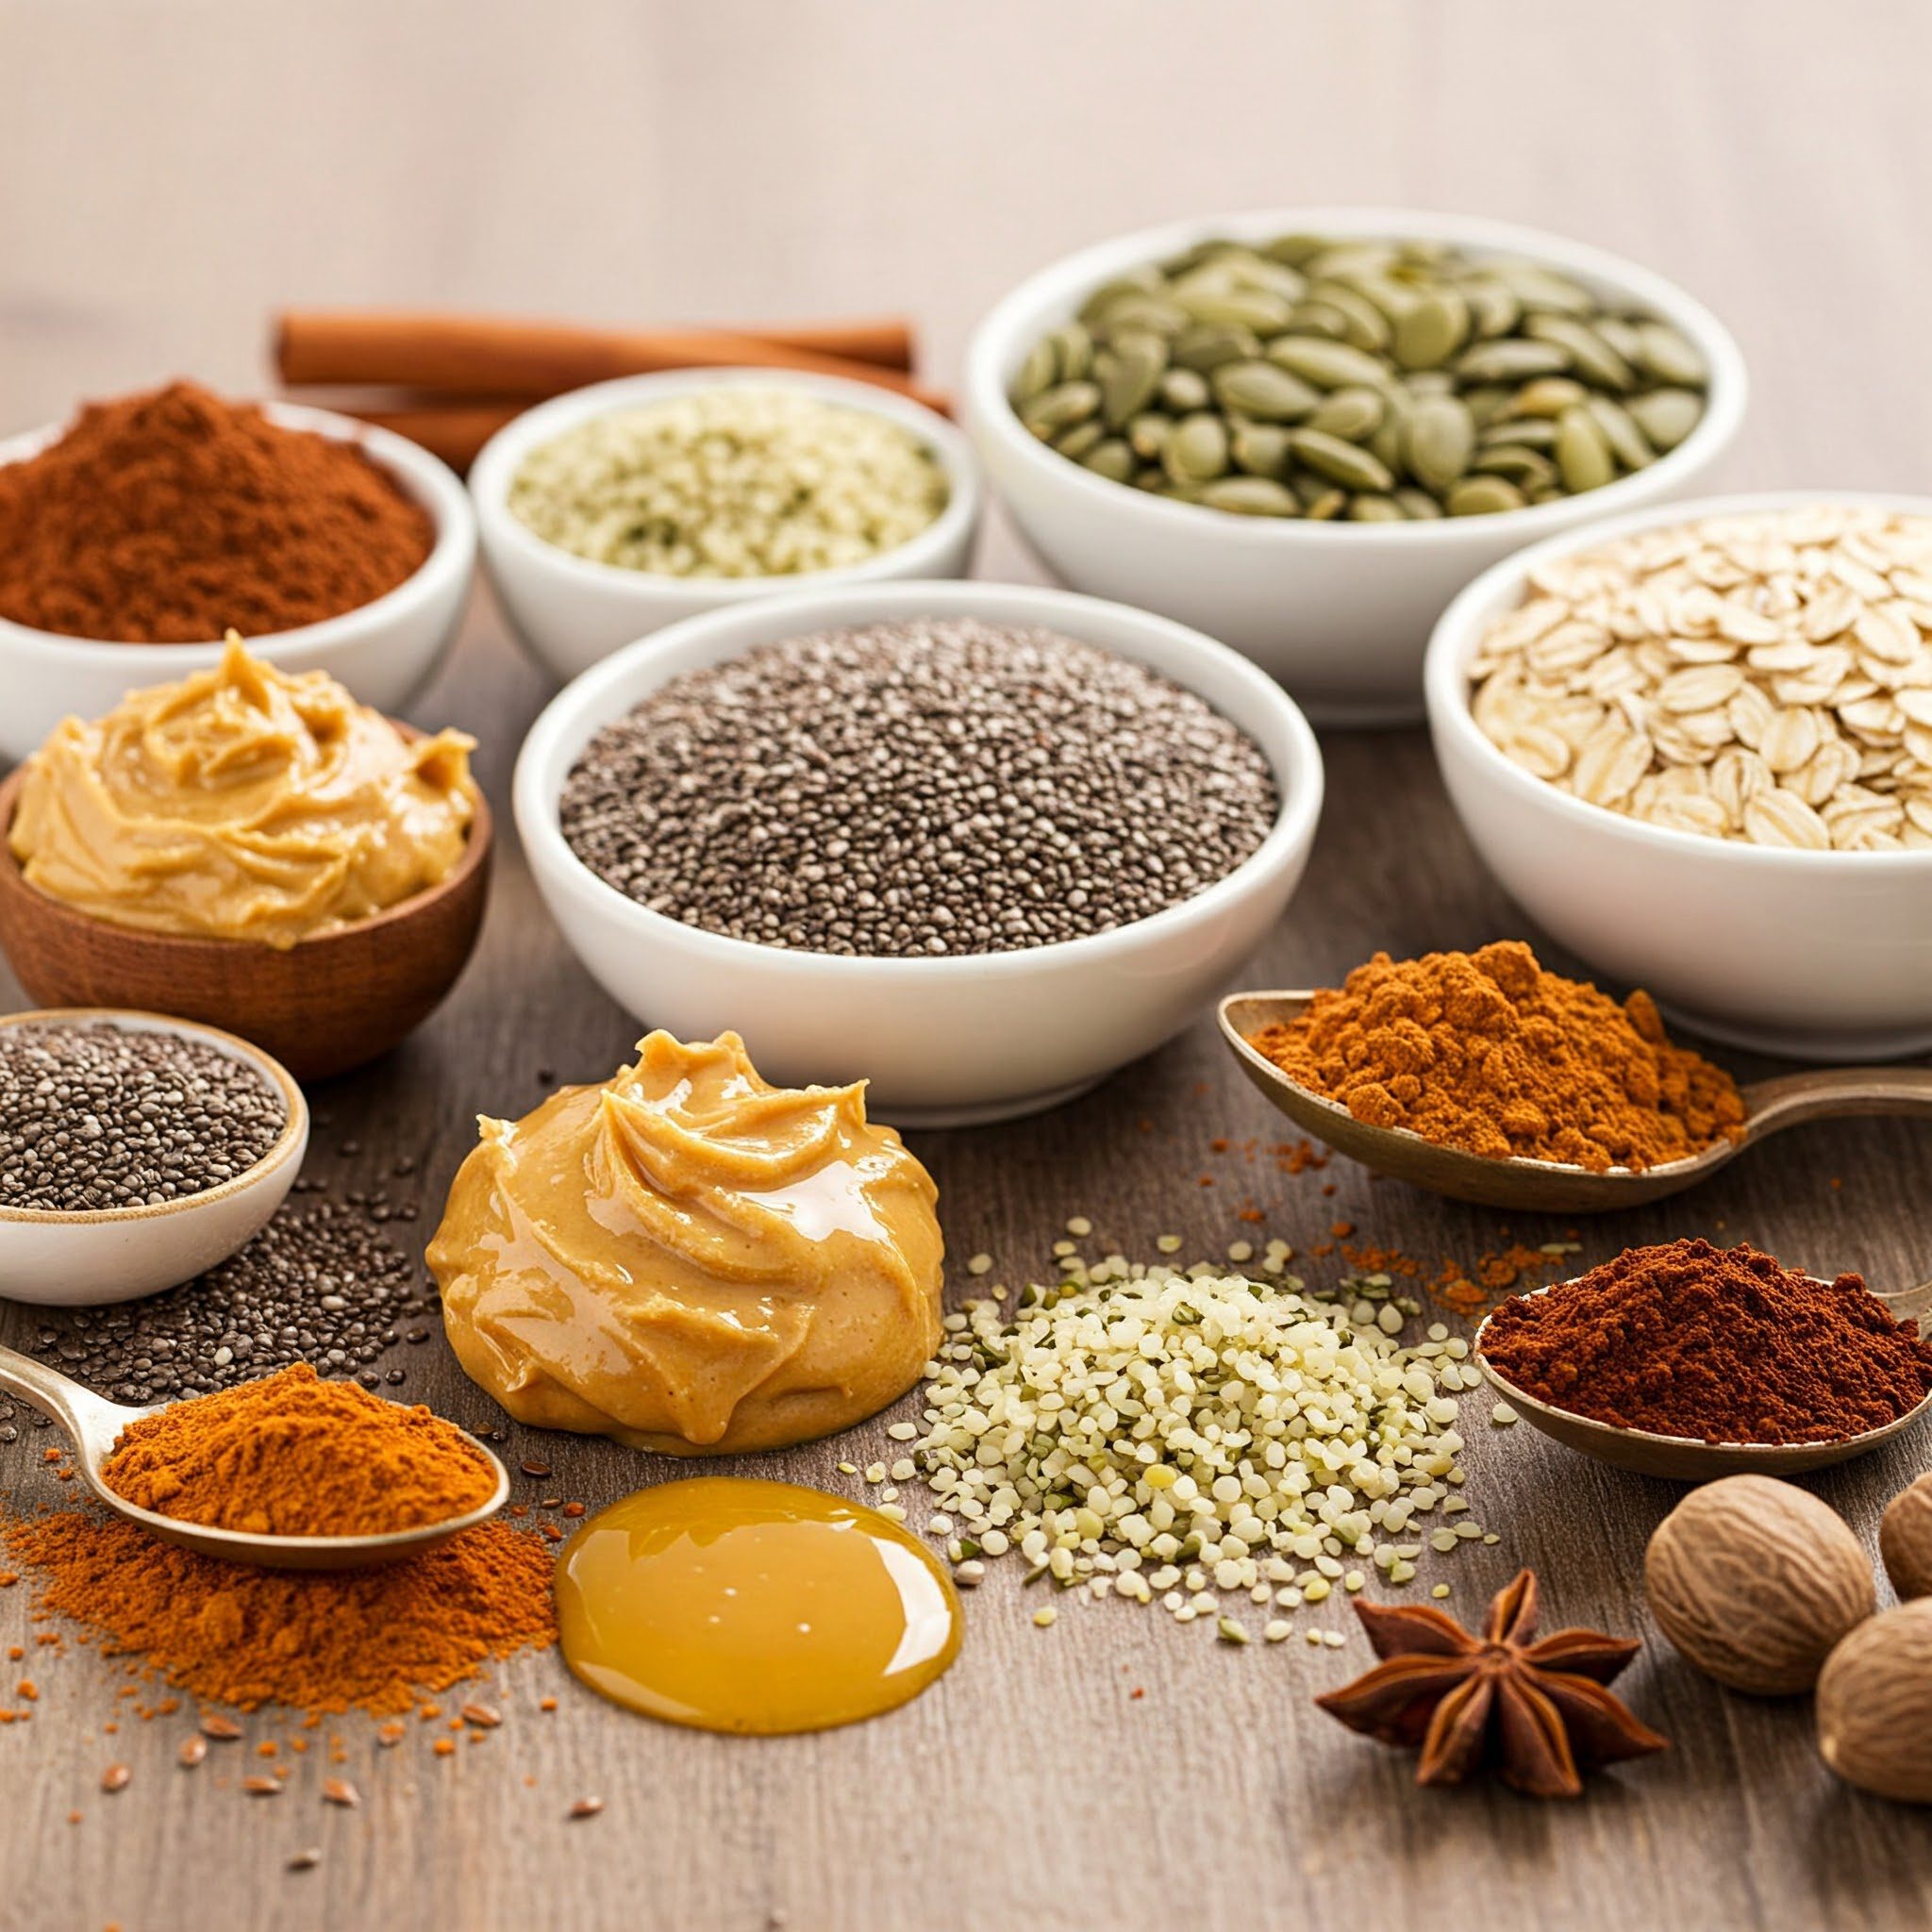
Step 4: Awesome Boosters! (Level Up Your Smoothie!)

Want to go from awesome to EPIC? Toss in a booster! These are extra bits that add more flavor, texture, protein (muscle power!), healthy fats, or fiber (tummy helper!). Totally optional, but fun to play with! Just add a little bit, like a spoonful or two.

Super Booster Ideas:

  • Seeds:
    • Chia Seeds: Tiny powerhouses! They get kinda jelly-like and thicken smoothies. Packed with fiber and good stuff. 1 tablespoon is plenty.
    • Flax Seeds (Ground): Gotta be ground up for your body to use them (or buy ’em ground). More fiber and healthy fats. 1 tablespoon.
    • Hemp Seeds (Hearts): Soft, nutty, great source of protein! 1-2 tablespoons.
  • Nut Butter: Peanut butter, almond butter, cashew… oh yeah! Adds protein, healthy fats, and major yum factor. A spoonful turns a banana smoothie into practically a dessert! Just check it doesn’t have tons of added sugar.
  • Oats (Rolled Oats): Yep, the oatmeal kind! Add 1/4 cup raw rolled oats. They add fiber to keep you full longer and make the smoothie thicker and creamier.
  • Honey or Maple Syrup (Just a Touch!): If your fruit isn’t super sweet, a tiny drizzle (like a teaspoon) of honey (only for kids over 1!) or pure maple syrup can help. But honestly, try to let the fruit do the sweetening!
  • Cocoa Powder (Unsweetened): Chocolate smoothie time! Add a tablespoon of unsweetened cocoa powder. Amazing with banana and peanut butter!
  • Spices: A little pinch of cinnamon or nutmeg adds warmth and tastes great with banana, apple, or pumpkin.


Awesome Boosters
Awesome Boosters


Whew! So many options! Just remember the basic plan: Liquid + Fruit + Maybe Veggie + Maybe Booster. Now you’re armed with tons of ideas for your quest on how to make healthy smoothies!

Okay, Let’s DO This! Your First Smoothie Mission!

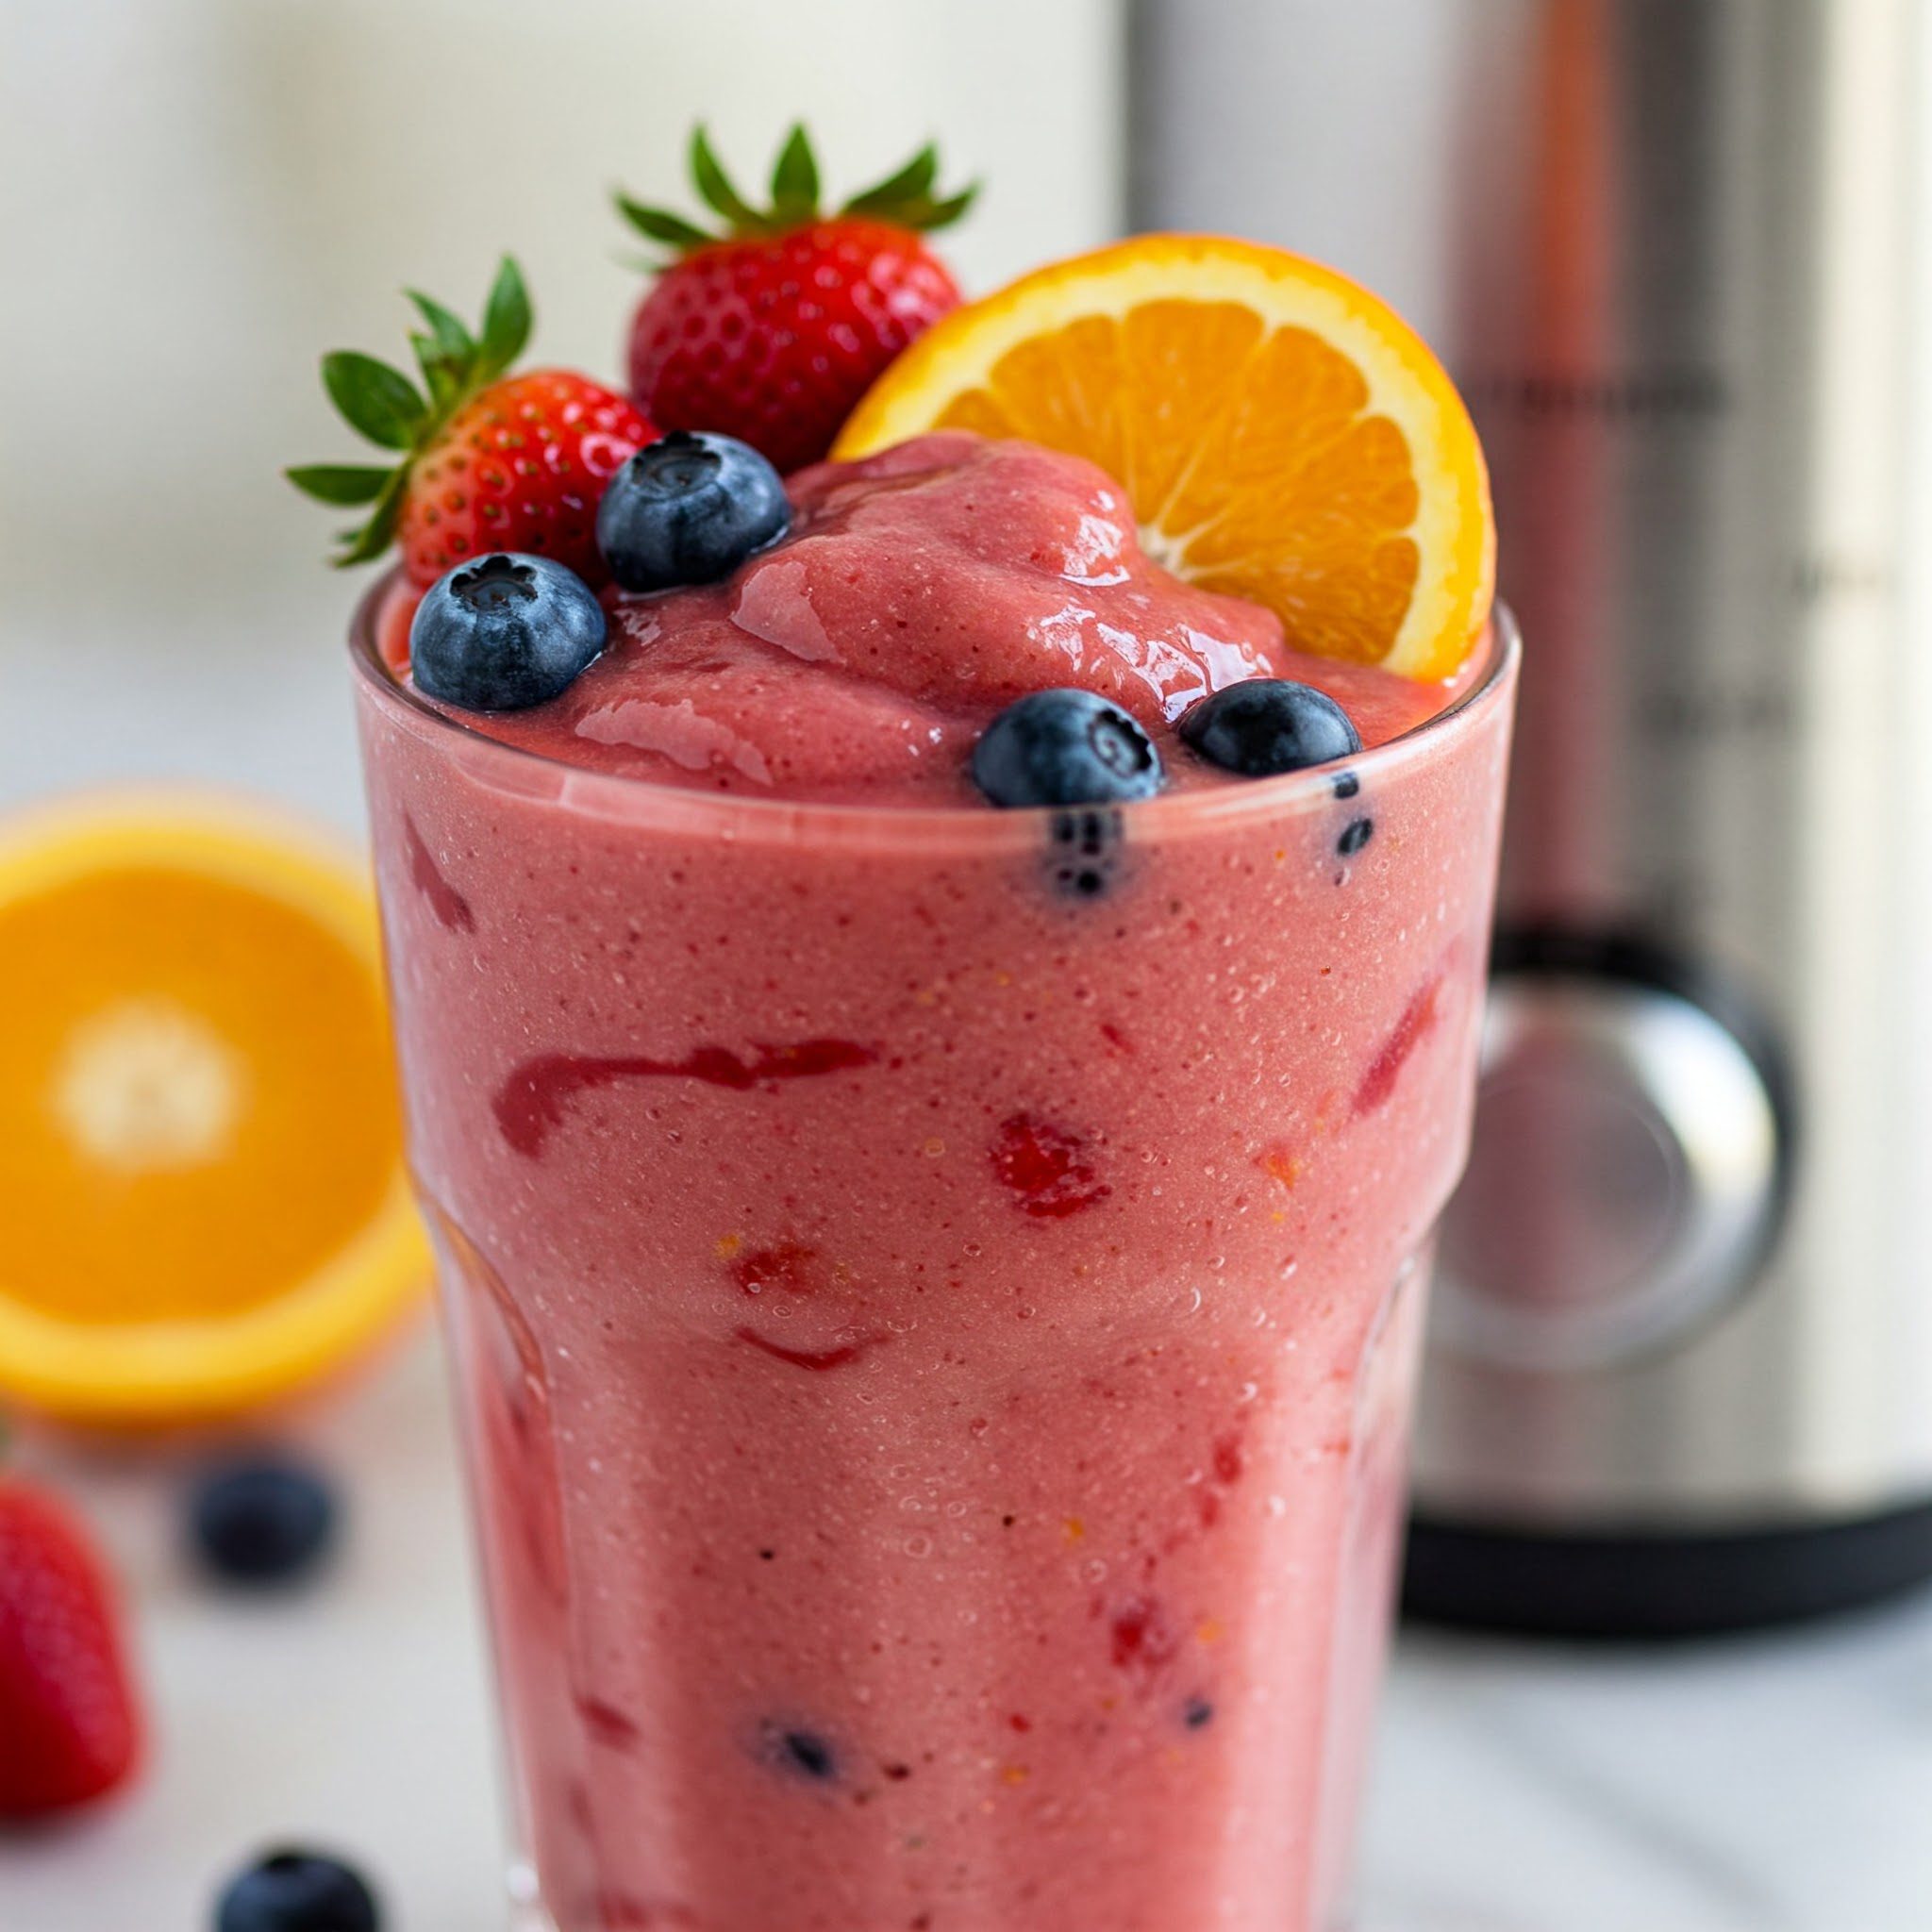
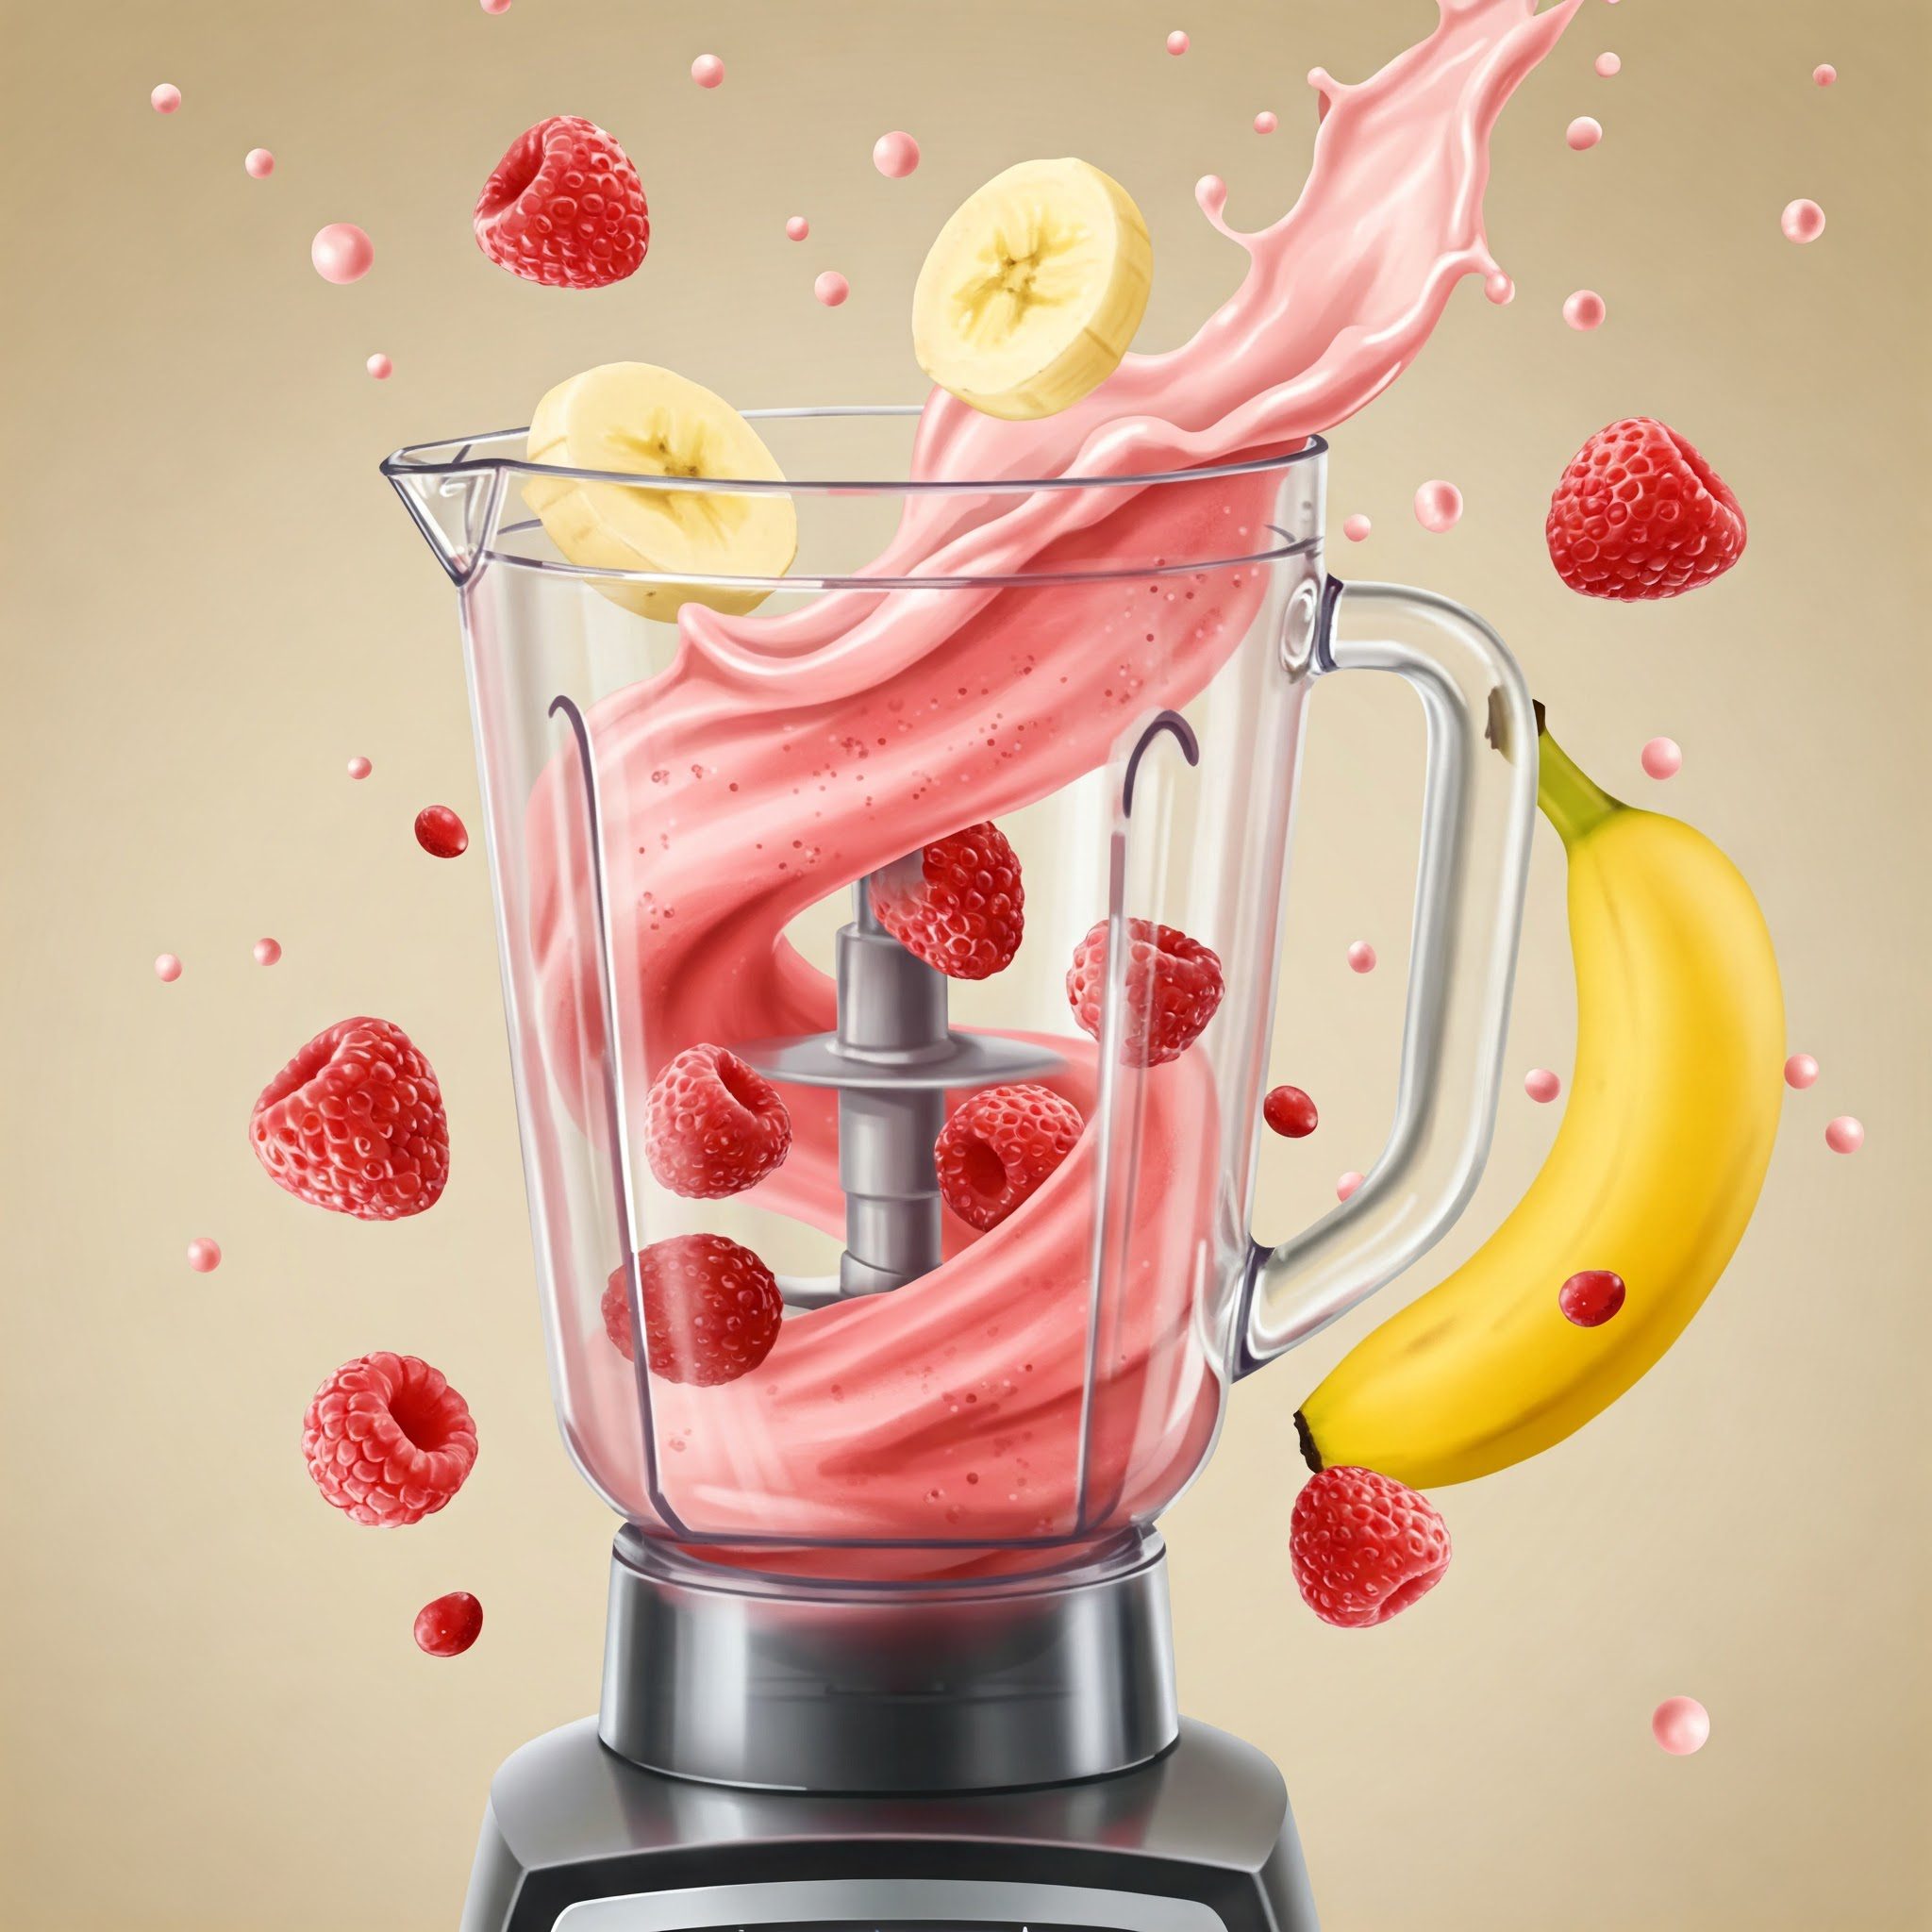
Enough talk, let’s blend! Are you ready to make your very first, super simple, guaranteed-delicious smoothie? We’re going for a classic: The Strawberry Banana Blast!

We’ll stick to the basics: Liquid + Fruit. Easy peasy.

Mission Brief: Create one awesome Strawberry Banana Blast.

Your Gear:

  • Blender
  • Measuring cup (or just guess-timate!)
  • 1 cup Milk (your choice – dairy, almond, oat…) – Liquid Base
  • 1 Banana (ideally frozen chunks!) – Fruit Star
  • About 1 cup Frozen Strawberries – Fruit Star
  • Your Grown-Up Sidekick (ready for action!)


Your First Smoothie Mission

Engage! Follow these steps:


Step 1: Wash Up!

Even if using frozen fruit like today, it’s a good habit: always wash fresh fruits or veggies if you use them later. Clean food, clean hands – ready to go!

Wash Up
Wash Up

Step 2: Ingredient Line-Up!

Get your milk, frozen banana bits, and frozen strawberries all near the blender. Makes life easier.

Ingredient Line-Up
Ingredient Line-Up

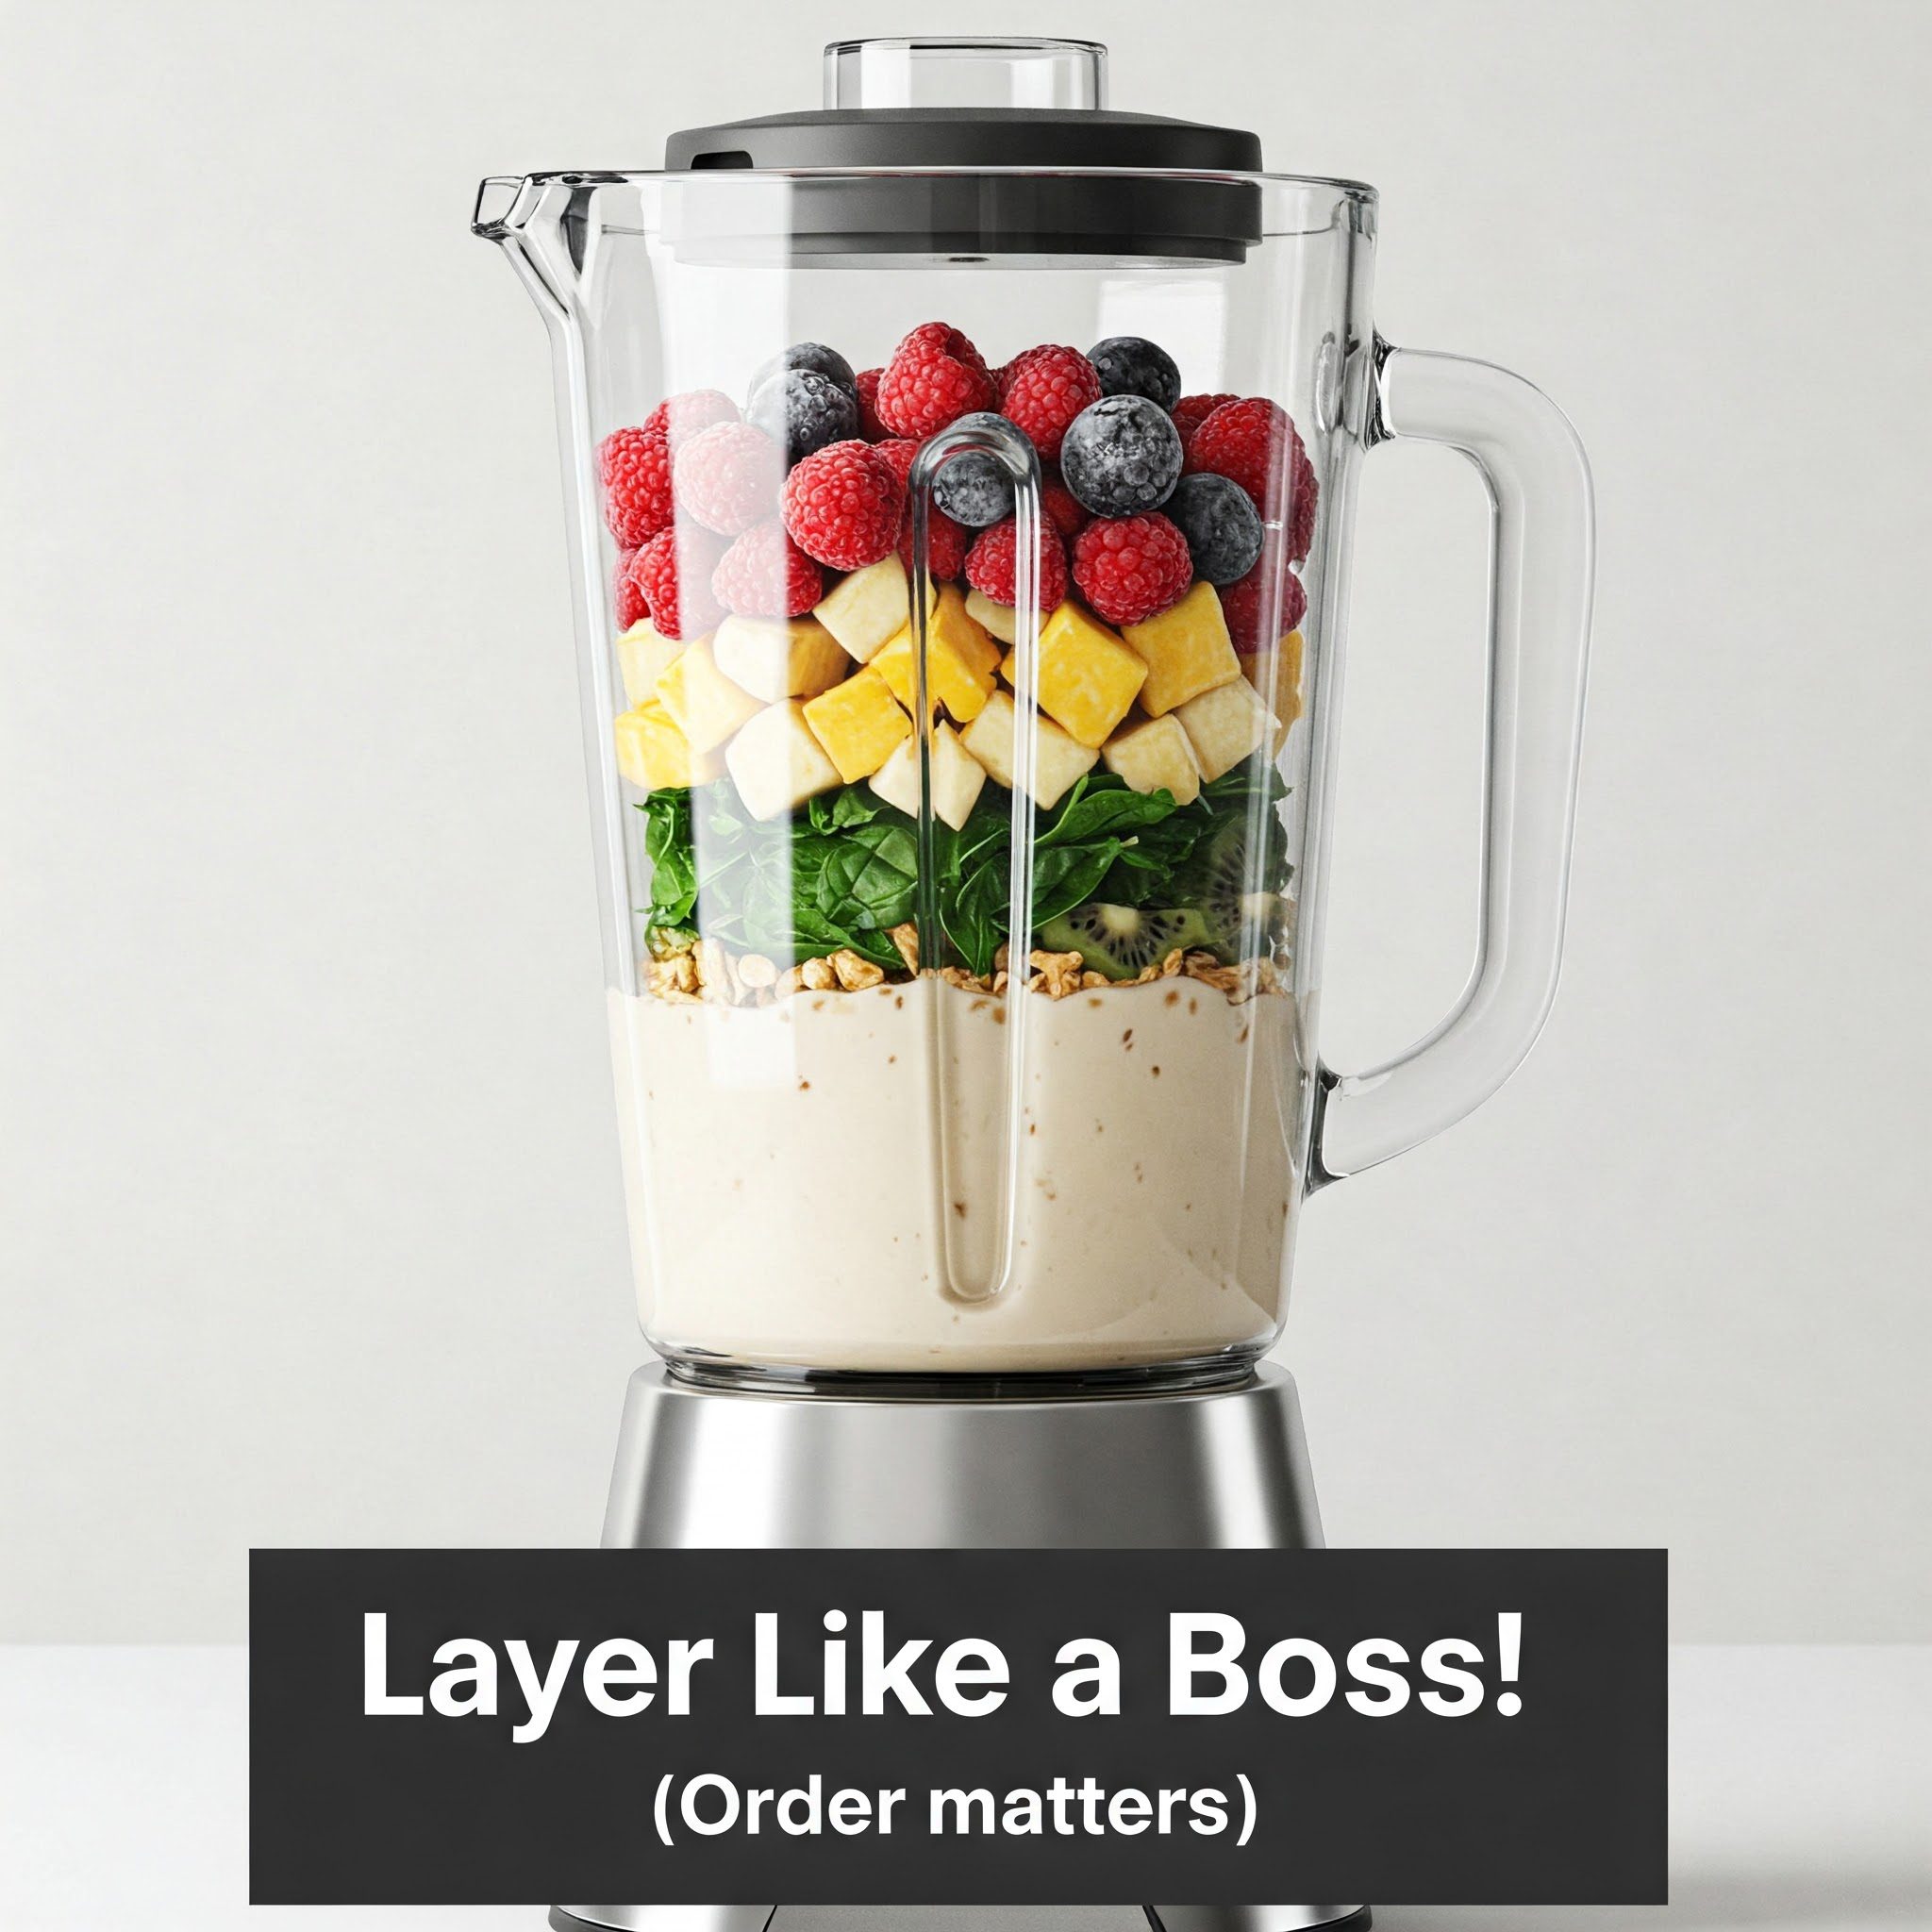
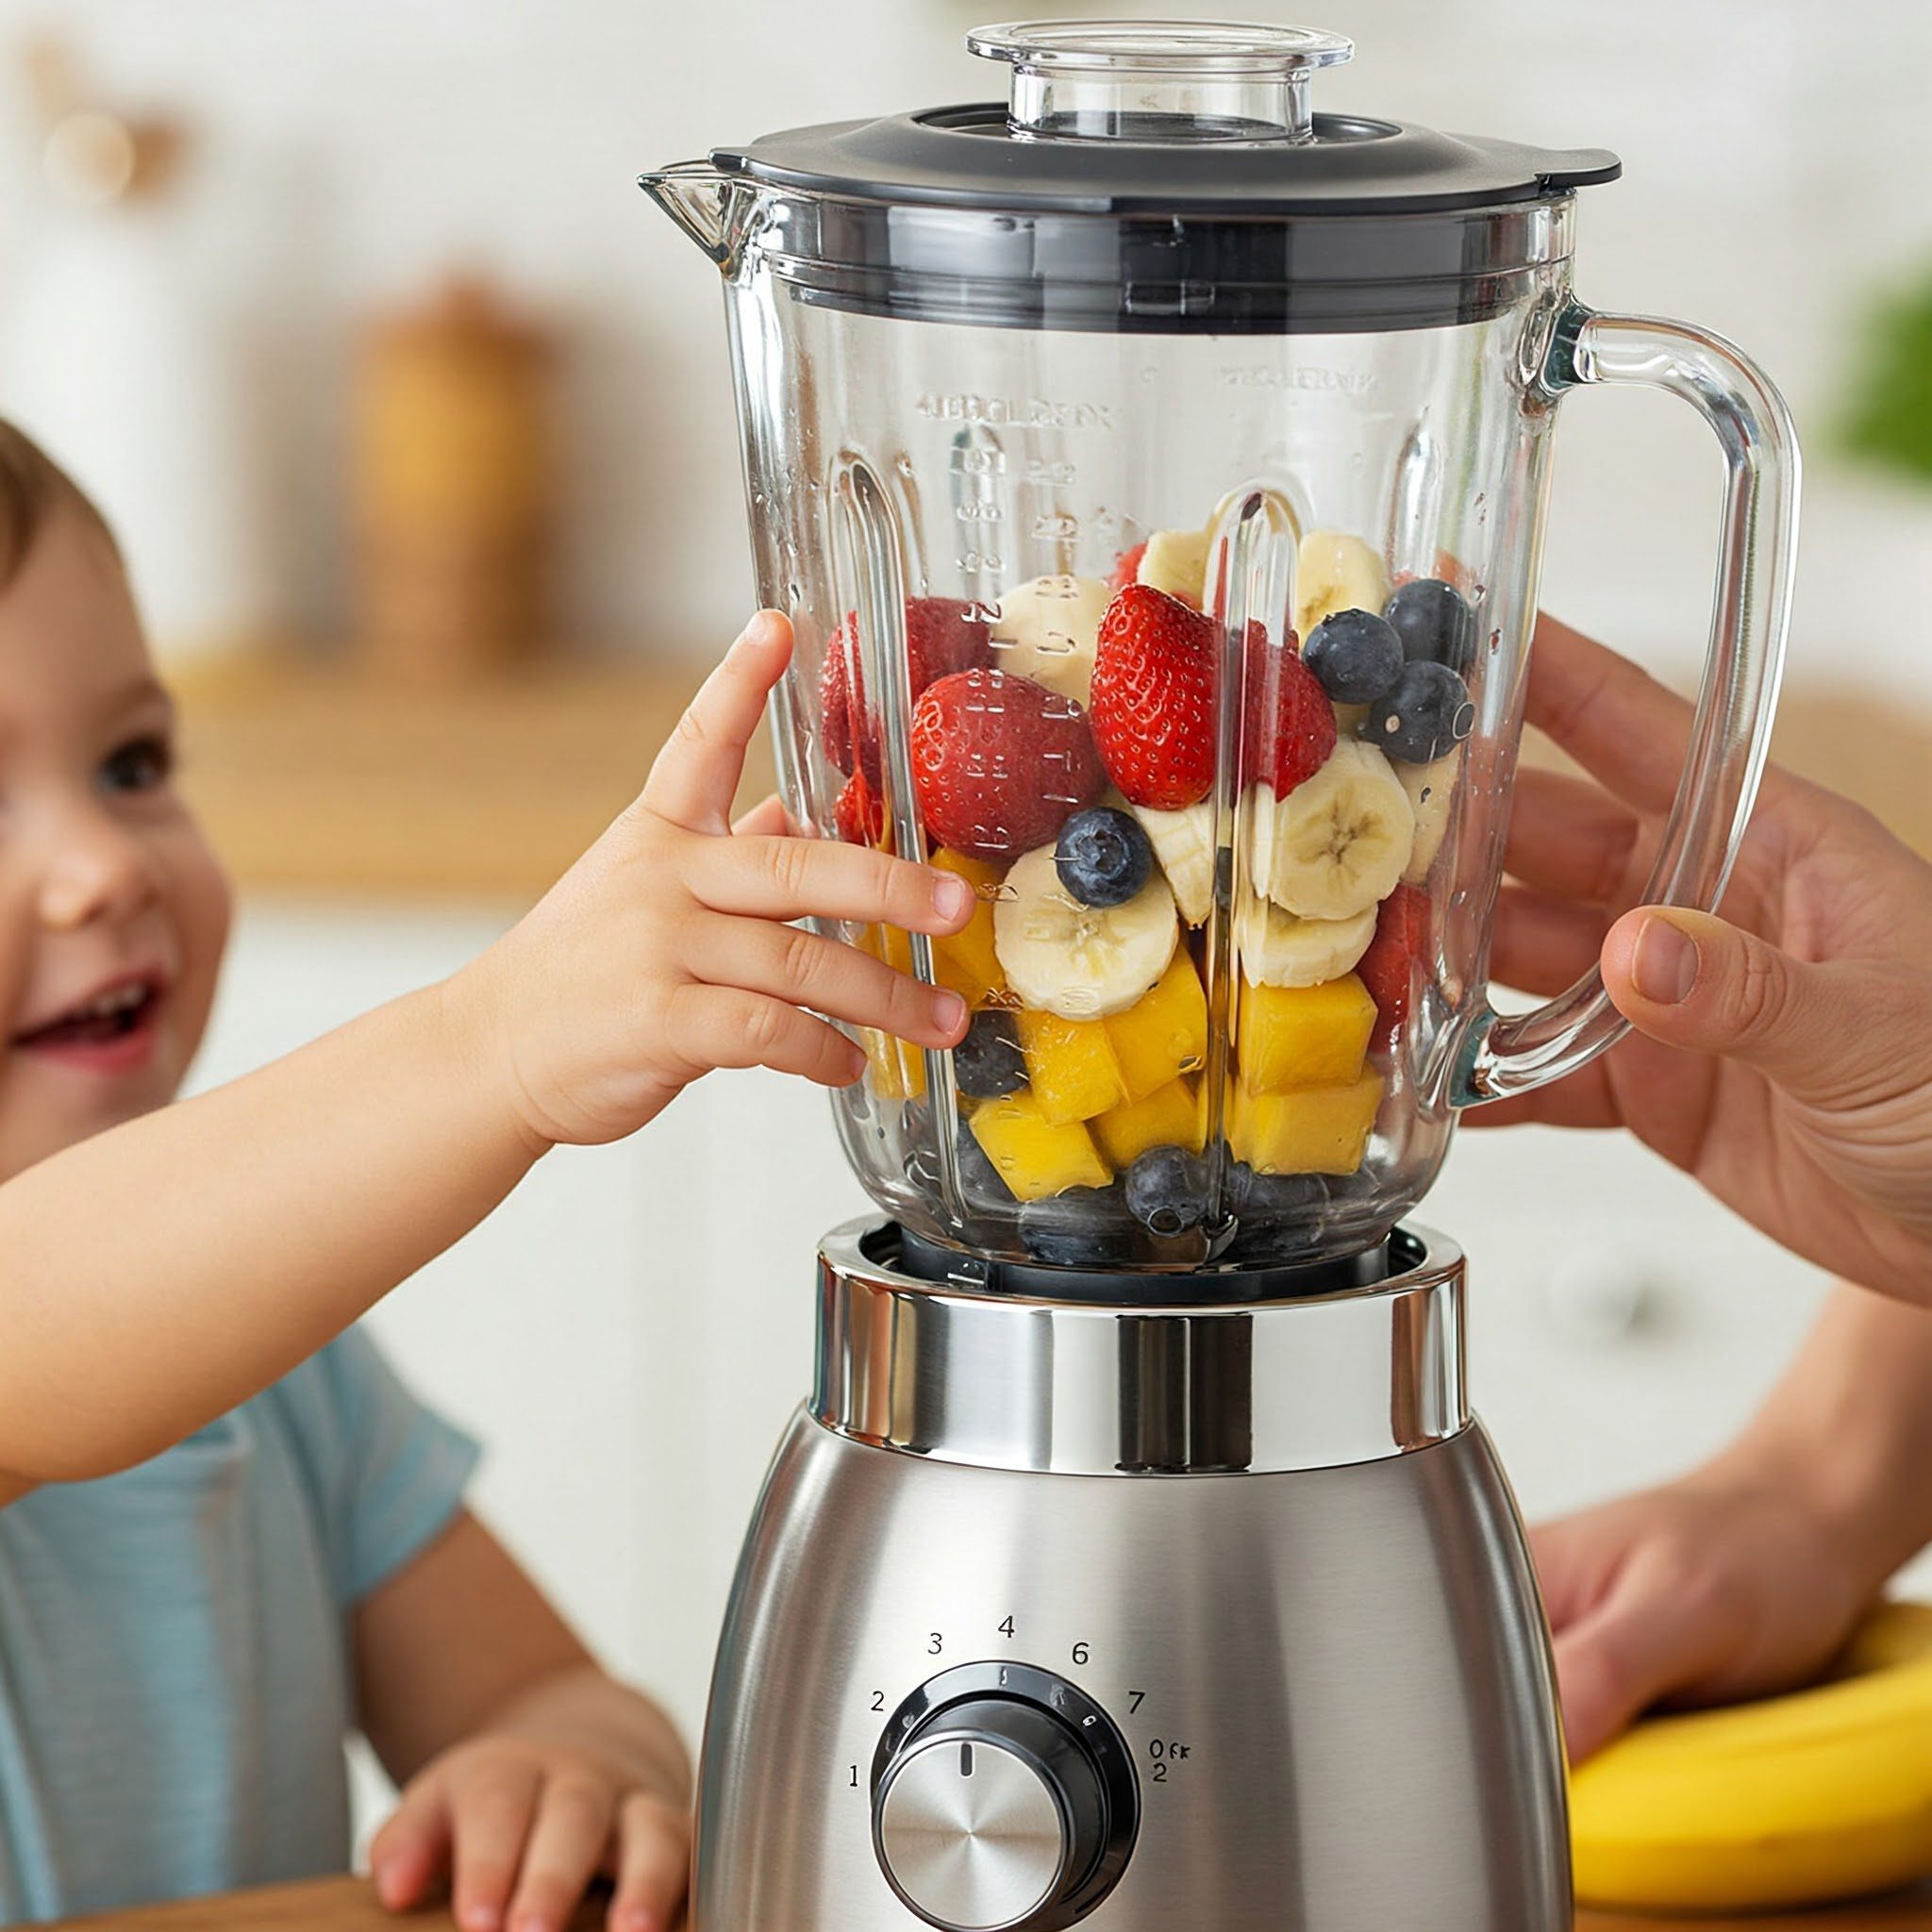
Step 3: Layer Like a Boss! (Order Matters!)

Here’s a secret trick for how to make healthy smoothies blend like a dream: put things in the blender in the right order! Usually, it’s liquids first on the bottom, then softer stuff/greens, then the hard frozen stuff or ice goes on top.

  • Liquid Down! Pour your 1 cup of milk into the blender jug. This gives the blades room to start spinning.
  • Fruit Mountain! Add the frozen banana chunks and frozen strawberries on top of the milk.


Layer Like a Boss
Layer Like a Boss

Step 4: Batten Down the Hatches! (Lid ON!)

Put that blender lid on. Make sure it clicks, seals, or twists on securely. Double-check it! No one wants a smoothie volcano!

Batten Down the Hatches

Step 5: Hit the Button! (With Grown-Up Co-Pilot!)

Okay, place the jug firmly onto the blender base. Now, with your adult helper right there:

  • Start the blender on LOW for maybe 10-15 seconds. You’ll see it start grabbing the ingredients.
  • Then, crank it up to HIGH.
  • Let it whirr for 30-60 seconds. Listen and watch. Is it looking smooth and creamy? No big chunks left? It might be loud – that’s normal! If it seems stuck, stop the blender. Ask your grown-up to maybe give it a careful stir (NEVER when running!) or add a tiny splash more milk, then try blending again.


Hit the Button
Hit the Button

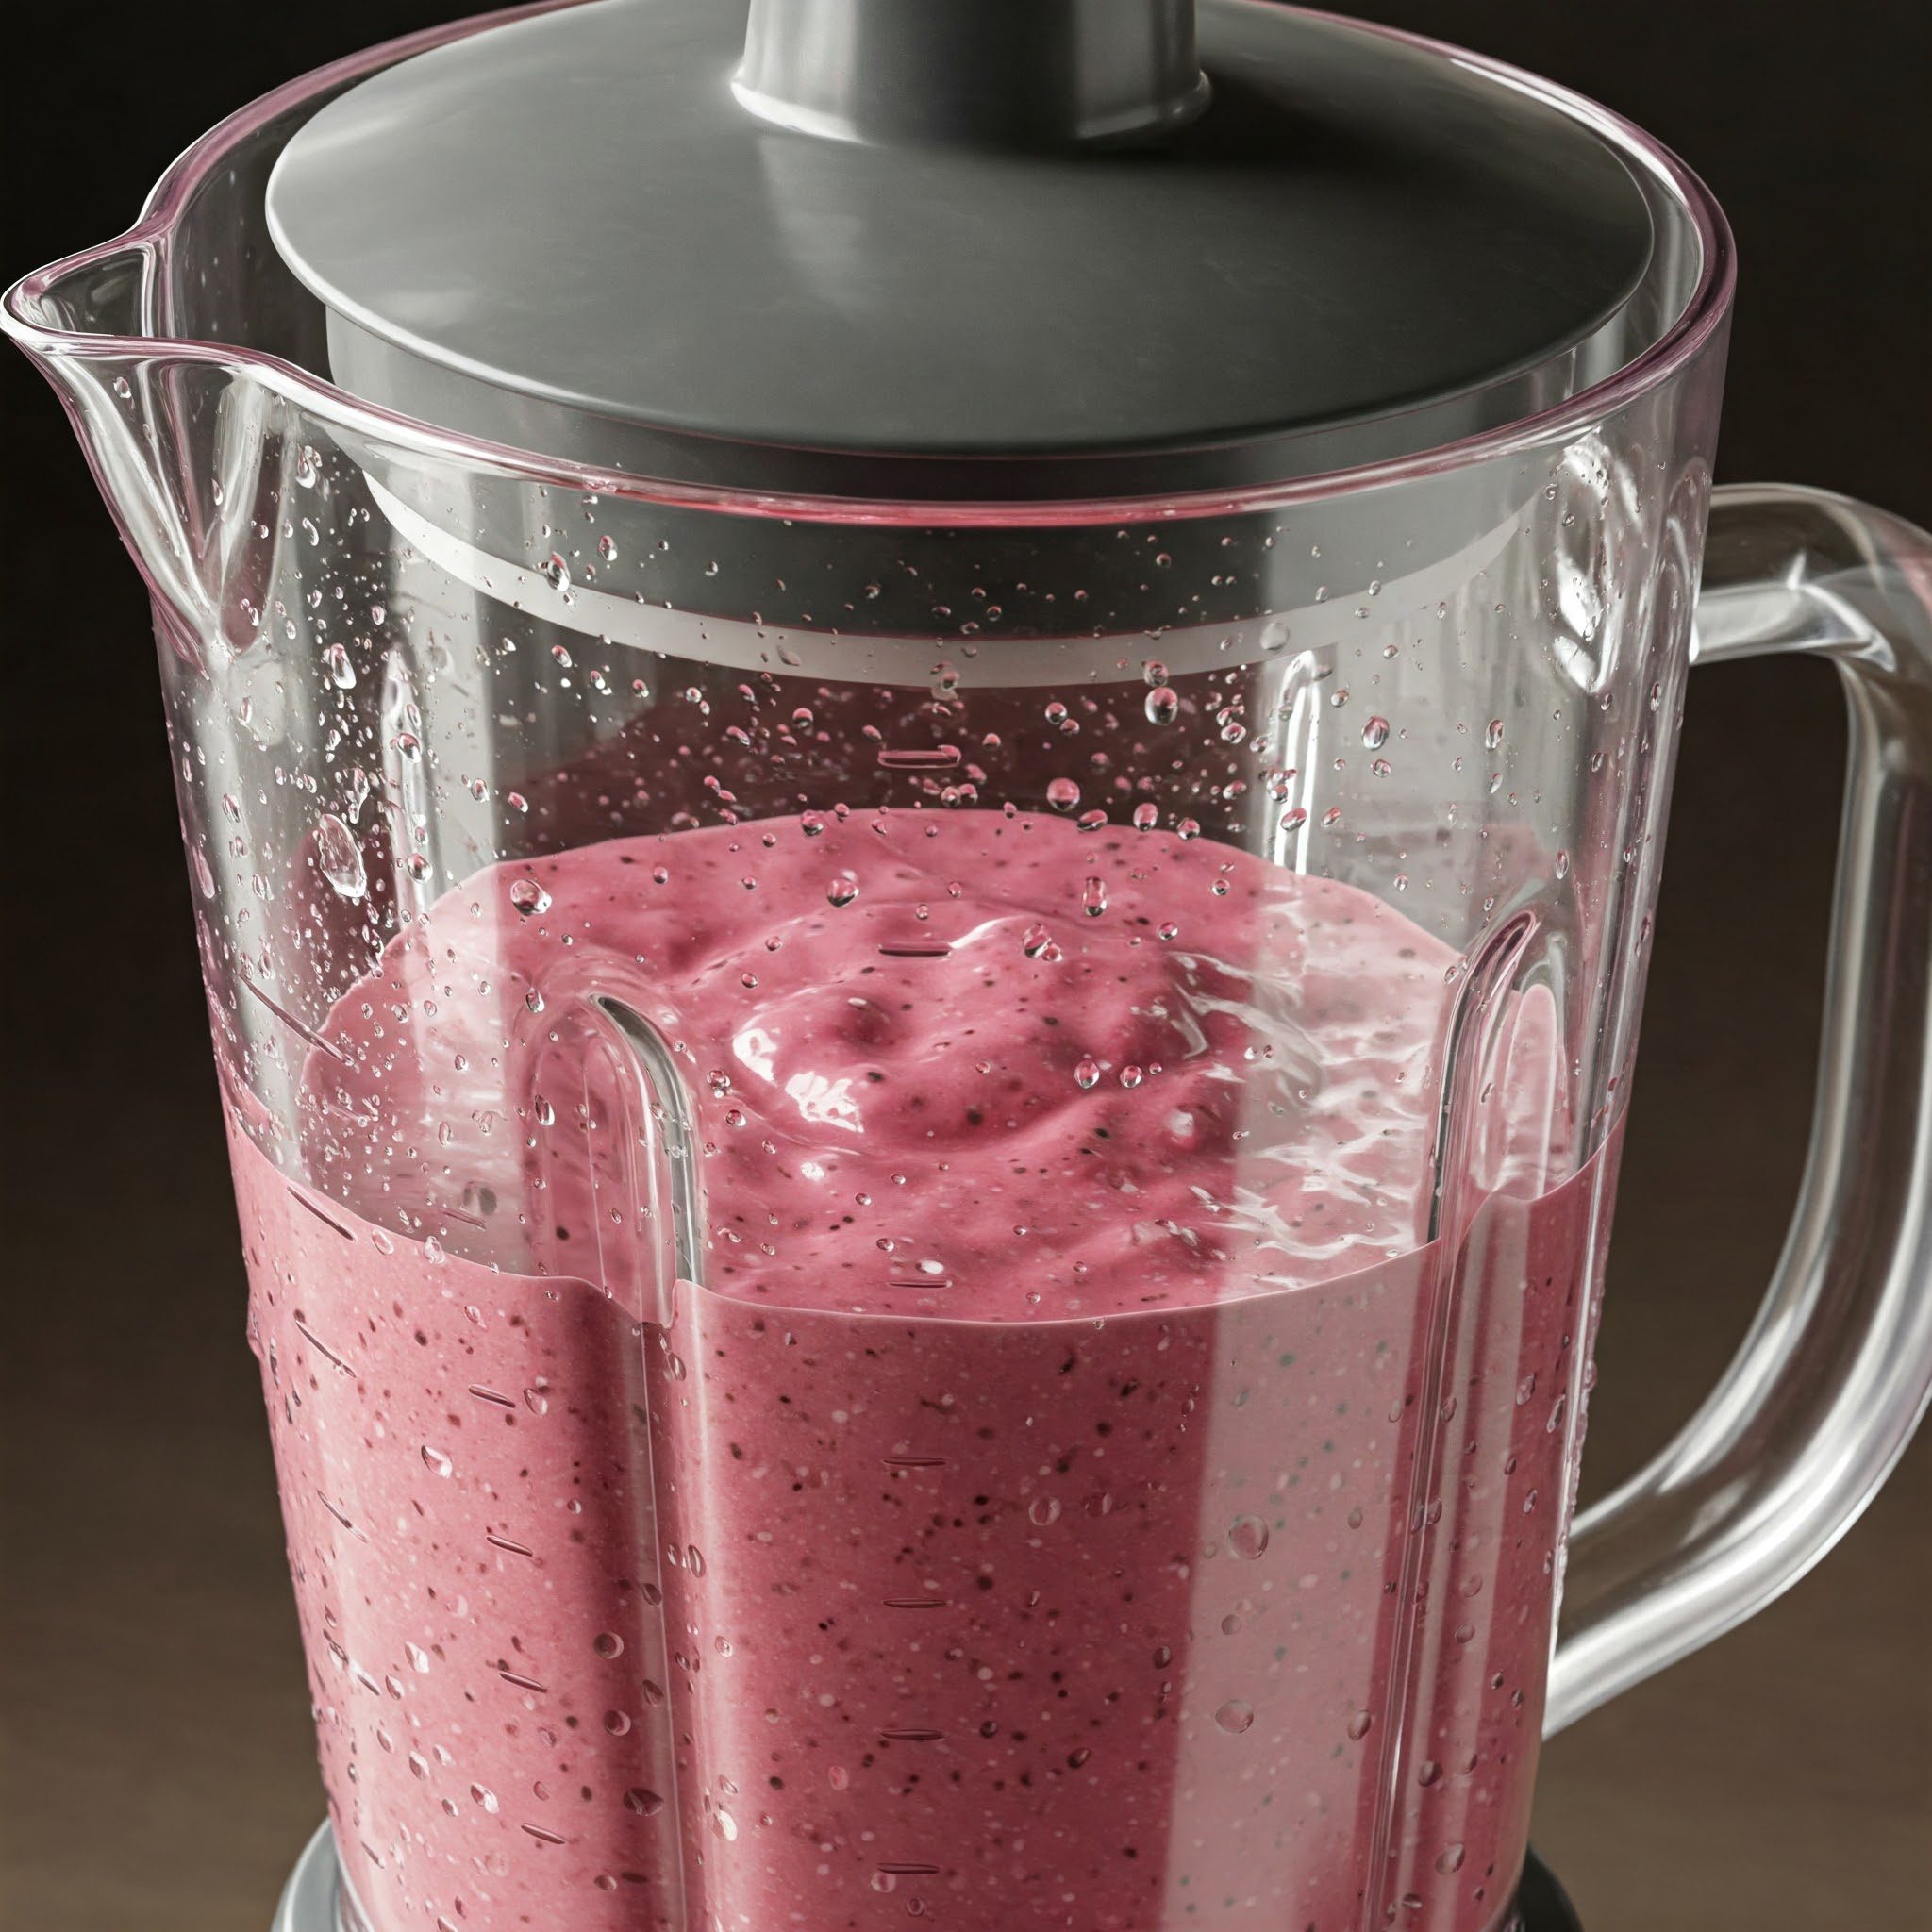
Step 6: The Texture Check!

Turn off the blender. Carefully take off the lid. How does it look? Is it thick like a milkshake or a bit thin like juice?

  • Too Thick (Like Mud)? Add just a tiny bit more milk (start with a tablespoon or two) and blend for just 5 seconds more.
  • Too Thin (Like Water)? Add a few more frozen berries or banana chunks (or a couple of ice cubes if that’s all you have) and blend again briefly.


The Texture Check
The Texture Check

Step 7: Pour & Taste! Victory!

Carefully pour your amazing Strawberry Banana Blast into your glass. Add a straw if you want. Now for the moment of truth… take a big sip! Awesome, right?! YOU totally did that! You just learned the basic secret of how to make healthy smoothies! High five!

Pour & Taste! Victory

Flavor Adventures! Beyond the Basics!

You crushed the Strawberry Banana Blast! NICE! But guess what? That’s just the starting line! The smoothie universe is HUGE! Learning how to make healthy smoothies is really about becoming a flavor explorer. Think of your blender as your spaceship!

Here are some ideas to get your imagination zooming:
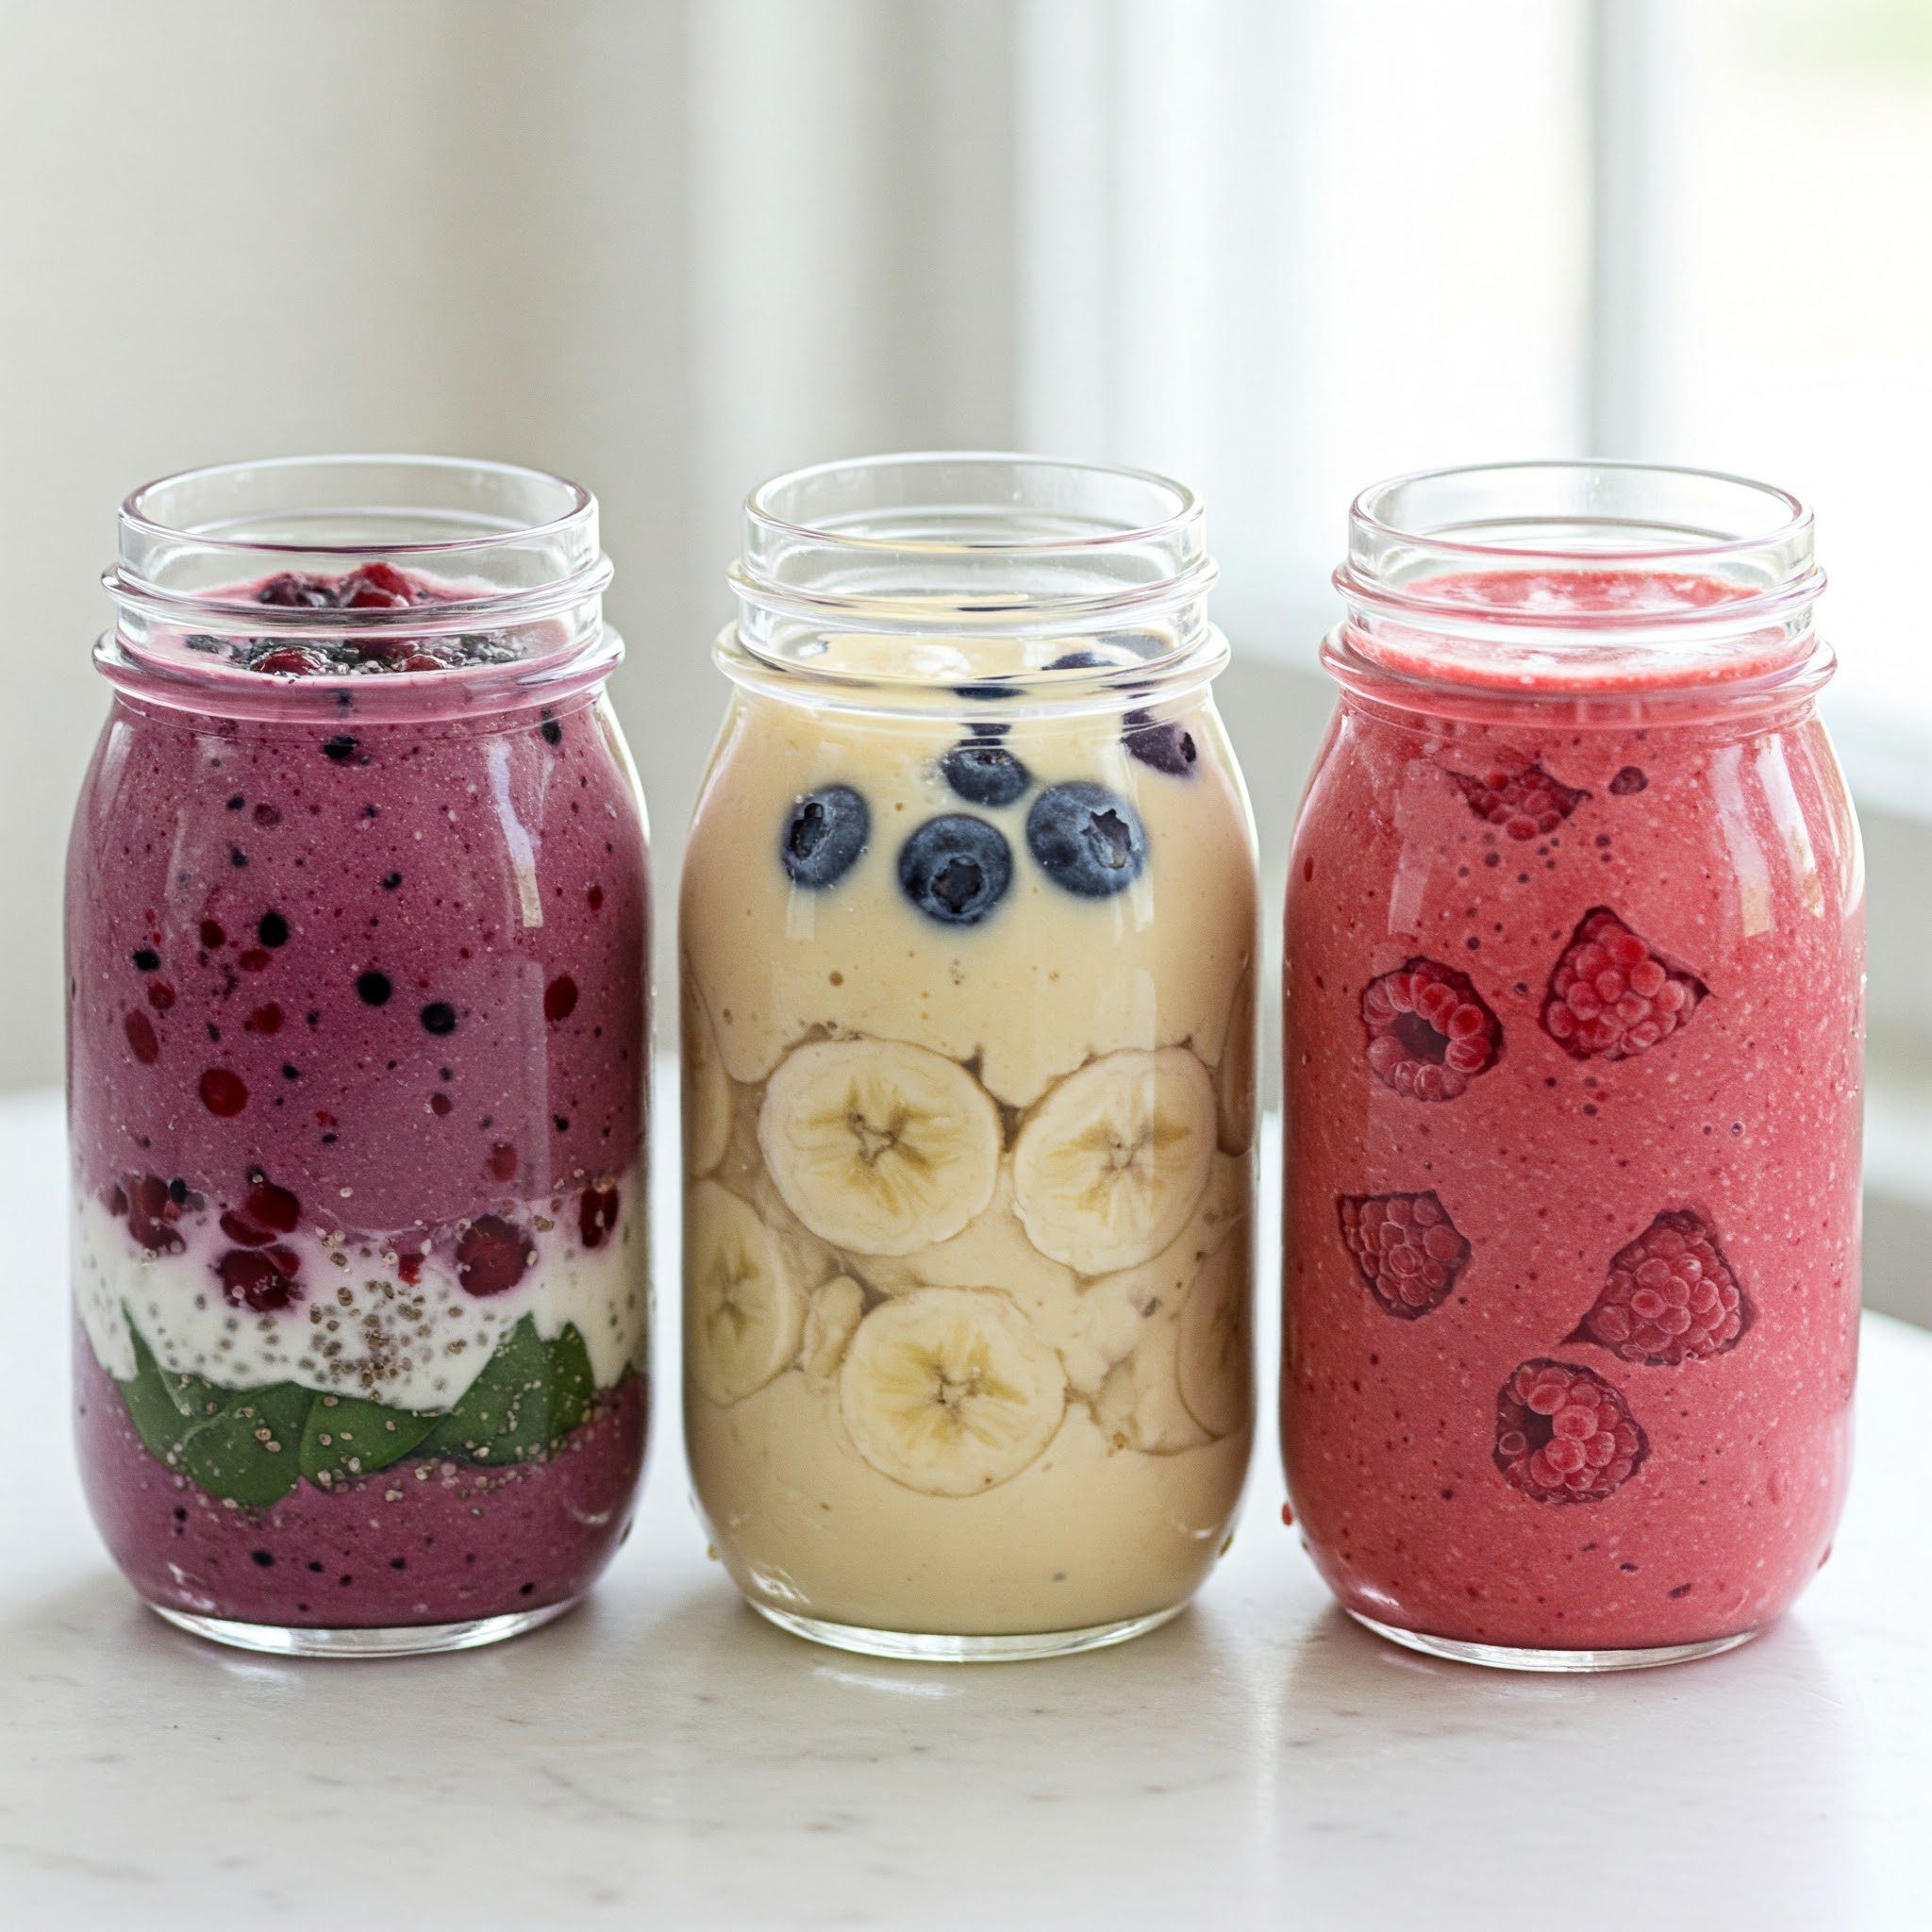
Berry Bonanza!

If berries are your jam:

  • Berry Overload: Milk or yogurt + Frozen mixed berries + Handful of spinach (go on, try it!) + Chia seeds (optional!).
  • Blueberry Brain Boost: Almond milk + Frozen blueberries + Half a frozen banana + Dash of cinnamon (optional!).
  • Raspberry Zing Thing: Coconut water or plain water + Frozen raspberries + Half a frozen banana + A little squeeze of lime juice (makes it pop!).


Berry Bonanza
Berry Bonanza

Tropical Escapes!

Dreaming of beaches?

  • Mango Madness: Coconut milk or a splash of OJ + Frozen mango + Half a frozen banana. Simple, perfect.
  • Pineapple Power: Coconut water or milk + Frozen pineapple + Half a frozen banana + Handful of spinach (seriously, you won’t taste it with pineapple!).
  • Green Island Dream: Water or almond milk + Frozen mango & pineapple + Big handful of spinach + Maybe half an avocado for super creaminess (optional!).


Tropical Escapes
Tropical Escapes

Going Green (It’s Easier Than You Think!)

Ready to be brave and add those greens? You got this!

  • Your First Green Mission: Milk (oat milk is great here!) + Frozen mango or pineapple (their sweetness hides the green flavor!) + 1 Frozen banana + 1 BIG handful of baby spinach. Blend it super well! Take a sip… surprised it tastes good? Told ya!
  • Kale Kickstart: Almond milk + Frozen blueberries + Half a frozen banana + Just a couple of kale leaves (rip out the hard middle stem!) + Maybe a spoonful of almond butter (optional!). Start small with kale, it’s a bit stronger.


Going Green It's Easier Than You Think!
Going Green It’s Easier Than You Think!

Creamy & Dreamy Smoothies!

Love that thick, almost-milkshake texture?

  • Peanut Butter Bliss: Milk + 1 Frozen banana + 1-2 Tablespoons peanut butter + Maybe 1 Tablespoon unsweetened cocoa powder for a chocolate hit! + Chia seeds (optional!). SO GOOD.
  • Orange Dream Machine: Milk or vanilla yogurt + 1 peeled orange (no seeds!) or use frozen mango + Half a frozen banana + Tiny splash of vanilla extract (optional extra flavor!).
  • Avocado Awesome: Milk or water + Half an avocado + Frozen mango or berries + Handful of spinach + Squeeze of lime. Sounds weird, tastes amazing and SO creamy!


Creamy & Dreamy Smoothies


Your Move! What sounds yummy to YOU? What fruits are your favorites? Don’t be scared to experiment! Apple-cinnamon? Peach-raspberry? Go for it! The only real rule in learning how to make healthy smoothies is making something you enjoy!

You Can Watch Video Related “How to make healthy smoothies”

Smoothie Pro Tips (Stuff I Learned Along the Way!)

You’re doing great! Seriously, you’re becoming a smoothie natural. Here are just a few extra little tricks I’ve picked up that can make your smoothie game even stronger. Think of these as your advanced smoothie ninja training for how to make healthy smoothies!

Pro Tip #1: Frozen is Your Friend!

I know, I sound like a broken record, but frozen fruit really is the secret weapon!

  • Freeze Your Own: Got bananas getting spotty? Berries looking a bit sad? Don’t toss ’em! Peel, chop (if needed), and freeze them in a bag or container for future smoothies! Waste less, smoothie more!
  • Buy It Frozen: Bags of frozen berries, mango, pineapple, etc., are awesome. Super convenient, often less pricey than fresh (especially out of season), and ready to go.
  • No Ice Needed (Usually!): Using frozen fruit chills your smoothie perfectly, so you don’t need ice, which can make it watery. If you only have fresh fruit, fine, add 4-5 ice cubes, but frozen fruit gives better flavor and texture.


Frozen is Your Friend

Pro Tip #2: Smart Sweetening!

Fruit is already sweet, which is great! Try to lean into that natural sweetness.

  • Riper = Sweeter: Remember those spotty bananas? They’re actually sweeter and perfect for smoothies!
  • Taste First! Always blend everything up and take a little sip before you even think about adding extra sweeteners like honey or maple syrup. You might be totally happy with the fruit’s sweetness!
  • Watch Sneaky Sugars: Just be aware that fruit juices and flavored yogurts can add a lot of extra sugar. Using plain yogurt and milk/water/unsweetened plant milk gives you more control over the sweetness level.


Smart Sweetening
Smart Sweetening

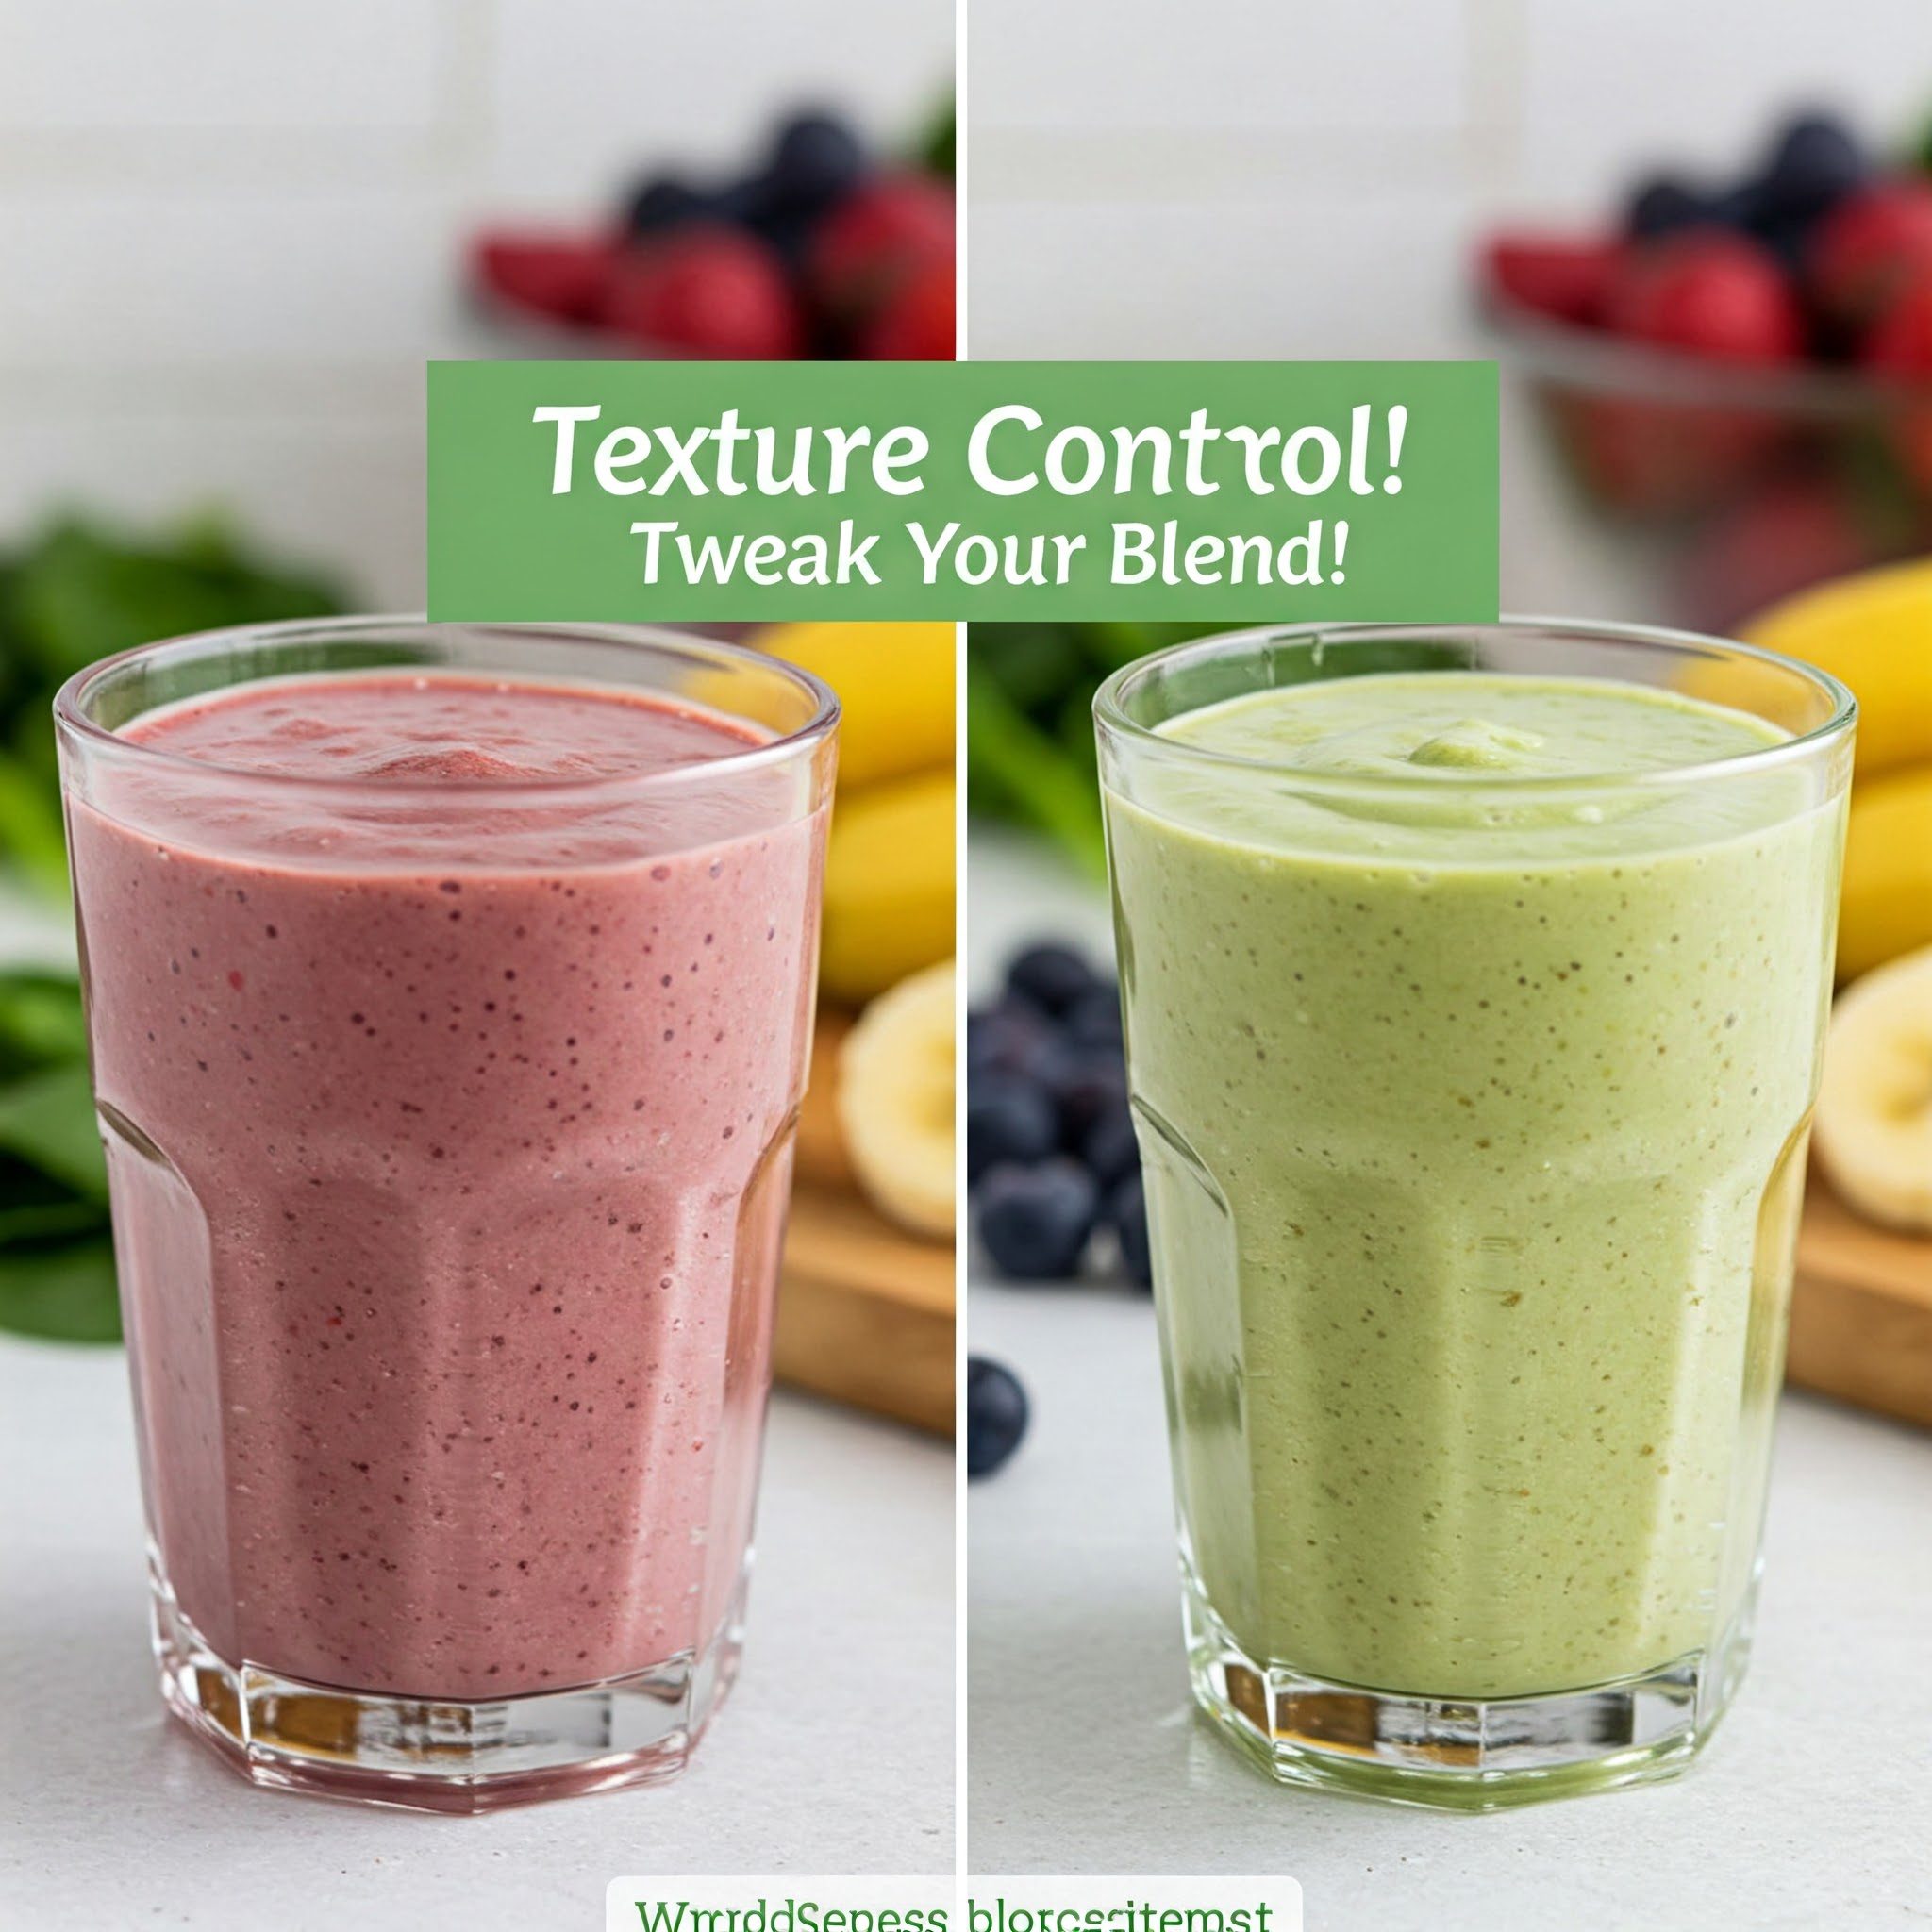
Pro Tip #3: Texture Control! Tweak Your Blend!

Sometimes it’s not quite right on the first go. No worries! Easy fixes:

  • Too Thick (Can’t Suck it Through a Straw!)? Add a splash more liquid (milk, water, whatever you used), just a little bit, and give it a quick 5-second re-blend.
  • Too Thin (Like Juice)? Add more frozen fruit, a few more frozen banana chunks, a scoop of yogurt, a couple of ice cubes, or even a spoonful of chia seeds (let them sit for a minute to work their magic) and blend again briefly.


Texture Control Tweak Your Blend

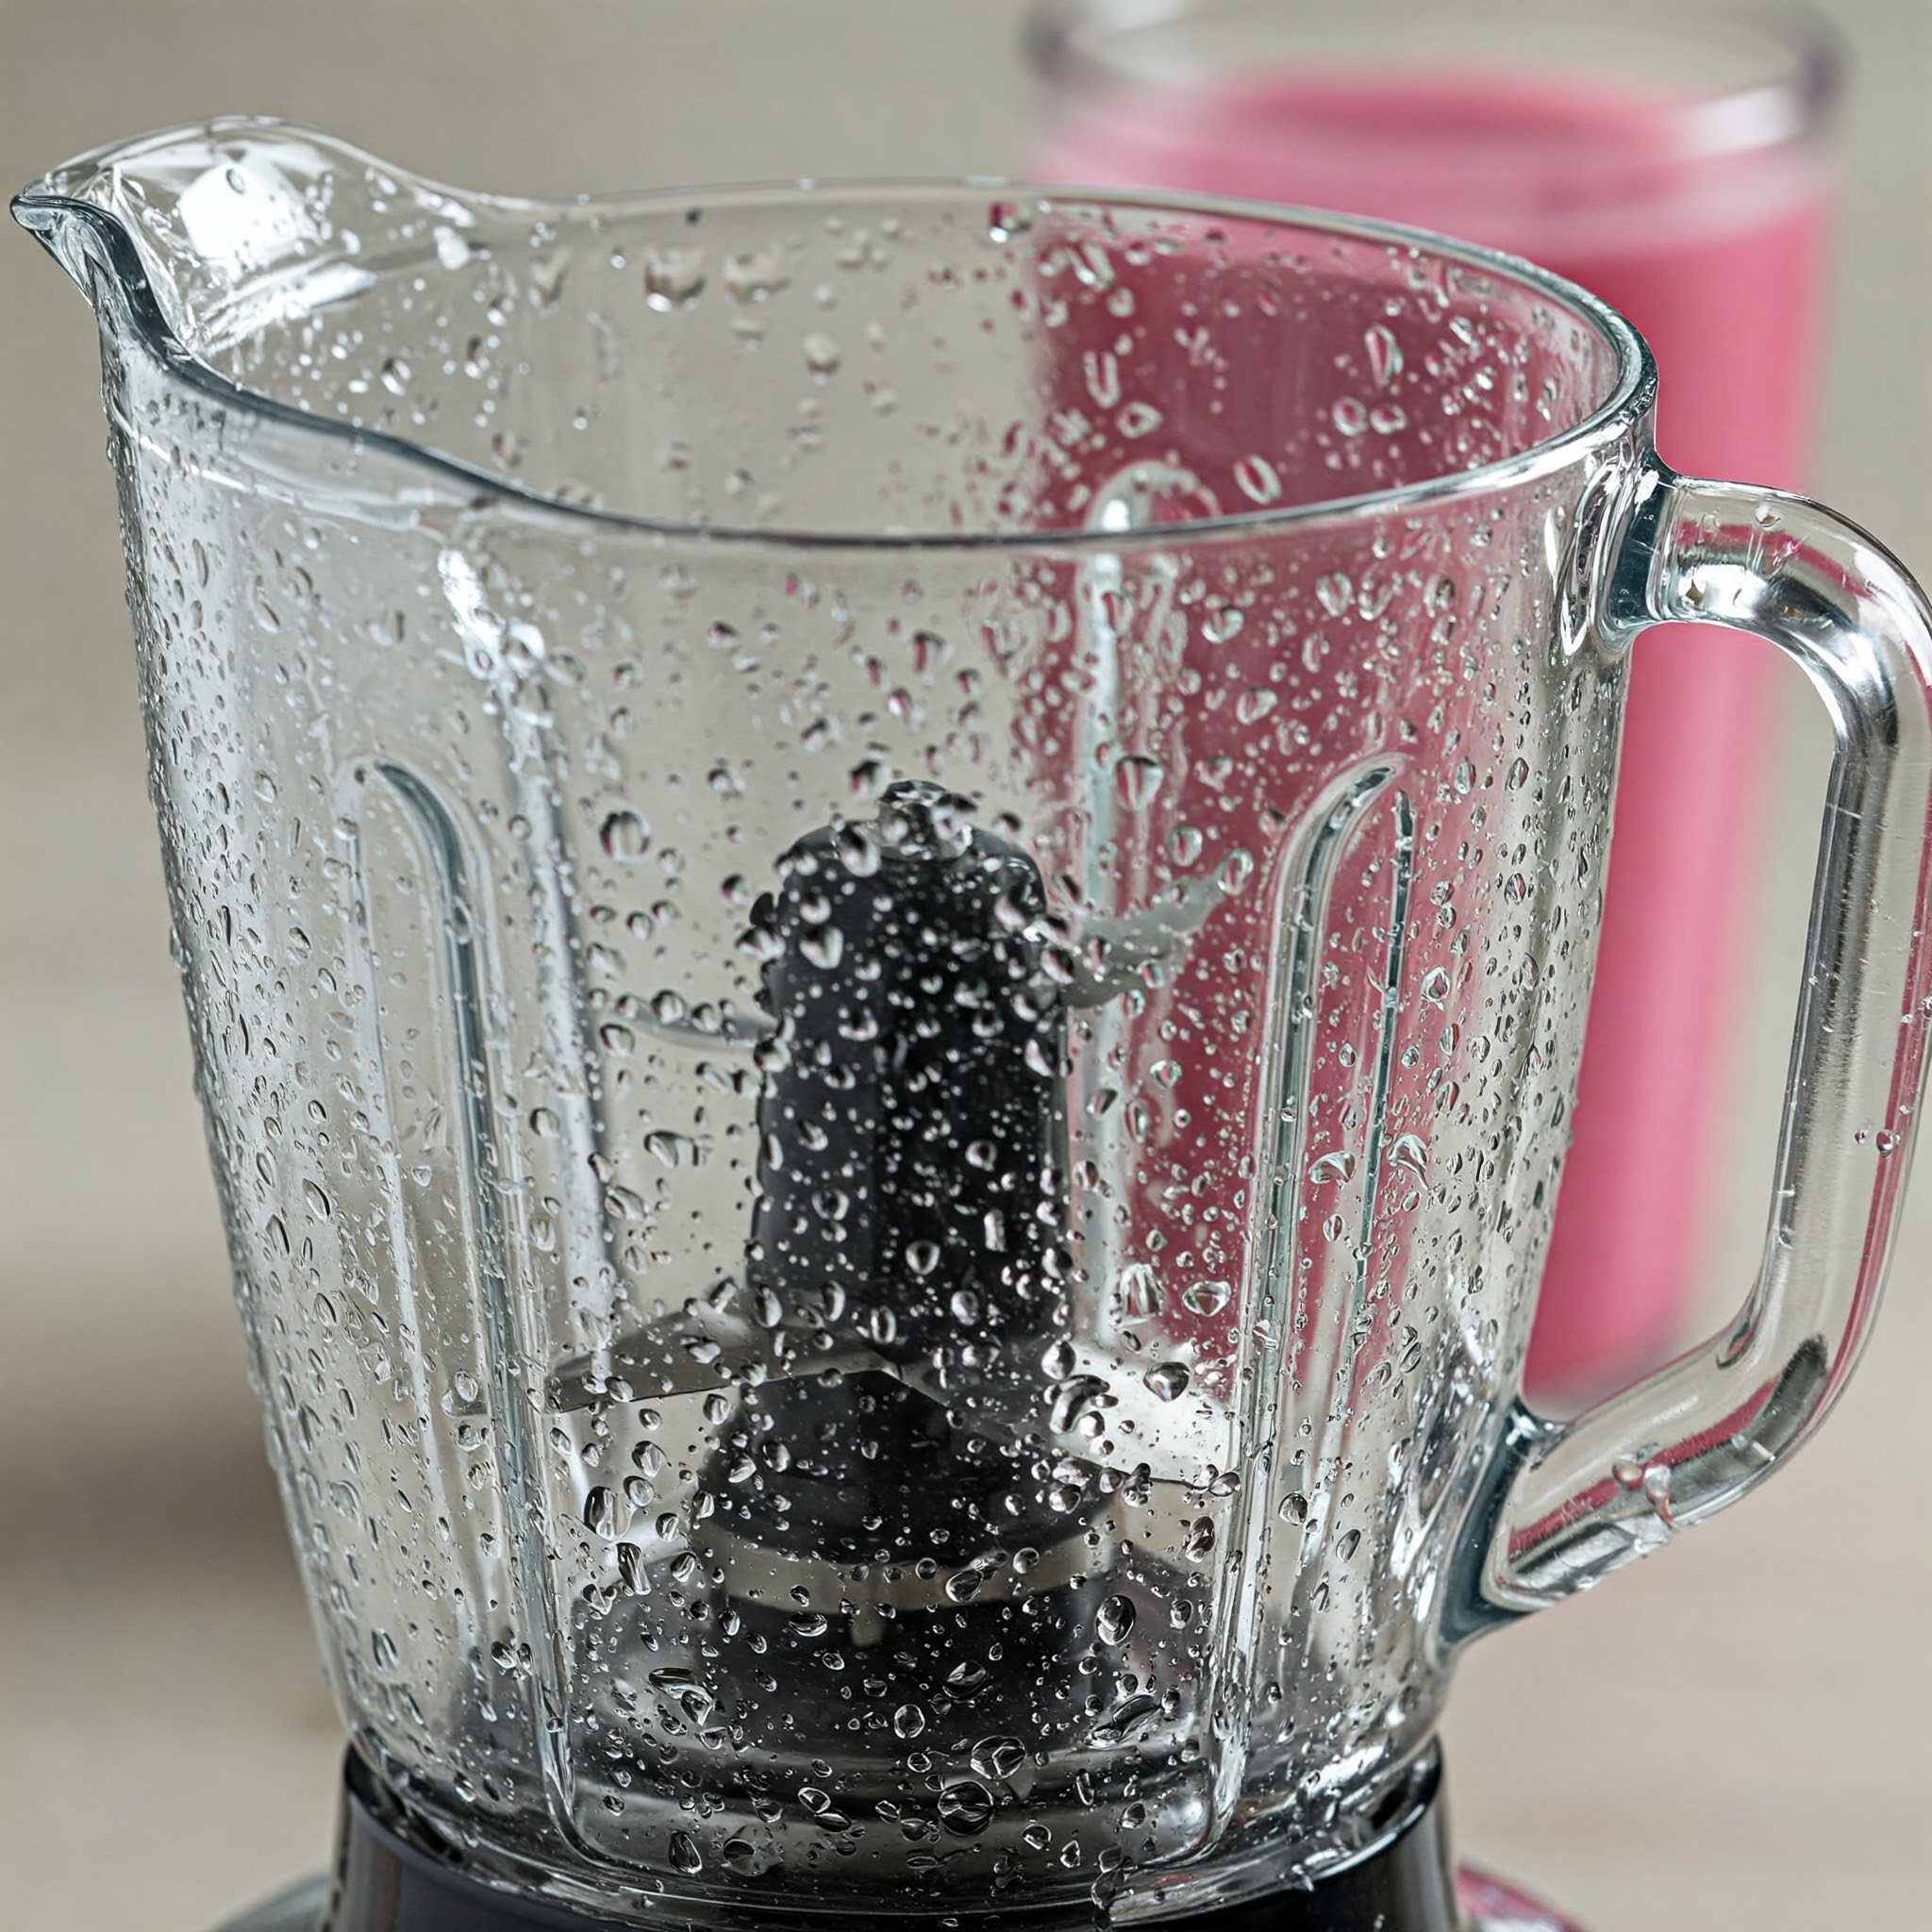
Pro Tip #4: Clean Up Quick = Happy Life!

Don’t let the thought of cleaning the blender bum you out! The secret is SPEED:

  • Rinse Right Away! As soon as you pour your smoothie, give the blender jug, lid, and blade base (carefully!) a quick rinse with warm water. Don’t let smoothie cement form – it’s way harder to clean later!
  • The Soap Trick: For lots of blenders (check with your grown-up!), you can do this: fill the jug halfway with warm water, add ONE drop of dish soap, put the lid on, and blend on low for 20-30 seconds. Instant bath for your blender! Then just rinse it really well.
  • Careful with Blades! Always follow the cleaning instructions for your blender , and be super careful around the sharp blade part (let your grown-up handle that if needed!).


Clean Up Quick
Clean Up Quick

Pro Tip #5: Just Have Fun With It!

This is honestly the biggest tip. The best way to really master how to make healthy smoothies you absolutely LOVE is just to play around.

  • Start Simple, Then Swap: Use a recipe you like, then try changing just one thing. What if you use oat milk instead of regular milk? Or mango instead of berries?
  • One New Thing at a Time: Curious about spinach? Add just a bit to your usual smoothie. Want to try chia seeds? Just a teaspoon to start.
  • Note Your Wins: If you invent an amazing new combination, maybe scribble it down so you don’t forget!
  • Oops is Okay: Sometimes experiments are… well, weird tasting. It happens! Laugh it off, dump it out (or see if a grown-up will drink it!), and try something else next time. It’s all part of the adventure!


Just Have Fun With It

Smoothie Safety Squad Check-in! (Quick Reminders!)

Safety first, fun second! We talked about this, but it’s super important, so let’s recap quickly. Being a safe smoothie maker is rule number one, even before learning how to make healthy smoothies taste good!

  • Blades are Sharp! Respect ‘Em! No fingers, no spoons, nothing in the blender when it’s plugged in or on. Period. Wait ’til it’s off AND unplugged if you need to scrape sides (use a rubber spatula!).
  • Lid On Tight! Check it twice! No smoothie fireworks!
  • Grown-Up Co-Pilot On Duty! Always have an adult present for help with plugs, blades, and chopping.
  • Knives = Grown-Up Zone! Let them handle the sharp stuff.
  • Allergy Aware! If anyone drinking the smoothie has allergies (like nuts, dairy, kiwi, etc.), be SO careful. Double-check ingredients, read labels, and wash the blender super well if it was used for something unsafe before.
  • Slippery When Wet! Clean up spills right away so no one takes a tumble.


Smoothie Safety Squad Check-in

Be a safety star! Follow the rules, and smoothie making stays awesome and injury-free.

So, When’s Prime Smoothie Time?

You know how to make healthy smoothies, you’re a safety pro… but when’s the best time to drink one? Good news: pretty much ANYTIME you want something delicious and good for you! But here are some popular moments:

  • Morning Rush Fuel: Smoothies are lifesavers on busy school mornings! Super quick to make and give you awesome energy to start your day. Add oats or peanut butter to make it stick with you longer.
  • After-School Recharge: Starving when you get home? A smoothie beats reaching for junk food! It’s refreshing and satisfying.
  • Post-Game Recovery: After running around playing sports, riding bikes, or just playing hard, your body needs good stuff. A smoothie with fruit (for energy) and maybe some yogurt or protein (ask your grown-up about protein powder) helps your muscles feel better.
  • Healthy Treat Time: Craving dessert? A sweet, fruity smoothie (maybe with a little cocoa?) feels like a treat but is way better for you!
  • Hunger Gap Filler: Just feeling a bit peckish between meals? A small smoothie is perfect!


So, When's Prime Smoothie Time
So, When’s Prime Smoothie Time


Basically, if you’re hungry or thirsty and want something yummy that’s also good fuel, it’s probably a great time for a smoothie!

Sharing the Smoothie Love!

You know what makes smoothies even better? Sharing them! Now that you’re getting awesome at how to make healthy smoothies, you can be the official smoothie maker for your family or friends!

  • Make Enough for Everyone: Most regular blenders can handle making 2-4 servings at once. Just double or triple the ingredients (you might need to blend in batches if it’s too full) and share the deliciousness!
  • Take Requests! Ask your family what flavors they love. Maybe make Mom her favorite mango smoothie or surprise your brother with a berry blast!
  • Smoothie Station Fun! This is a super fun idea for when friends are over (get permission first!). Set out bowls of different frozen fruits, liquids (milk, water), maybe some yogurt, and fun toppings like granola or seeds. Let everyone build their own custom smoothie! (With grown-up supervision for the blending, of course!).


Sharing the Smoothie Love


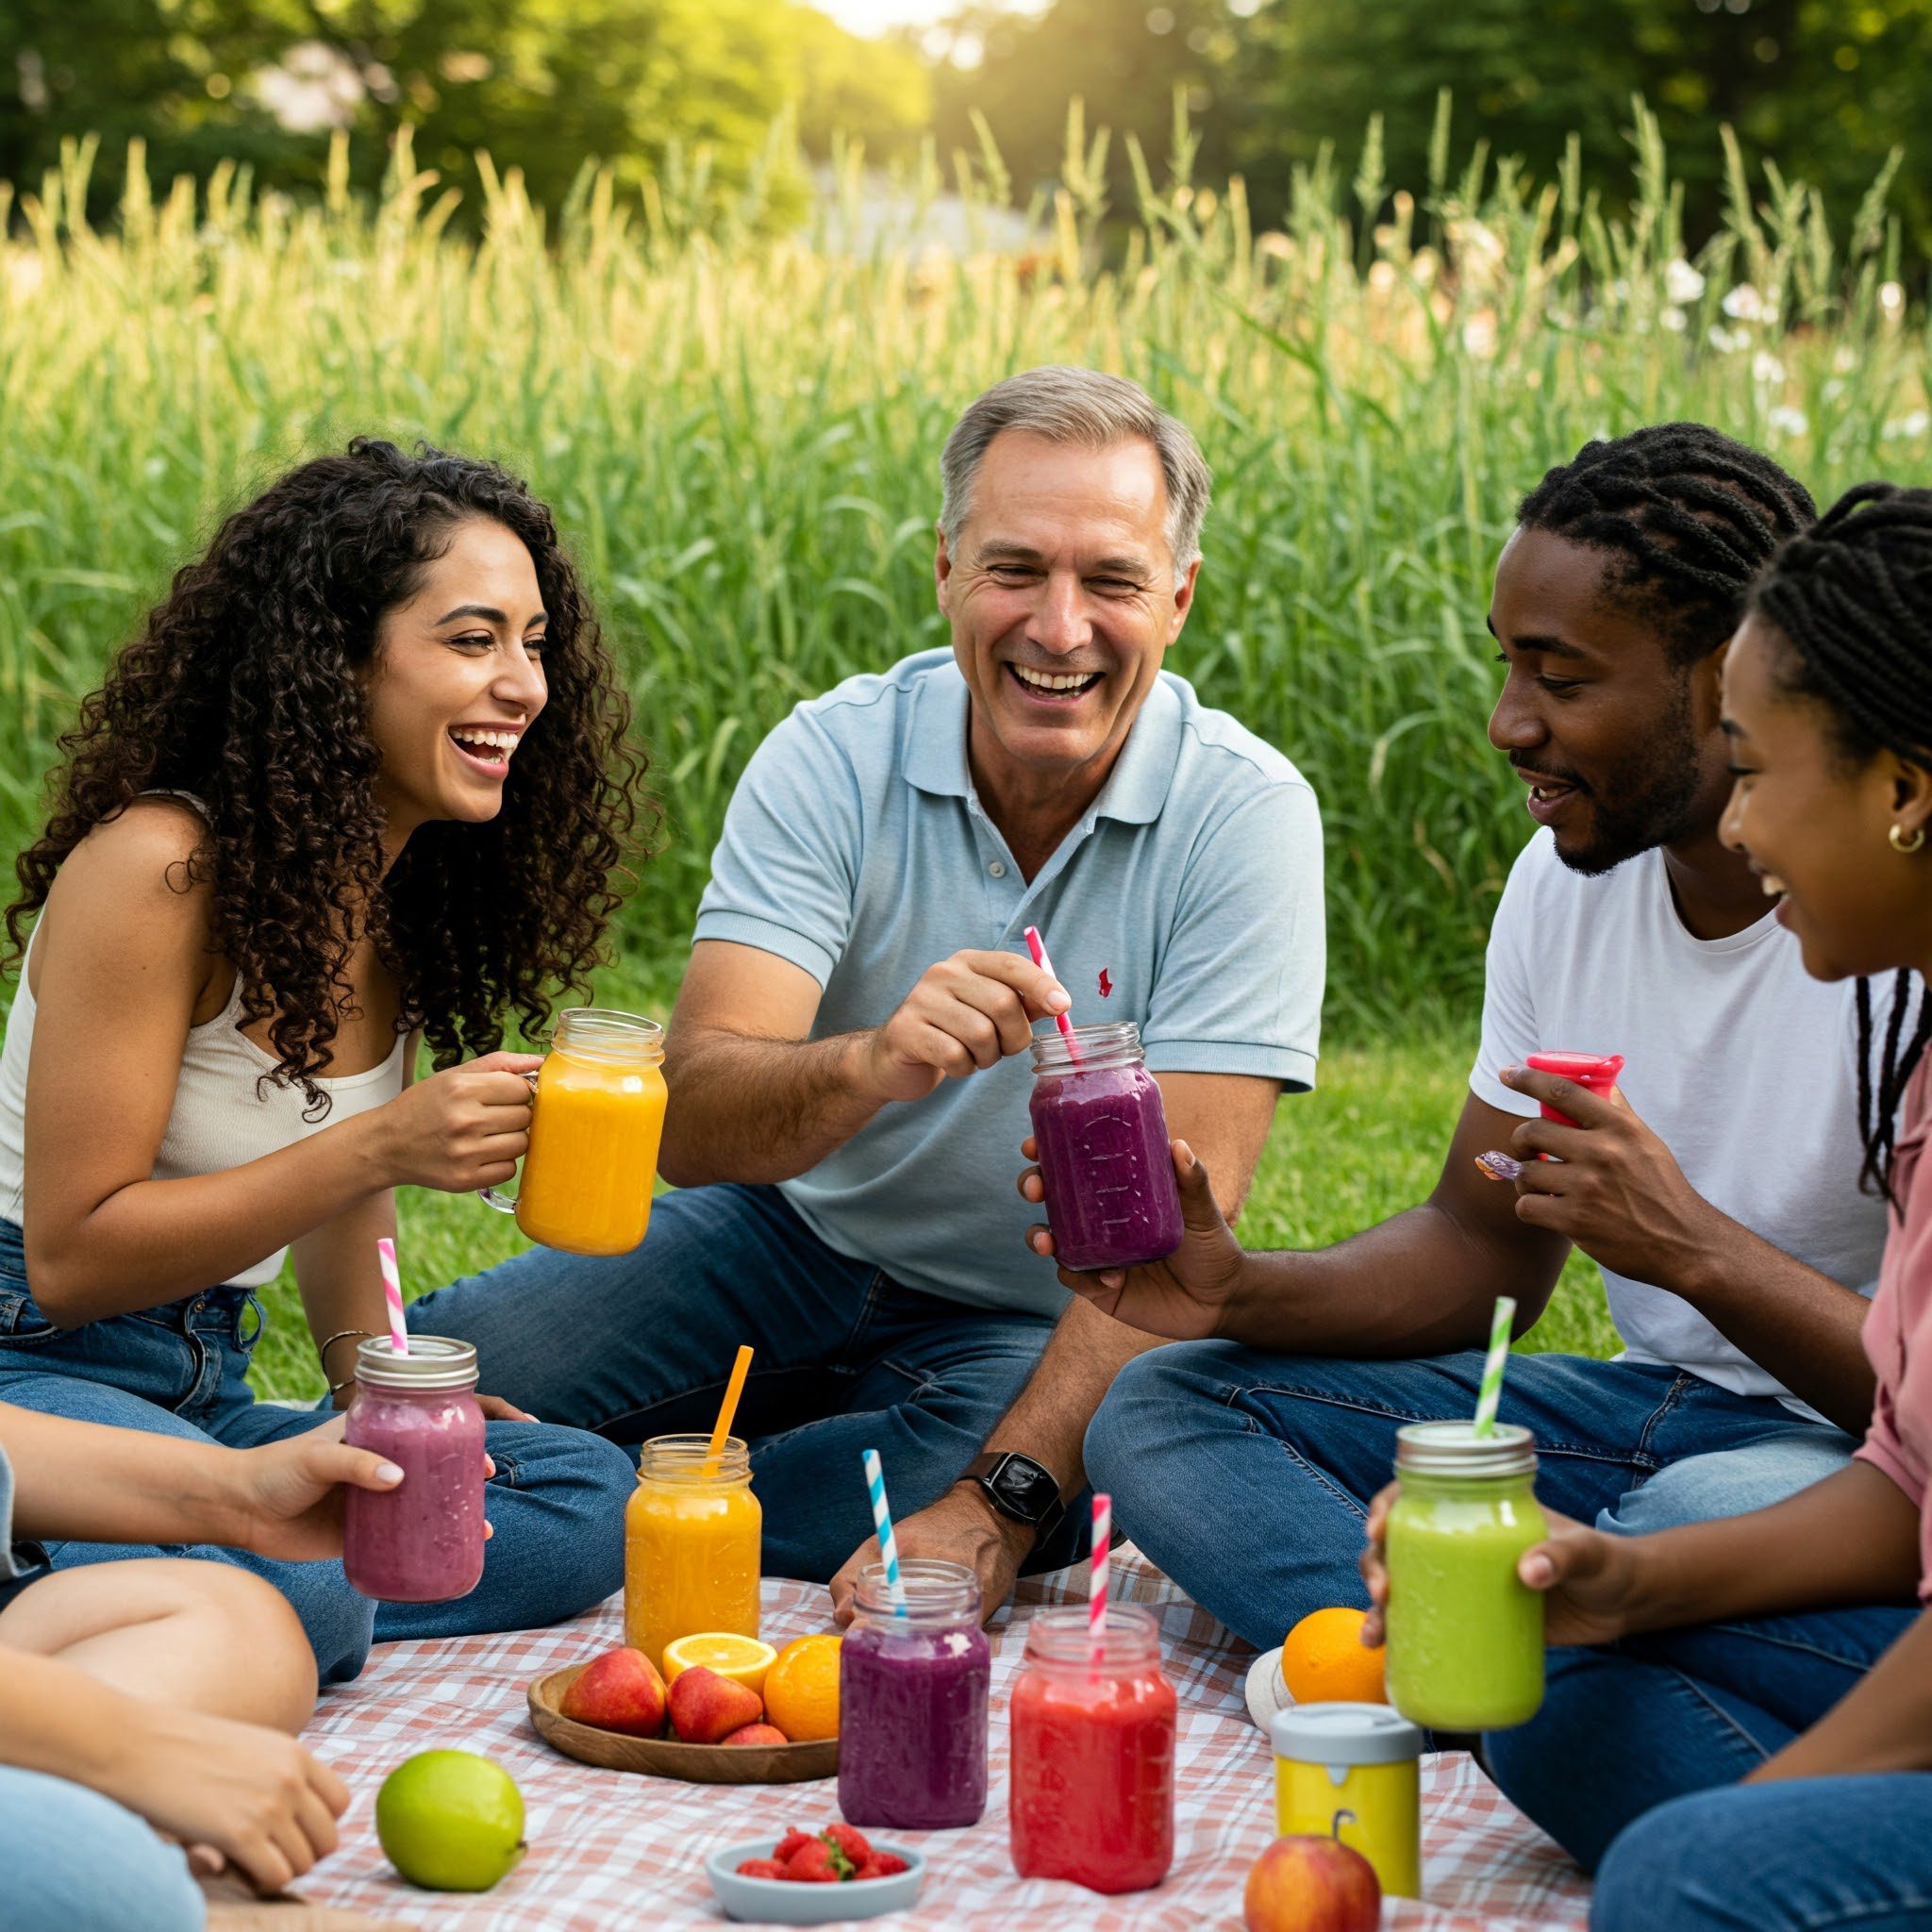
Sharing your creations is a super nice way to show you care – and everyone loves a tasty smoothie!

Bonus Round: Fun Facts & Cool Ideas!

Let’s end with some extra cool tidbits!

  • Did You Know? The name “smoothie” really took off back in the 1970s – that’s when blenders started becoming super popular in people’s homes!
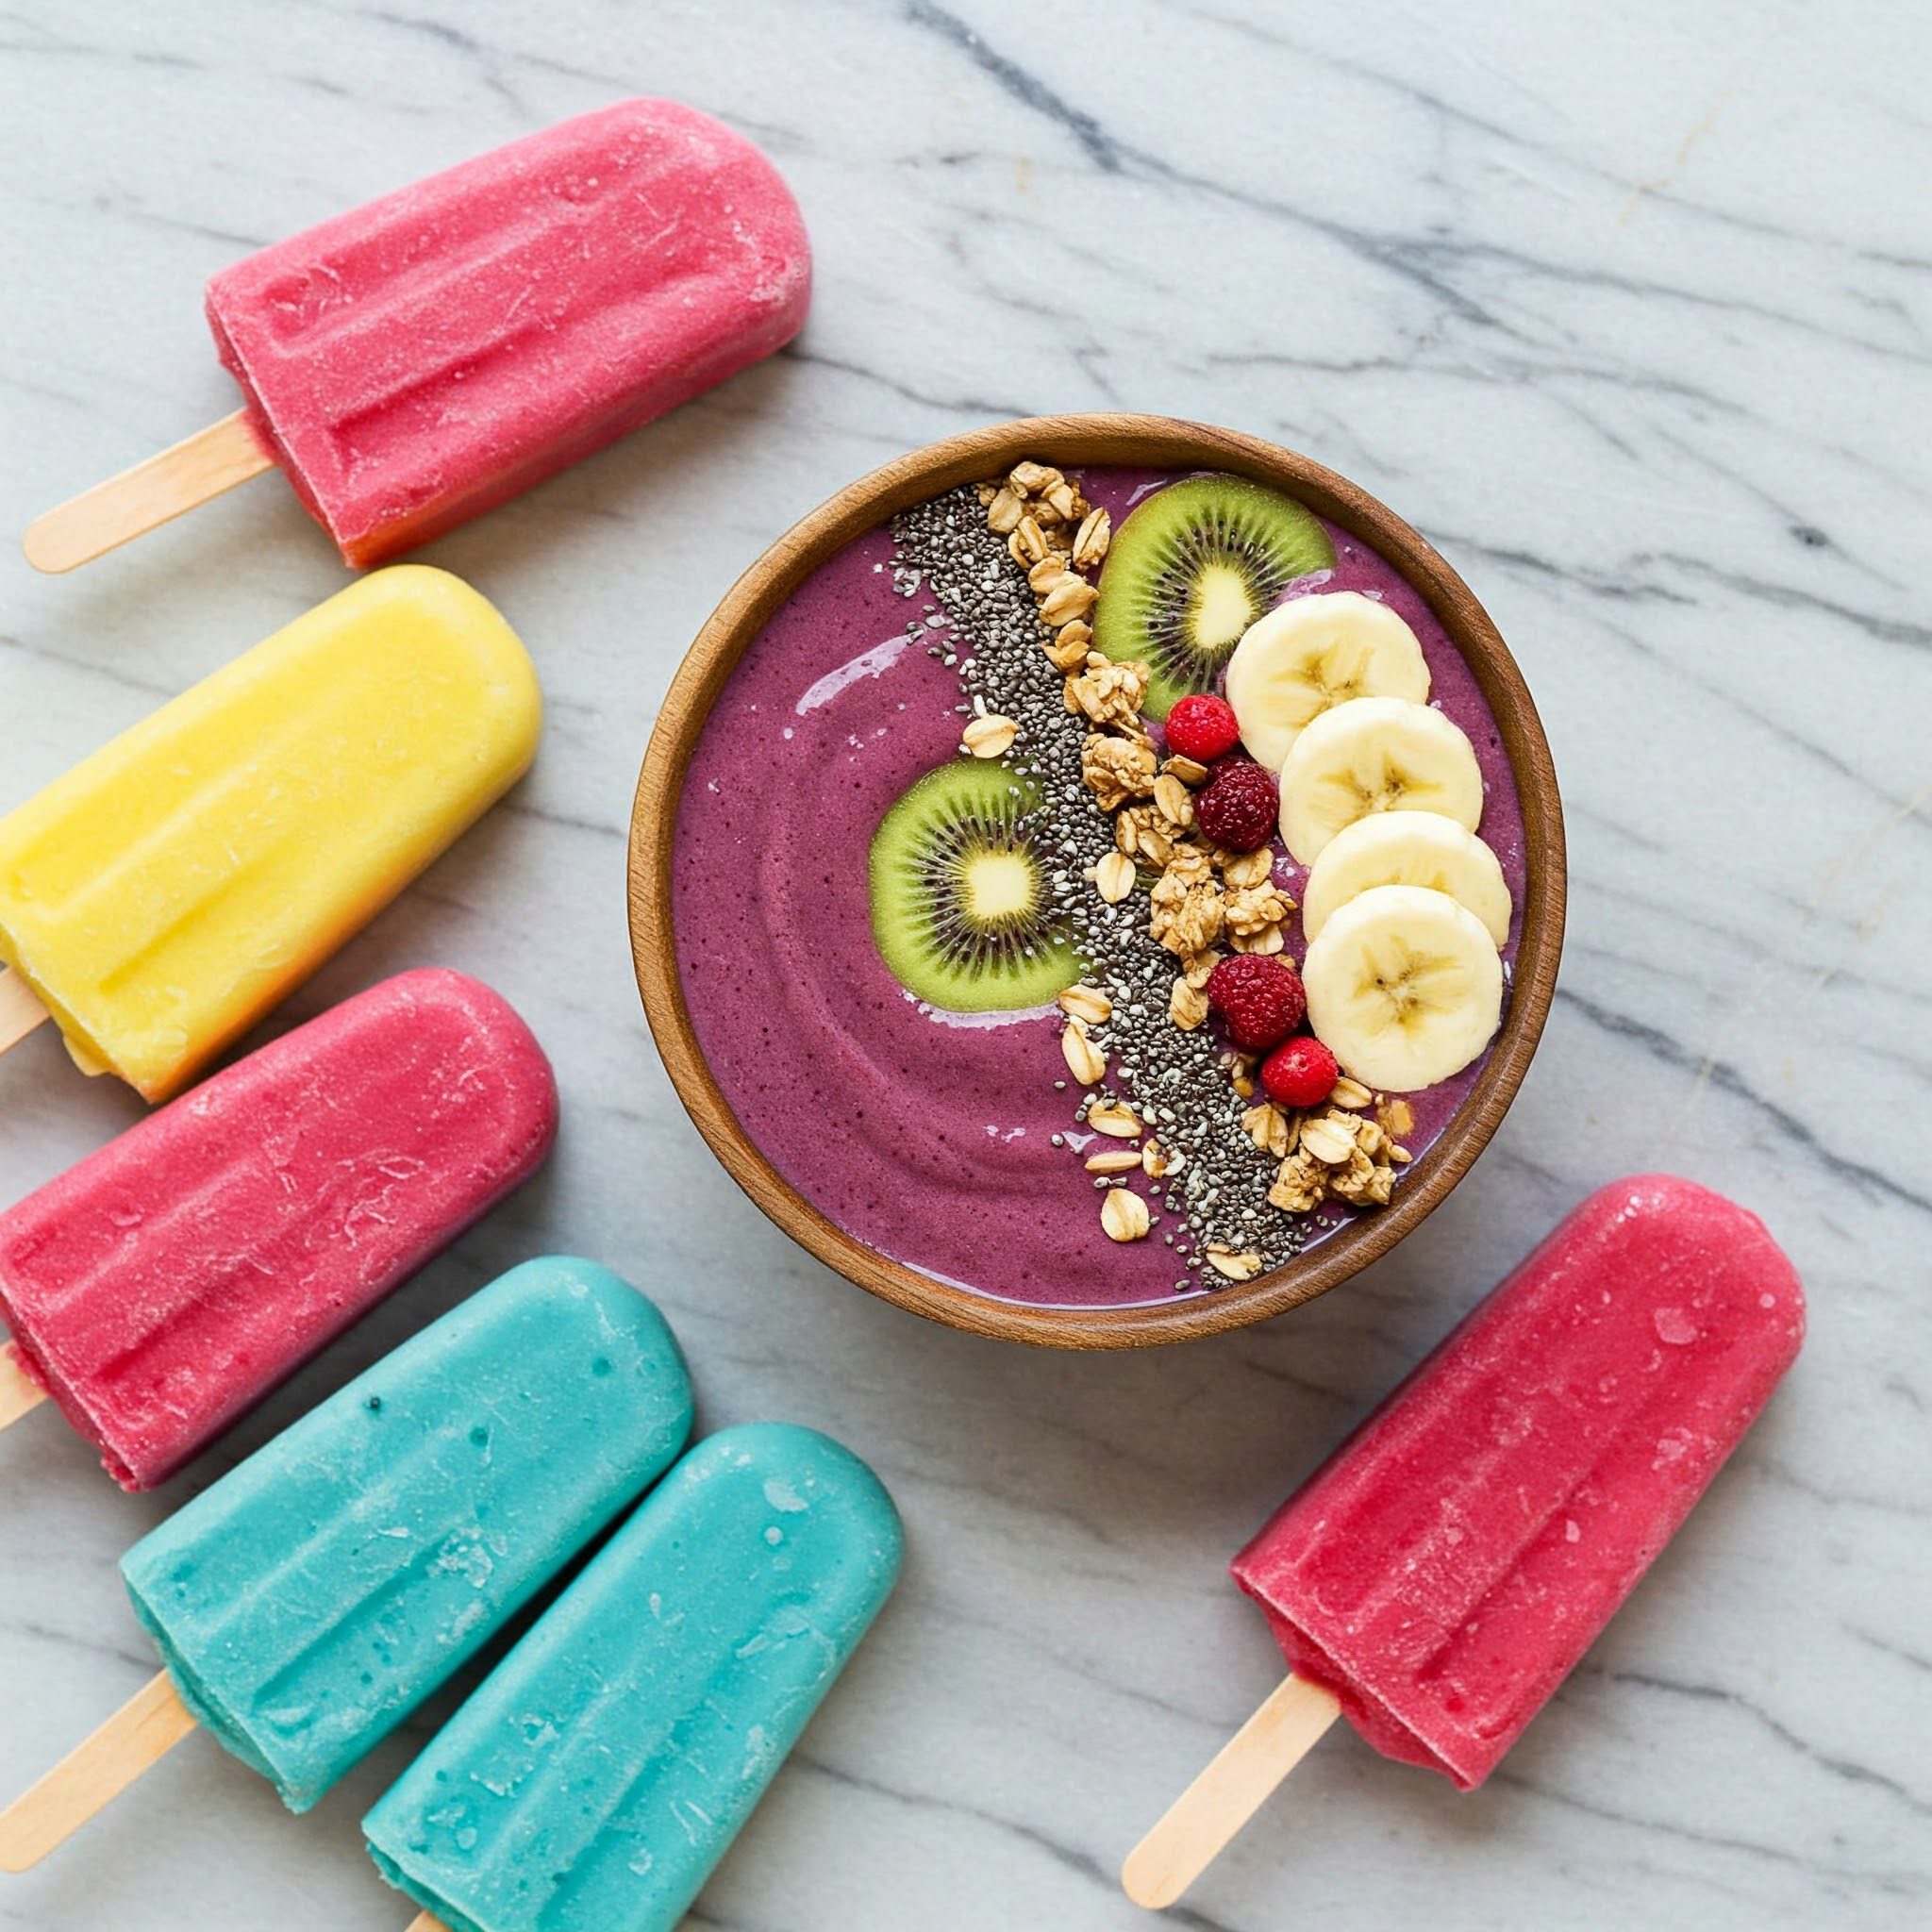
  • Awesome Idea: Smoothie Bowls! Make your smoothie EXTRA thick (less liquid, more frozen banana/avocado/fruit). Pour it into a bowl. Then, decorate the top with lines of sliced bananas, berries, a sprinkle of granola, maybe some coconut flakes or chia seeds. It looks amazing and you eat it with a spoon!
  • Fun Fact: Adding cooked beets (not pickled!) can turn your smoothie an incredible bright pink or red color!
  • Awesome Idea: Smoothie Popsicles! Got leftover smoothie? Pour it into popsicle molds and freeze! Boom – healthy, homemade ice pops for later! Perfect for hot days.
  • Did You Know? A little squeeze of lemon or lime juice doesn’t just add zing – it can also help keep fruits like apples or bananas from turning brown (though it all gets blended up anyway!). It just brightens the flavor.
  • Awesome Idea: Theme Smoothies! Get creative! Make a “Sunshine Smoothie” (orange, mango, pineapple). A “Monster Green Smoothie” (spinach, kiwi, maybe pineapple). A “Love Potion Smoothie” for Valentine’s Day (strawberries, raspberries, maybe a beet!).


Fun Facts & Cool Ideas


See? Learning how to make healthy smoothies is just the start of endless yummy creativity!

Our Website Pages  

Cooking Baking Recipes Home

Cooking Baking Recipes About Us

Cooking Baking Recipes Contact Us

Cooking Baking Recipes Privacy Policy

Cooking Baking Recipes Terms & Condition


YOU Did It! You’re Officially a Smoothie Pro!

YES! High five! Look at you! We just journeyed through the entire amazing world of how to make healthy smoothies, and you totally nailed it! You know the secret formula (Liquid + Fruit + Optional Goodies!), you’re a safety expert, you’ve got tons of ingredient ideas buzzing in your head, and you even made your first delicious blend! That is seriously fantastic!

Just remember, the best part about making smoothies is having fun and putting good stuff into your amazing body. It’s like being a cool scientist in your own kitchen lab, mixing and matching until you find your perfect, delicious creation that makes you feel great. Don’t ever be afraid to try something new (even if it’s green!), experiment with flavors, and discover your own signature smoothie moves.

Keep practicing, keep blending, keep tasting! You’ve got the skills, you’ve got the know-how, and now you can whip up a fantastic, healthy snack or treat whenever you want. How cool is that?!

So go on, grab that blender (and your trusty grown-up sidekick!), pick out some yummy stuff, and blend yourself up some pure happiness. You absolutely got this, Smoothie Master! Now go make something awesome!

How to make cold foam for coffee

Your Secret Weapon for Amazing Iced Coffee: How To Make Cold Foam For Coffee!

https://sportsariseencyclopaedia.com/eb8i04p74?key=a13aad7d62fc71345a2bad80620f621e

Ever ordered an iced coffee and seen that dreamy, cloud-like topping? You know, the one that makes you feel instantly fancy? Yep, that’s cold foam! And if you thought you needed to be a barista wizard or own a gazillion dollars worth of equipment to make it, think again. Making cold foam at home is seriously easy, and it’s about to become your new favorite coffee ritual.

Cold foam is basically cold milk that’s been frothed up into a light, airy layer. It sits beautifully on top of iced drinks like cold brew, iced lattes, and even iced teas, adding this incredible smooth, velvety texture that just upgrades your entire sipping experience. Unlike the hot, steamy foam on cappuccinos, cold foam stays cool and refreshing – perfect for those chilly sips!   

It really blew up in popularity around 2018 (thanks, Starbucks!), and honestly, once you try it, you get why. That contrast between the bold coffee and the sweet, creamy foam? Chef’s kiss!   

Why Whip Up Cold Foam Yourself?

Aside from the sheer joy of making something cool at home, there are awesome reasons to DIY your cold foam:

  1. Save Some serious Cash: Those cafe prices can add up, right? Making cold foam at home costs pennies compared to ordering it out. Your wallet will thank you!
  2. Be Your Own Barista: Vanilla? Caramel? Pumpkin spice? You are in control! You can flavor your foam however you like, whenever you like. Sky’s the limit!
  3. It’s ridiculously Easy: No fancy degree needed! You probably have a tool in your kitchen right now that can make cold foam.
  4. Fun for Everyone: Seriously, even the kids can help with this (with a little supervision, of course!). It’s a fun, quick kitchen experiment.

Whether you’re a hardcore coffee aficionado or just love trying new things, adding cold foam to your iced drinks is such a game-changer.

What You’ll Need (Spoiler: It’s Simple!)

Ready to gather your ingredients? It’s pretty straightforward:

  • Milk: Skim milk is often considered the MVP here. Why? It has more protein and less fat than whole milk, which helps it create a really stable, airy foam that lasts. But guess what? You can totally play around! Whole milk gives you a creamier foam (though it might not last as long), 2% is a nice middle ground, and yes, you can even use non-dairy options like oat, soy, or almond milk. Just be aware that non-dairy milks, especially almond, might take a bit more effort or not get quite as frothy as dairy milk. Experiment to find your fave!


  • Sweetener (Totally Optional): Want sweet foam? Simple syrup is your best friend here because it blends in seamlessly. Don’t have simple syrup? It’s just equal parts sugar and water heated until dissolved, then cooled – super easy! You can also drizzle in honey, maple syrup, or your favorite flavored coffee syrups.   

related sweetener


  • Flavorings (Also Optional, but SO Fun!): This is where you get creative! A splash of vanilla extract is classic. Try caramel, hazelnut, a sprinkle of cinnamon, nutmeg, or even some cocoa powder for a mocha vibe. Matcha powder or even a tiny bit of fruit puree? Go wild!

related flavour

Here’s a quick peek at the gang:

Ingredient Why It’s Awesome What Else Can I Use?
Skim Milk Creates that light, lasting foam Whole, 2%, Oat, Soy, Almond Milk
Simple Syrup Adds sweetness without graininess Honey, Maple Syrup, Flavored Syrups
Vanilla Extract Adds a little something extra special Other syrups, spices, cocoa powder

The Milk Lowdown: Picking Your Perfect Pour

Okay, let’s get slightly specific about milk because it really does impact your foam game:

  • Skim Milk: Your go-to for the most voluminous, longest-lasting foam. Think light and airy, like coffee clouds!
  • Whole Milk: It’s richer and creamier, absolutely delicious, but the foam might be a bit thinner and disappear faster due to the higher fat content.
  • 2% Milk: A happy medium! You get some creaminess with decent foam stability.
  • Non-Dairy Milks: Oat and soy milks usually foam up better than almond milk because they have more protein. Almond milk can work, but it might result in thinner, less stable foam and could take more frothing effort.

The Milk Lowdown

Honestly, the best way to find your favorite is just to try them!

Your Cold Foam Tool Kit (You’ve Got This!)

Guess what? You don’t need to buy anything fancy if you don’t want to. Here are a few ways to get that milk frothy:

  • Handheld Milk Frother: This little gadget is affordable and perfect for cold foam. Super quick and easy!
  • Immersion Blender: Got a stick blender? Just pop it in your milk container and blend away! It’s fast but can sometimes be a little splashy.
  • French Press: Pour your milk in, put the lid on, and vigorously pump the plunger up and down. It’s a little more effort but totally works!   
  • Regular Blender: Making a big batch? Your standard blender can handle it. Just blend on high until you see that lovely foam forming.
  • Mason Jar: Seriously, it works! Pour milk in, screw the lid on tightly, and shake it like you mean it for 30-60 seconds. It’s a mini arm workout with a delicious reward. 

Your Cold Foam Tool Kit

Choosing your weapon depends on what you have and how much effort you want to put in!

Tool Why We Love It Things to Keep in Mind
Milk Frother Fast, easy, affordable, specifically made for this! Best for single servings
Immersion Blender Quick results Can be a little messy
French Press No electricity needed Requires manual effort
Regular Blender Great for bigger batches Takes up counter space, more to clean
Mason Jar Simplest tool, no special purchase Requires some arm strength!

Alright, Let’s Make Some Cold Foam! Your Step-by-Step Guide

Ready? This is the fun part!

  1. Gather Your Goodies: Measure out about 1/4 cup of your cold milk (skim is our top pick!), maybe 1 teaspoon of simple syrup or other sweetener, and a tiny splash (like 1/4 teaspoon) of vanilla extract or other flavor if you’re using it.
  2. Combine Forces: Pour the milk, sweetener (if using), and flavoring (if using) into whatever container you’ll be frothing in – a tall glass, a small pitcher, your French press, blender cup, or mason jar.
  3. Froth That Milk! Now, unleash your frothing power!
    • Milk Frother: Dip it into the milk, hit the button, and move it gently up and down for about 20-30 seconds. Watch the magic happen!
    • Immersion Blender: Blend on high, keeping the head submerged, until it gets frothy.   
    • French Press: Pump that plunger rapidly up and down until the milk visibly increases in volume and looks foamy.   
    • Regular Blender: Blend on high for about 30 seconds.   
    • Mason Jar: Shake, shake, shake! Shake hard for 30-60 seconds until the milk is visibly frothy.
  4. Check the Foam: Take a peek. You’re looking for something thick and bubbly. If it’s still looking mostly like liquid milk, give it another few seconds of frothing.
  5. Serve it Up! Gently spoon or pour that beautiful, creamy foam over your iced coffee, cold brew, or whatever cold drink you’re enjoying.

Make Some Cold Foam

Boom! You just made cold foam. Wasn’t that easy?!

Pro Tips for Cold Foam Greatness 

Want your foam to be extra amazing? Keep these little secrets in mind:

  • Keep it COLD: This is key! Cold milk froths better and holds onto those air bubbles longer.
  • Don’t Overfill: Make sure your container has plenty of room for the milk to expand as it gets frothy.
  • Froth Right Before Serving: For the freshest, fluffiest foam, make it just before you’re ready to add it to your drink.
  • Sweeten to Taste: The sweetness level is totally up to you. Start with a little syrup and add more if needed.
  • Get Adventurous with Flavors: Don’t be shy! Try mixing and matching syrups or spices. Your kitchen is your coffee lab!
  • Clean Up ASAP: Rinse your frother, blender, or jar right away. Dried milk is NOT fun to clean later.

Pro Tips for Cold Foam Greatness 

Follow these tips, and you’ll be whipping up cafe-quality foam every time!

Got Extra Foam? Here’s What to Do

If you accidentally made too much (hey, it happens!), you can stash it in a sealed jar in the fridge for a couple of days. Just know that it might separate a bit – you’ll see the liquid milk at the bottom and the foam on top.

To use it again:

  • Give the jar a good shake or use your frother for a few seconds to bring it back together.
  • Spoon or pour it onto your drink right away.

We find it’s best to just make what you need for each drink to keep it super fresh and fluffy!

Let’s Talk FLAVORS! Cold Foam Variations to Try

This is where you get to have some serious fun. Cold foam is a perfect canvas for flavor!

  • Vanilla Cold Foam: Easy peasy! Just add a little vanilla extract or vanilla syrup while frothing. A classic for a reason!
  • Caramel Cold Foam: Stir in some caramel syrup. Hello, sweet, buttery goodness!
  • Mocha Cold Foam: Mix in a bit of chocolate syrup or a tiny spoonful of cocoa powder. Decadence!   
  • Matcha Cold Foam: Add a pinch of ceremonial grade matcha powder for a vibrant green tea twist. Earthy and cool!   
  • Pumpkin Spice Cold Foam: Perfect for fall (or whenever you’re craving it!). Use pumpkin spice syrup or a tiny mix of cinnamon, nutmeg, and ginger.

Let's Talk FLAVORS! Cold Foam Variations to Try

Seriously, the possibilities are endless. What will you create?

Put That Foam to Work! Easy Cold Foam Coffee Recipes

Ready to rock your new cold foam skills? Here are a couple of simple ideas:

Classic Cold Brew with Cloud Foam

You’ll need:
  • 1 cup cold brew coffee (your favorite kind!)
  • Ice
  • 1/4 cup cold skim milk  
  • 1 tsp simple syrup (optional)
  • 1/4 tsp vanilla extract (optional)
Steps:
  1. Fill a tall glass with ice.
  2. Pour in your cold brew.
  3. Combine milk, syrup, and vanilla (if using) in your frothing container.
  4. Froth until thick and foamy!
  5. Gently spoon or pour the cold foam over the cold brew.
  6. Sip and feel like you’re on vacation!
Classic Cold Brew with Cloud Foam

Iced Latte with Dreamy Caramel Foam

You’ll need:
  • 1 shot (about 1-2 oz) of espresso (or strong brewed coffee), cooled a bit
  • 1/2 cup milk (whatever you like for your latte base)
  • Ice
  • 1/4 cup cold skim milk (for the foam) 
  • 1 tsp caramel syrup (for the foam)
Steps:
  1. Fill a glass with ice.
  2. Pour in your cooled espresso.
  3. Add the 1/2 cup of milk for the latte base. Stir gently.
  4. Combine the 1/4 cup skim milk and caramel syrup in your frothing container.
  5. Froth until thick and foamy.
  6. Spoon that glorious caramel foam over your iced latte.
  7. Enjoy your fancy creation!
Iced Latte with Dreamy Caramel Foam

These are just starting points – feel free to mix and match milks, syrups, and coffee types!

A Tiny Bit of Science (the Fun Kind!)

Ever wonder why milk gets all foamy, especially when it’s cold? It’s pretty cool! Milk has these things called proteins. When you introduce air (by frothing!), those proteins act like tiny little nets, trapping the air bubbles and creating that stable, foamy structure. Skim milk works great because it has a higher ratio of protein to fat, and fat can sometimes weigh down the foam.   

For non-dairy milks, it’s also about the protein content! That’s why oat and soy tend to foam better than almond – they generally pack a bit more protein punch. Knowing this helps you understand why your foam turns out the way it does!

You Can Watch Video Related “How To Make Cold Foam For Coffee”

Where Did This Goodness Come From Anyway?

While frothing milk for hot drinks is super old school, cold foam is the newer kid on the block. It’s said to have roots in places like Scandinavia, where frothing milk has been part of coffee culture for ages. But the big moment for cold foam in the U.S. was definitely when Starbucks launched it around 2018, putting it on the map for pretty much everyone! Now look at it – a total iced coffee staple!   

Our Website Pages  


Cooking Baking Recipes Home

Cooking Baking Recipes About Us

Cooking Baking Recipes Contact Us

Cooking Baking Recipes Privacy Policy

Cooking Baking Recipes Terms & Condition

Ready to Elevate Your Coffee Game?

Making cold foam at home is seriously one of the easiest and most rewarding things you can do for your coffee routine. With just a little milk, maybe some sweetener, and a tool you probably already own, you can transform your everyday iced coffee into something truly special.

Whether you keep it simple or go wild with flavors, it’s a fun way to customize your drink and treat yourself. It’s easy enough for anyone to try and adds that little bit of cafe magic to your own kitchen.

So go on, grab your cold milk, pick your tool, and get frothing! Your next amazing iced coffee experience is just seconds away.

Happy frothing! ✨

chicken salad chick

Chicken Salad Chick 

https://sportsariseencyclopaedia.com/eb8i04p74?key=a13aad7d62fc71345a2bad80620f621e

Dude. Listen. You know how sometimes you just find a spot, and it just clicks? Like, it’s not fancy, it’s not trying too hard, it just feels… good? That’s how I feel about Chicken Salad Chick. Seriously.

Imagine walking in, and it’s all bright and clean, and the air just smells like… happy food. Like, comfort food smells, but fresh? Yeah, that. It’s like getting a hug from a really good cook. They’ve got this whole thing figured out. And yeah, the name is kinda cute, right? Chicken Salad Chick. It just sounds friendly.

And the CHICKEN SALAD, dude. Holy moly. It’s not that bland, mushy stuff you get sometimes. This is the real deal. They make it like, a million different ways. Feeling classic? Got you. Want something spicy? Yep. Something a little sweet? They do that too! There’s seriously a flavor for whatever mood you’re in. You can get it on bread, on a croissant (game changer, by the way), or just a scoop on a salad. Whatever floats your boat. It’s like, their superpower is chicken salad, and they use their powers for good.

chicken salad chick

So, How’d This Place Happen?

Okay, get this. From what I hear, it all started with just one person who really knew their chicken salad. Like, they had the recipe. Probably from like, their grandma or something, you know? That kind of good, homey stuff. And they were just like, “Hey, the world needs this.” So they opened one little spot.

And people just vibed with it. ‘Cause it wasn’t just the killer food, right? It was the feeling. They made you feel welcome, like you were just stopping by their place. It was small, it was real. And because it was so good, and they were so nice, people started telling other people. And it just grew! Like a snowball of deliciousness and good feelings. They’ve gotten bigger now, yeah, but they somehow kept that original, friendly vibe. It’s pretty cool, right? From a kitchen recipe to… this!

The Actual Food Bit – It’s Not Just Random Stuff

Okay, so the chicken salad itself. How is it so good? It’s not rocket science, but they just do it right. Good chicken, cooked perfectly. Then they mix in fresh, crunchy stuff. Not soggy gross veggies, like, good veggies. And that dressing… man. It’s creamy, but not heavy? And it’s got just enough flavor, that secret something, that makes you want another bite. And another. And another.

They’re not just throwing stuff together, you know? They use good ingredients, they care about how it tastes and how it makes you feel. It’s actually pretty healthy too! Like, lean chicken, fresh veggies. You can eat it and feel good about it. It’s not just a cheat meal; it’s a feel-good meal. And they even do seasonal stuff, changing it up a bit. Keeps it interesting!

The Menu Spread – Prepare to Get Excited

Dude, picking is hard. But here’s the rundown:

  • The Originals: Like, the classic chicken salad that started it all. And one with nuts and grapes (Fancy Nancy – sounds fancy, tastes awesome). Stuff you just know is gonna be good.
  • Funky Fresh Ones: They have one with avocado that is SO creamy. One with cranberries that’s got that sweet-tart thing going on. One with like, Mediterranean vibes. They get creative, which I respect.
  • Sides That Aren’t Sad: You know how sometimes sides are just… meh? Not here. The bread is legit. The soups are comforting. You can get fruit, veggie sticks. It all just goes together perfectly.

Seriously, you could go every day for a week and try something different and awesome.

You Can Watch Video Related Chicken “Salad Recipe”

It’s Not Weird to Go Alone!

This is important. Some places, going by yourself feels awkward, right? Not Chicken Salad Chick. It feels totally normal! And bringing your family? Perfect. Meeting friends? Ideal. It just feels like a place where everyone fits in.

They designed it that way, I think. It’s bright, it’s got good energy, and the people working there are just genuinely nice. Like, they actually seem happy to see you. That kind of real friendliness is everything, man. It builds this community thing without even trying too hard. They even do events sometimes, which is cool. It feels like your spot, you know?

Okay, How Did They Get So Many Spots?

Good question! It wasn’t just like, the main person opened all of them. They basically found other people who were just as hyped about the idea and the food, and helped them open stores. It’s like they’re sharing the love, making sure that same great food and friendly vibe is in every place. They train everyone up, not just on making the salad perfect, but on being awesome to customers. So you get the same good experience, which is key.

And they really encourage the local owners to be, like, local. Get involved in their town, help out, be part of the neighborhood. It’s a cool way to grow a business, making sure it still feels personal even when it gets bigger.

Eating Here Makes You Feel… Good?

Yeah, seriously. It’s healthy without tasting like sadness. You get good protein from the chicken, all those vitamins from the fresh stuff. It’s light but filling. It’s the kind of meal that gives you energy, not takes it away.

And big bonus: you can totally make it work for you. Wanna go light? Skip the bread, get a scoop. Wanna add more veggies? Easy. It’s super customizable, which is a total win. It just fits into eating well without being a whole production.

The Vibe: Why You Walk Out Happy

It’s the whole package, man. The people are friendly, like genuinely happy to serve you. The place is clean and just… pleasant to be in. It’s not loud or stressful. If you have little dudes with you, they seem to have stuff for them too. And they pay attention to the small things, like making sure your food looks good, not just tastes good. And they actually listen if you have feedback! Like, they care about making it better.

Online and Stuff: Still Friendly

Even online, they’re pretty cool. Their social media is fun, just showing off the food and the vibe. They do contests, interact with people. It feels like they’re just chatting with you, not just trying to sell you something. Their website is easy to use if you wanna order ahead. They just make it simple to connect.

Always Changing (But Keeping the Good Stuff)

They’re good at keeping things fresh. They do those seasonal flavors, trying new stuff out. It keeps me coming back to see what’s new! But they never mess with the classics too much. It’s a good balance – respect the original magic, but don’t be afraid to experiment. It shows they’re having fun with it.

What’s Next For These Guys?

They’re just gonna keep growing, I bet. Bringing that good food and good vibe to more places. Probably gonna add more tech stuff to make ordering even easier. And they’re serious about the health angle and being good to the planet, which is awesome. But the core thing is still gonna be about community and making you feel welcome. They’re not gonna lose that.

Your Questions, Answered (Quickly!)

  • Why them? Dude, the chicken salad is next level, and the vibe is just genuinely friendly and welcoming.
  • Healthy? Yep! Fresh ingredients, lean protein. Solid choice.
  • New stuff ever? Totally! Seasonal specials and new flavors pop up.
  • Community? Huge part of who they are. Events, local support, good neighbors.
  • How to get in on this? Just go eat there! Or check online!


Bottom Line, Man

Chicken Salad Chick is just… a good spot. It’s about simple things done really, really well. Great food that makes you feel good, served in a place where you feel like you belong. It’s not complicated. It’s just honest, delicious food and genuine kindness.

From that first recipe in someone’s kitchen to all the places they are now, it’s just a cool story about sharing something you love and building a place where people want to be.

Our Website Pages  


Cooking Baking Recipes Home

Cooking Baking Recipes About Us

Cooking Baking Recipes Contact Us

Cooking Baking Recipes Privacy Policy

Cooking Baking Recipes Terms & Condition


Go check it out. Seriously. Get yourself some chicken salad. Soak in the vibe. You’ll see what I mean. It’s more than just lunch. It’s a little slice of happy.

Hope that’s more like it, dude! Let me know what you think!

5 Easy Tips on How Long To Cook Chicken In Rice Cooker

How Long To Cook Chicken In Rice Cooker

https://sportsariseencyclopaedia.com/eb8i04p74?key=a13aad7d62fc71345a2bad80620f621e

Forget kitchen marathons! Your humble rice cooker is a secret weapon for incredibly easy and delicious chicken. Perfect for beginners or busy weeknights, this method delivers juicy, flavorful results with minimal effort. Let’s dive into how quick it is, the super-simple steps, and a few tricks for an extra tasty meal. Prepare to be amazed by your new favorite dinner hack!

How Long To Cook Chicken In A Rice Cooker

Why I Am Genuinely Obsessed with Rice Cooker Chicken (And Why You Will Be Too!)

Okay, let’s get real. Life is busy! And sometimes, the thought of a complicated dinner is just… nope. That’s where your rice cooker swoops in like a superhero. It’s not just a one-trick pony for rice. it’s actually amazing at steaming, boiling, and yeah, even getting chicken perfectly cooked. Here’s why I can’t stop talking about it:

  • It’s SO Stupid Simple: Seriously, if you can push a button, you can make this. You literally just put stuff in, close the lid, and walk away. No hovering, no constant stirring. Ahh, freedom!
  • Dinner in a Flash (and Less Mess!): You know those nights when you’re starving but dreading the pile of dishes? This is your answer! You can often cook your chicken and a side (like rice or veggies) all at the same time. Maximum dinner, minimum cleanup. Yes, please!
  • Healthy Eats Made Easy: Steaming or gently cooking chicken in the rice cooker is way healthier than frying. It locks in moisture and flavor without needing a ton of added fat. Good for you, and totally delicious!

Okay, Okay, How Long Will This Actually Take? (The Timeline You Need!)

Alright, the burning question! How long until you’re digging into that delicious chicken? It depends a little on what cut you’re using, but here’s a quick cheat sheet for the standard “Cook” or “Steam” setting on most rice cookers  (because who has time for the slow cook setting on a Tuesday?):

  • Boneless, Skinless Chicken Breasts: These cook up pretty fast! Think around 20–25 minutes.
  • Chicken Thighs or Drumsticks: Give these guys a little extra love, more like 25–30 minutes. The bone and bit more fat need a touch longer to get perfectly tender.
  • Whole Chicken Pieces (bone-in): For bone-in cuts, you’re probably looking at roughly 30–35 minutes.

Just remember, if your rice cooker has fancy settings like “Slow Cook” or just “Keep Warm,” that’s a totally different thing and will take way, way longer. We’re focusing on the quick weeknight magic here!

My Foolproof, Anyone-Can-Do-It Guide to Rice Cooker Chicken!

Ready to see how easy this is? Grab your chicken, grab your rice cooker, and let’s do this!

Step 1: Prep Your Chicken (It’s Not Rocket Science, I Promise!)

  • Quick Rinse & Pat: Just like you usually would, give your chicken pieces a rinse under cool water and then pat them nice and dry with a paper towel. This helps seasonings stick!
  • Sprinkle on the Goodness: Now for the fun part! Load up your chicken with your favorite seasonings. Salt, pepper, garlic powder, onion powder, a little paprika – go wild! Feeling ambitious? A quick 30-minute marinade before this step takes the flavor to the next level!

Step 2: Liquid Magic Goes In!

  • Water or Broth? Dealer’s Choice! Pour about 1–2 cups of water or chicken broth into the very bottom of your rice cooker  pot. This is going to create all that wonderful steam that cooks your chicken so beautifully and keeps it from drying out. Broth adds extra flavor, just sayin’.
  • Veggies? Heck Yes! Want to make it a complete meal in one go? Chop up some hearty veggies like carrots, broccoli stems, potatoes, or bell peppers and toss them right into the liquid. They’ll cook up perfectly tender alongside the chicken.

Step 3: Tuck the Chicken In

  • Single Layer is Key: Arrange your seasoned chicken pieces in a single layer in the pot. If you’re being a kitchen ninja and cooking rice at the same time, put your rice and water in first according to the rice instructions, then lay the chicken pieces right on top of the uncooked rice. Yep, it works!
  • Close That Lid! Make sure it’s sealed up tight so all that precious steam stays inside where it needs to be.

Step 4: Press the Magic Button!

  • Go Time! Hit the “Cook” or “Steam” button on your rice cooker.
  • Hands Off (Seriously!): This is the hardest part for me! Try really hard not to lift the lid every two minutes. Every time you do, you let out heat and steam, and it makes the cooking take longer. Just trust the process!

Step 5: The Moment of Truth – Is It Done?

  • Your Thermometer is Your BFF: Okay, safety first! The best way to know your chicken is perfectly cooker and safe to eat is to use a meat thermometer. Carefully open the lid (watch out for steam!), and stick the thermometer into the thickest part of the largest piece of chicken. You’re looking for it to read 165°F (74°C).
  • No Thermometer? You Can Still Check! If you don’t have a thermometer, carefully take out the largest piece of chicken and cut into the very thickest part. The meat should be totally white all the way through (no pink!), and when you cut it, the juices should run clear, not cloudy or pink.

Step 6: Dinner is SERVED!

Woohoo! Carefully lift the chicken out of the rice cooker. Now comes the reward! Serve it up with that perfectly cooked rice, those tender veggies, maybe a quick side salad. You did it!

Follow the Steps in Video Below

My Little “Make It Even Better” Rice Cooker Chicken Tips!

Want to go from yummy to “OMG, you have to try this!”? Here are a few things I do:

  • Liquid Balance: Don’t drown your chicken, but don’t leave it high and dry! That 1-2 cups of liquid is usually just right to create enough steam without making things soggy.
  • Flavor Adventures: Don’t be afraid to play! A little lemon slice, some fresh herbs tossed in, a drizzle of teriyaki sauce before cooking – seriously, get creative and find your favorite flavor combos!
  • The Rice & Chicken Combo: I mean, why dirty two things? Cooking them together is pure genius for busy nights.
  • Give ‘Em Room: Don’t stack the chicken pieces too high. A single layer helps ensure they all cook at the same rate.
  • The Crucial Rest Step: This is key! Once the chicken is cooked, take it out and let it rest for just 5-10 minutes, loosely tented with foil. This lets the juices settle back into the meat, making it unbelievably tender and juicy. Don’t skip this!

Your Quick Q&A (Because We All Have Questions!)


1. Can I just toss in frozen chicken?

You can, but it’s going to take significantly longer – figure around 40-45 minutes, and you really need that thermometer to be sure it’s cooked through. I honestly prefer thawing it first for the best texture and more consistent cooking time, but in a pinch, frozenworks!

2. Can I cook other stuff besides chicken?

Absolutely! Your ricecooker is secretly powerful. You can cook things like sausages, meatballs, fish fillets, or even steam veggies on their own. Get experimental!

3. Is this actually safe?

Totally safe, as long as that chicken reaches 165°F (74°C) internal temperature. That’s your magic number for food safety!

4. Can I seriously make a whole meal in here?

Heck yeah! Chicken , rice, veggies – all in one pot (well, one appliance). It’s the ultimate lazy-but-smart way to get dinner done.

The Bottom Line: Go Try This!

Seriously, cooking chicken in your ricecooker is one of those simple kitchen tricks that feels almost too easy to be true, but it works. It’s healthy, saves you time, and produces perfectly cooked chicken with hardly any effort. Whether you’re a total beginner or just having a night where cooking feels like a monumental task, this method is going to become your new best friend.

So please, the next time you’re wondering what to make and eyeing your ricecooker , just go for it! Give this chicken method a whirl. I have a feeling you’re going to be just as obsessed as I am. Happy cooking (the easy way)!

Our Website Pages  

Cooking Baking Recipes Home

Cooking Baking Recipes About Us

Cooking Baking Recipes Contact Us

Cooking Baking Recipes Privacy Policy

Cooking Baking Recipes Terms & Condition

How To Cook Turkey Bacon

How To Cook Turkey Bacon?

https://sportsariseencyclopaedia.com/eb8i04p74?key=a13aad7d62fc71345a2bad80620f621e

You know those packs of turkey strips in the grocery store? Yeah, that stuff. For the longest time, I was like, “Eh, is that really gonna hit the spot like regular bacon?” BUT. Big BUT. When you cook it right? O. M. G. It gets this amazing crispiness, this perfect salty, savory thing happening, and it’s just… chef’s kiss! It’s become my absolute go-to for when I want that bacon vibe without, you know, the whole bacon situation. And guess what? It’s ridiculously easy! Like, even-on-a-Monday-morning-easy. So grab your apron (or don’t, honestly, it’s that simple), and let me tell you how I make mine absolutely perfect every time.

How To Cook Turkey Bacon

First Off: What’s the Deal with These Turkey Strips Anyway?

Okay, real quick. Think of ’em as bacon’s slightly less greasy cousin. They’re made from turkey, sliced thin, and usually smoked and cured to give ’em that familiar breakfast meat flavor. You’ll find ’em chilling in the refrigerated section. A lot of people reach for them ’cause they tend to be a bit lower in fat, which is cool, but honestly? I’m here for the flavor and the CRISP!

Method 1: Pan-Frying – My Ride-or-Die for Ultimate Crispiness!

If you want that classic, perfectly crispy result, the stovetop is where it’s at. It’s quick, it’s satisfying, and you get to see the magic happen!

  • Get Your Pan Warm & Ready: Just grab any skillet, but if you have a non-stick one, grab that one! Put it on the stove over medium heat. You actually don’t need a ton of oil – the turkey lets off a little fat itself. I usually just do a tiny swirl of olive oil or a quick spray, just enough to coat the bottom lightly.
  • Lay ‘Em Down Nice: Okay, this is key! Carefully lay the turkey strips in a single layer. Pretend they need their personal space bubble! If you crowd the pan, they won’t get crispy; they’ll just kinda steam. Nobody wants soggy turkey bacon! Cook ’em in batches if you have a lot.
  • Watch ‘Em Sizzle & Flip! You’ll hear that glorious sizzle right away. Let them cook for maybe 2-3 minutes on one side. Keep an eye on them! Seriously, they can go from perfect to “oops!” pretty fast. When they’re golden brown and looking crispy around the edges, use a spatula to gently flip ’em over. Cook the other side for another 2-3 minutes until they look perfectly done and crispy all over.
  • Drain the Excess: As soon as they’re perfect, get ’em outta the pan! Pop them onto a plate lined with paper towels. This just catches any extra grease and helps keep them nice and crisp. Serve ’em immediately and just enjoy that amazing crunch!

Method 2: Baking – When You’re Feeling a Little Lazy (No Judgment Here!)

Okay, some days you just don’t want to stand over a hot stove, right? Baking is your best friend when you’re cooking a bigger batch or just want to be hands-off.

  • Heat the Oven! Turn your oven on to 375°F (190°C). Easy peasy.
  • Tray Prep = Easy Cleanup: Grab a baking sheet. Pro tip: Line it with parchment paper! Trust me, cleanup is a million times easier.
  • Single File, Please: Lay your turkey strips out on the parchment paper. Again, don’t let them overlap! Give ’em room to breathe and crisp up.
  • Into the Warm Bath (Err, Oven!) Slide the baking sheet into the preheated oven. Let them bake for about 10-12 minutes. Halfway through (around 5-6 minutes), peek in and maybe flip them over using tongs just to be sure they cook evenly. Keep an eye on them in the last few minutes – every oven is different! You’re looking for that golden, crispy look.
  • A Moment to Chill: Pull the sheet out of the oven and let the strips cool for just a minute before you devour them. Perfect!

Method 3: Air Frying – For the CRISPIEST Results Ever!

Okay, if you have an air fryer, you HAVE to try this. It gets turkey bacon unbelievably crispy with barely any oil. It’s magic!

  • Air Fryer Power On! Preheat your air fryer to 375°F (190°C).
  • Basket Layout: Put your turkey strips in a single layer in the air fryer basket. Yep, you guessed it – no overcrowding! Cook in batches if you need to.
  • Let the Air Do Its Thing! Cook for about 6-8 minutes. Around the 3-4 minute mark, give the basket a good shake or use tongs to flip them. Cook until they reach your desired level of crispness.
  • Eat ‘Em Right Away! Seriously, they are peak crispy right out of the air fryer. Don’t wait!

You Can Watch Video As Well

My Personal Tips for Making Your Turkey Bacon Dreams Come True!

Okay, learned these through trial and error (mostly error in the early days!). Here are my little secrets:

  1. Know When to Stop: This is key! Don’t overcook them thinking they’ll get crispier. They’ll just get dry and sad. As soon as they look golden and crispy, they’re done. Pull ’em!
  2. Keep the Heat Medium: Especially pan-frying! If the heat is too high, the outside will burn before the inside is cooked or before it gets properly crispy. Medium heat is your friend.
  3. Pat Them Dry! I know, simple, but it helps SO much. Give those strips a little pat with a paper towel before they go in the pan/oven /air fryer. Less moisture = more crisp!
  4. Spice It Up! They have flavor already, but sometimes I add a tiny sprinkle of extra black pepper, a pinch of garlic powder, or even a little smoked paprika. Adds a little extra something!
  5. Space Invaders are NOT Welcome: Seriously, can’t stress this enough. Give them space in the pan/basket! Batch cook if you have to. It makes all the difference between soggy and spectacular.

Fun Ways to Use Your Amazing Crispy Turkey Bacon!

Alright, you’ve got this pile of perfectly cooked, crispy goodness. Now what?!

  • The Ultimate Breakfast Sandwich: Slap those crispy strips onto your morning sandwich with eggs and cheese. Pure heaven.
  • Salad Upgrade: Crumble them up and sprinkle them over your salad. Instant flavor and crunch boost!
  • Wrap Stars: Tuck them into wraps with lettuce, tomato, maybe some avocado and ranch. So good!
  • Omelet or Scramble Booster: Chop ’em up and stir them into your morning eggs. Makes a regular scramble feel fancy!
  • Just Eat ‘Em! Honestly, sometimes I just grab a couple right off the plate as a quick, satisfying snack. No judgment here!

Leftovers? (Is That Even a Thing?)

If you actually manage to have some leftover (seriously, kudos!), just pop ’em in an airtight container in the fridge. They’ll be fine for a couple of days. To reheat, I usually just warm them up quickly in a pan on low heat or even a few seconds in the microwave.

So yeah! Cooking turkey strips is seriously one of the easiest ways to add something really yummy and satisfying to your meals. With these simple methods and little tricks, you are officially a turkey strip master! Go on, get that pan hot (or that oven/air fryer!). You are going to love this! Happy sizzling!

You Can Check Our Recipes Category For More Recipes Click! (Go find your next kitchen adventure!)

How to Cook Tandoori Chicken: A Simple Guide for Beginners

How to Cook Tandoori Chicken: A Simple Guide for Beginners

https://sportsariseencyclopaedia.com/eb8i04p74?key=a13aad7d62fc71345a2bad80620f621e

YOU. Yes, YOU! Come here for a second. I need to tell you about something that’s gonna make you feel like a total kitchen rockstar. Tandoori Chicken! I know, right? Sounds fancy, sounds complicated, sounds like something you only get at restaurants. WRONG! My friend, you can make this at home, and it is NOT hard. Like, at all. It’s juicy, it’s got this incredible flavor, and it’s got that cool color that just screams “yum!” If you’ve never cooked anything more complicated than toast, you can do this. Pinky promise.

How To Cook Tandoori Chicken

Quick Chat: What’s Up With “Tandoori” Anyway?

So, the name “Tandoori” just comes from the Tandoor, which is basically a super hot clay oven they use in India. They marinate chicken in this amazing yogurt-y, spicy mix and then cook it crazy fast in there. That high heat and the marinade? That’s what gives it that special taste and smokiness. But guess what? Your regular oven or even your grill can totally nail this flavor at home. No special oven required! 🙌

Okay, What Stuff Do We Need? (The Shopping List!)

Don’t freak out, the list isn’t scary! You probably have a lot of this already.

  • Chicken: Grab maybe 4 to 6 pieces. Honestly, chicken thighs and drumsticks with the bone in are the BEST here. They stay SO juicy. If you only have breast, it’s okay, but the bone-in is just next level for this!
  • Yogurt: About a cup of plain yogurt. This is the secret sauce for tender chicken! Don’t skip this.
  • Lemon juice: Like, a squeeze or two, 1-2 tablespoons. Adds a little brightness and tang! 🍋
  • Garlic paste: Maybe a tablespoon? You can buy the little jars of paste, or just mince a couple of garlic cloves until they’re super super fine.
  • Ginger paste: Same deal, about a tablespoon. Jar is easy, or grate fresh ginger really finely.
  • Garam masala: Just a teaspoon. This is the magical Indian spice mix! You can find it in the spice aisle.
  • Ground cumin: 1 teaspoon. Classic!
  • Ground coriander: 1 teaspoon. Also classic, has a nice, almost citrusy flavor.
  • Turmeric powder: 1 teaspoon. This helps with the color and has a nice earthy taste.
  • Red chili powder: 1 teaspoon. This is where the heat comes from! Adjust based on how much spice you like! 🔥
  • Paprika: 1 teaspoon. Gives more color and a mild, sweet pepper flavor.
  • Salt: 1 teaspoon. Gotta season!
  • Vegetable oil or melted butter: Like 2 tablespoons. This is for brushing on the chicken while it cooks – keeps it moist and yummy!

Ingredients-For-Tandoori-Chicken

Let’s DO This! Making the Tandoori Magic Happen! 

Ready? It’s seriously just a few simple steps.

Step 1: Chicken Prep – The Little Secret!

Okay, first thing, give your chicken a rinse and pat it dry with paper towels. Now, grab a knife and make a few good, deep cuts – slashes! – right into the thickest parts of the chicken pieces. Don’t be gentle! You want that awesome marinade to really sink in there and flavor the meat all the way to the bone. This is a pro move! 😉

Step 2: The Marinade Party Bowl!

Get a big bowl out. Like, bigger than you think you’ll need, so you can mix easily. Now, just dump everything from the ingredients list (except the oil/butter) into this bowl: the yogurt, lemon juice, garlic, ginger, ALL the spices (garam masala, cumin, coriander, turmeric, chili powder, paprika), and the salt. Grab a spoon and stir it all together until it’s a smooth, beautiful, reddish-orange paste. It should smell AMAZING already! Give it a little taste test if you’re brave, and if you’re thinking, “Needs more heat!”, just add another tiny pinch of chili powder.

Step 3: Chicken’s Spa Day!

Okay, gently put your slashed chicken pieces into that bowl with the marinade. Now, get your hands in there (wash ’em first, obviously!) or use tongs, and make SURE every single piece is absolutely covered in that marinade. Get it into those cuts! Once they’re all beautifully coated, cover the bowl (plastic wrap is your friend here!) and put it in the fridge. Now, for the hardest part: waiting! Let it hang out in the fridge for at least 2-3 hours. If you can remember to do it the night before? DO IT. The longer it sits, the more flavor soaks in, and the more tender it gets. Overnight is seriously the best!

Step 4: Time to Get HOT! (Oven or Grill Time!)

When you’re ready to eat (yay!), preheat your cooking device! If you’re using your oven, crank it up to 400°F (200°C). If you’re grilling, get that grill heated up to medium-high heat. Both work great, just pick whichever feels easier right now!

Step 5: Let’s Cook This Yummy Chicken!

  • Oven Method: Grab a baking tray. PLEASE line it with aluminum foil or parchment paper. Trust me, cleanup is a breeze if you do this! If you have one of those wire racks that fits on the tray, use it! It helps the chicken cook evenly all around. Lay your marinated chicken pieces on the rack (or directly on the foil if no rack).
  • Grill Method: Carefully place the marinated chicken pieces right onto the hot grill grates.

Now, let ’em cook! This usually takes about 20-30 minutes total, depending on how big your chicken pieces are. You’ll want to flip them over about halfway through (so, around 10-15 minutes in). And hey, remember that oil or melted butter from the ingredients list? If you’re grilling (or even if you’re oven baking and want extra moisture/color), brush some of that onto the chicken every 10 minutes or so. It keeps it nice and juicy and helps with the color.

Step 6: Is It Done Yet?! (How to Tell!)

The best way to know for sure is to use a meat thermometer! Carefully peek under the lid/check the grill, and stick the thermometer into the thickest part of the biggest chicken piece (avoid hitting the bone!). You’re looking for it to read 165°F (74°C). Visually, it should look like that beautiful reddish-orange color, maybe with some nice little charred spots, and when you cut into a piece, the inside should be totally white and the juices should run clear.

Step 7: EAT IT! (And Enjoy the Applause!)

You did it!!! 🎉 Carefully get the chicken off the heat. Let it sit for just 5 minutes before serving – this lets the juices redistribute and makes it extra tender. If you have fresh cilantro, chop some up and sprinkle it on top. A little extra squeeze of lemon juice is also perfect! Serve your amazing homemade tandoori chicken with some warm naan bread, some rice, or a simple salad. Prepare for people to ask, “OMG, where did you buy this?!” 😉


You Can Watch Video As Well 

My Personal Top Secret (Okay, Just Good Advice!) for Nailing It!

Just a few things from my own kitchen adventures:

  • Bone-In IS Better for This: Seriously, the bone adds flavor and helps keep it moist. If you can get bone-in thighs or drumsticks, do it!
  • MARINATE LONGER! I know I said it, but it’s the biggest flavor booster. Plan ahead if you can and let it chill in that marinade overnight. Life changing.
  • Give Them Space! I know we already talked about it, but seriously, don’t overcrowd the pan/rack/grill. They need room to get crispy, not steamy!
  • Adjust the Spice! That chili powder is just a starting point. If you like things HOT, add more! If you’re nervous, start with less and you can always add a spicy sauce later.
  • Trust Your Gut (and a Thermometer): Once you make this a few times, you’ll get a feel for it. But the thermometer is always your best friend for knowing it’s safely cooked!

Quick Recap: You Got This!

See? Tandoori chicken at home is totally doable and SO rewarding. It’s mixing, waiting (the hardest part!), and then cooking. You don’t need fancy equipment, just some yummy ingredients and these simple steps. You’re going to make juicy, flavorful chicken that tastes incredible.

So please, please try this! It’s way easier than you think and tastes amazing. You’re going to love making this! Happy cooking (and eating!)! ❤️

You Can Check Our Recipes Category For More Recipes Click! (Go find your next kitchen adventure, champ!)

How Long To Cook Hot Dogs In Oven

How Long To Cook Hot Dogs In Oven

https://sportsariseencyclopaedia.com/eb8i04p74?key=a13aad7d62fc71345a2bad80620f621e

Let’s talk about hot dogs. I mean, who doesn’t love a good hot dog, right? They’re like, the ultimate comfort food – quick, simple, and just plain tasty. Most of the time, you probably boil ’em or throw ’em on the grill if the weather’s nice. But lemme tell you, cooking them in the oven? Mind. Blown. It’s unbelievably easy, way less messy than boiling, and they get this perfect texture that I am obsessed with. If you’ve never tried it, or if you’re just wondering exactly “how long do hot dogs go in the oven for?”, you are in the right place! Get ready to make some perfect oven dogs.

How Long To Cook Hot Dogs In Oven.

Why the Oven, You Ask? Let Me Tell You!

Okay, so grilling is great and all, but let’s be real, sometimes you don’t want to fire up the grill just for a few hot dogs. And boiling? Gets the job done, but it’s not exactly exciting. The oven? It’s got some secret superpowers for hot dogs!

  • Making a Bunch? Easy Peasy: Got a few hungry people? Or maybe you just really love hot dogs (no judgment!). You can load up a baking sheet with tons of hot dogs at once. Perfect for feeding the fam or getting ready for game night!
  • Perfectly Cooked Every Time: The oven gives them this nice, even heat. They get all juicy on the inside, and the outside gets this slightly firm, almost crispy bite that is just chef’s kiss.
  • Weather? Don’t Care! Rainy day? Snowing? Doesn’t matter! You can have perfect hot dogs any time of year without even going outside. Winner!

What Stuff Do You Need? (Spoiler: Not Much!)

You probably have all this stuff already. It’s THAT simple.

Stuff to Eat:

  • Hot dogs: As many as your heart desires (and can fit on a pan!).
  • Hot dog buns: (Optional, but highly recommended for the full experience!)
  • Your fave toppings: Ketchup, mustard, that weird neon green relish, cheese, onions, whatever makes you happy! (Optional, but crucial for customization!)

Stuff You’ll Cook With:

  • A baking sheet: Any one you have will do!
  • Aluminum foil or parchment paper: YES. Use this. Your future self cleaning the pan will thank you. 🙏
  • Tongs or a spatula: For flipping those dogs safely.

Got your gear? Let’s get cooking!

Your Super Simple, Step-by-Step Guide to Oven Hot Dogs!

Seriously, you are like, five minutes away from deliciousness once the ovenheats up.

Step 1: Get That Oven Warm!

First things first! Preheat your oven. Set it to 400°F (that’s 200°C). While it’s heating up, grab your baking sheet and cover it with aluminum foil or parchment paper. Seriously, do not skip this – cleanup will be a breeze later!

Step 2: Hot Dog Layout!

Okay, take your hot dogs and just place them on the lined baking sheet. Give each one a little space; they don’t need to be touching. If you’re thinking about toasting the buns (highly recommend!), just set those aside for a couple more minutes.

Step 3: Bake ‘Em! (Here’s the Time!)

Slide that baking sheet into your preheated oven. Now, How long? Usually 10 to 15 minutes is the sweet spot!

  • If you like them just heated through and a little soft: Check around the 10-minute mark.
  • If you like those slightly crispy edges (my fave!): Let ’em go closer to 15 minutes.

Crucial Move: Around the halfway mark (so, about 5-7 minutes in), use your tongs or spatula to give each hot dog a flip! This helps them get nice and evenly browned on all sides.

Step 4: Toast Those Buns! (Optional but Awesome!)

If you want warm, slightly toasty buns (and why wouldn’t you?), this is the time! In the last 2-3 minutes that the hot dogs are baking, just pop your buns onto the same baking sheet around the hot dogs. They’ll get perfectly warm and slightly toasted just as the dogs finish.

Step 5: Serve and ENJOY!

Ding! Timer’s off! Carefully (oven mitts, people!) take that baking sheet out. Grab those perfectly cooked hot dogs, pop ’em in their warm buns (if you’re using them), and load ’em up with ALL your favorite toppings! Ketchup? Mustard? A mountain of cheese? Go wild! Now, sink your teeth into that perfection. So good!

My Little Tips for Oven Hot Dog Greatness!

Want to take your oven hot dogs from “good” to “OMG, tell me your secret!”? Try these:

  • Give ‘Em Some Cuts: Before you bake them, make a few small diagonal cuts along the length of the hot dogs with a knife. They curl up slightly when they cook, get extra crispy edges, and cook just a tiny bit faster! Plus, it looks cool. 
  • Elevate for Extra Crisp: Got a wire rack? Put it on the baking sheet before you put the hot dogs on. This lifts them up so the air circulates all around, and they don’t sit in any little juices. Maximum crispness unlocked!
  • Cheese Please (Before Baking)! If you want melted cheese on the hot dog itself (not just shredded on top), add it during the last couple of minutes in the oven. Same goes for things like pre-cooked bacon bits you want to crisp up onto the dog.

How to Tell They’re Ready (Besides Checking the Time!)

Hot dogs are already cooked when you buy them, so baking is mostly about heating them through and making the outside nice. You’ll know they’re good to go when:

  • The skin gets a little plump and turns a light golden-brown color.
  • You might see tiny little bits of juice sizzling out of the ends.
  • They feel firm but still have a little give when you gently press them (careful, they’re hot!).
  • If you want to be super extra sure (totally fine!), you can use a meat thermometer. Poke one in the end – it should be at least 140°F (60°C).

What NOT to Do! (Learned These the Hard Way!)

Even something this simple has tiny pitfalls. Avoid these!

  • Skipping the Preheat: Don’t just shove ’em in a cold oven! Preheating makes sure they cook evenly.
  • Baking TOO Long: They will get tough and dry and sad. Stick to the 10-15 minute window and check on them!
  • Not Flipping: Seriously, flip them halfway through. One side will get way crispier than the other if you don’t!
  • Ignoring the Pan Liner: Just… no. Use the foil or parchment. Trust me.
  • Packing Them In: Give those dogs their space! Crowding means steaming, not baking.

Why Oven Hot Dogs Are Just… The Best.

Honestly, baking hot dogs in the oven is just the ultimate easy button. It’s perfect for those crazy weeknights, feeding a bunch of kids (or adults!), or just when you want a quick, satisfying meal without a lot of fuss. 10-15 minutes and you get warm, juicy, slightly crispy hot dogs ready for ALL the toppings. Pair them with some chips, a quick salad, or some baked beans, and you’ve got dinner sorted!

Final Verdict: Go Bake Some Hot Dogs!

Seriously, if you haven’t tried oven-baked hot dogs yet, you’re missing out on a little piece of culinary convenience heaven. It’s foolproof, fast, and gives you perfect results every time. The next time you’re thinking hot dogs, forget the pot of boiling water or messing with the grill. Just heat up the oven, pop ’em in, and get ready to enjoy. Happy hot dogging! 😉🌭

You Can Check Our Recipes Category For More Recipes Click!(Find your next kitchen adventure)

Our Website Pages  


Cooking Baking Recipes Home

Cooking Baking Recipes About Us

Cooking Baking Recipes Contact Us

Cooking Baking Recipes Privacy Policy

Cooking Baking Recipes Terms & Condition

How Long To Cook Frozen Pizza In Air Fryer

How long to cook frozen pizza in air fryer?

https://sportsariseencyclopaedia.com/eb8i04p74?key=a13aad7d62fc71345a2bad80620f621e

If you love pizza but don’t want to wait forever for the oven, no problem! Using an air fryer is a quick and easy way to make this yummy treat. It doesn’t take long, and the crust becomes crispy while the cheese melts perfectly. If you’re hungry and ready for pizza, here’s how you can do it!

cooked frozen pizza
cooked frozen pizza

Why Use an Air Fryer for Pizza? 

The air fryer is awesome for cooking! It uses heated air to make food crispy and enjoyable. When you make pizza in it, you don’t need to preheat a big oven. It also takes less time, which is great if you’re really hungry. Plus, the cleanup is fast and simple.

This method is ideal for small pizzas, like personal-sized ones. It’s also perfect for reheating leftover slices and keeping them crispy instead of soggy.

What You Need 

Before you start, gather these items:

Ingredients:

  • A frozen pizza (choose the size that fits inside your air fryer) 
  • Optional toppings like extra cheese, pepperoni, or vegetables 
Ingradeint for fronzen pizza

Tools:

tools for fronzen pizza

Once you have these ready, you’re set to start making your cheesy treat. 

Steps to Make Pizza in an Air Fryer 

Step 1: Preheat the Air Fryer 

Preheating helps everything cook evenly. Turn on the air fryer to 380°F degrees and let it get hot for a little while. If your model doesn’t need preheating, you can skip this step. 

Step 2: Carefully place the Pizza in the Basket 

Takings the pizza outside of the box and the plastic it’s wrapped in. Carefully place it in the basket. Make sure it fits well and doesn’t overlap on the sides. If it’s too big, you may want to cut it into smaller pieces. 

Step 3: Set the Timer 

Set your air fryer timer for 6-10 minutes. The exact time depends on the size and thickness of the pizza. A smaller one will need less time, while a thicker crust might need more. 

Step 4: Check While It Cooks 

Halfway through, check the pizza. If it’s cooking unevenly, turn it carefully or rotate the basket. This helps the crust get crispy on all sides, and the cheese melts evenly. 

Step 5: Look for Melted Cheese 

You’ll know your pizza is all set when the cheese is bubbly and melted, and the crust is golden brown. Make sure it doesn’t overcook, as that could make the edges too hard.

Step 6: Remove and Cool 

Once it’s done, use a spatula   or tongs  to take the pizza out. Put your pizza on a plate and wait a little while before you eat it. It needs to cool down a bit!  Remember, it will be very hot!

Tips for the Best Results 

  • Don’t Overload With Toppings: If you add too many extra toppings, the pizza might cook unevenly. Stick to light add-ons. 
  • Use a Lower Setting for Crispier Results: If you like a crispier crust, you can lower the temperature to 360°F and cook it a little longer. 
  • Cook in Batches if Needed: If you’re making more than one pizza, cook them one at a time. This ensures each one gets even heat. 
  • Add Cheese Late: If you love extra cheese, sprinkle it on halfway through cooking. This stops it from overcooking. 

you can watch video as well

 Common Mistakes to Avoid 

Even though an air fryer makes cooking easy, here are some mistakes to watch out for:

  1. Crowding the Basket: For a frozen pizza, the air fryer works best when there’s space for air to flow. If you put too much stuff in the air fryer, it won’t cook everything evenly.
  2. Skipping Preheating: Starting with a warm air fryer ensures improved results. 
  3. Cooking Too Long: Check your pizza often so it doesn’t burn. It’s okay to cook it a bit more, but don’t let it get too brown.
  4. Not Rotating or Flipping: If the crust cooks faster than the top, rotate it gently to fix this. 
  5. Using Pizza That’s Too Large: Make sure your pizza fits inside safely. If it’s too big, try cutting it into smaller pieces before cooking. 

How Long Does It Take to Cook? 

Heating pizza in an air fryer usually takes 6 to 10 minutes. Small, thin pizzas will be ready sooner, while thicker ones or those with more toppings might take longer. Checking on it halfway is always a good idea to get it just right.

Why You’ll Love This Way 

Pizza in an air fryer is super fast, easy, and mess-free. You won’t have to wait for your oven to preheat, and the pizza turns out crispy and delicious. Plus, since the air fryer uses less energy than an oven, it’s great for saving time and effort. The result tastes like a mini pizza shop right in your kitchen! 

Pair It With Fun Sides 

Want to make your meal even better? Serve your pizza with some fun sides like:

  • Garlic breadsticks 
  • A small salad 
  • Mozzarella sticks 
  • Veggie sticks with ranch dip 

And don’t forget your favorite drink or dessert for a perfect meal. 

Final Thoughts 

It’s easy and enjoyable to make pizza in the air fryer! It’s a great way to enjoy a quick snack or meal without any fuss. Whether you’re in a hurry or just love the crispy crust this method gives, it’s worth a try. Follow these easy steps, and you’ll have a tasty pizza ready in minutes. 

Next time you’re hungry, grab your air fryer and your favorite pizza. Love every bite and share it with your family and friends. Happy cooking! 

You Can Check Our Recipes Category For More Recipes 
Click!

How To Cook Frozen French Fries In Air Fryer

How To Cook Frozen French Fries In Air Fryer?

https://sportsariseencyclopaedia.com/eb8i04p74?key=a13aad7d62fc71345a2bad80620f621e

It has never been so easy to make crispy, golden-brown fries. The frying machine will allow you to make tasty and quick snacks with little oil. You can fry them faster and more healthily than you would by deep-frying. With this guide, you can make delicious fries whether they are for your family or just yourself.

cooked frozen french fries

Why Use an Aerofryer?

The air fryer makes a great kitchen gadget. Food is cooked using hot air, so it doesn’t need much oil. The crunch that you crave is now possible with less grease. The design is intuitive, allowing for effortless use. Detachable pieces and non-stick surface make it easy to clean. The oil does not have to be heated up.

how to cook frozen french fries in an air fryer
air fryer

Why You Need

Gather everything you will need before starting to cook:

Ingredients:

This bag of frozen potatoes strips contains:

A minimal amount of oil, cooking sprays or other non-stick products can be used.

Use salt or seasonings as desired

Tools:

air frother

Tongs or a spatula

The time has come to start your project!

Step by step instructions


Step 1. Preheating the air Fryer

Preheating the fryer helps to cook them evenly. For 2-3 minutes, preheat the frying machine at 400degF. It will warm up while you prepare food.

Step 2: Lightly Coat Basket

You can spray a thin layer cooking oil into the fryer’s basket. If you spray the fryer basket with oil, it will keep fries from sticking. To spread the oil, you can also use paper towels if there is no spray.

Step 3: Add your Fries

The potatoes should be placed in the basket. You don’t want to pack them too tightly. Don’t overcrowd your basket. It will lead to suboptimal results. The air will circulate better if you spread them apart.

Set the timer

Cook at least 10-15 minutes. Remove the basket carefully from the air fryer at mid-cycle and shake it gently. This will ensure an even browning and cooking of French fries. This ensures the food cooks uniformly and gets maximum crispiness across all surfaces.

Step 5: Make sure you have enough food and cook it more, if needed

You can check after 10 minutes to see if your fries are golden-brown and crispy. If the potatoes need more time to cook, add another 2-3 minutes. Always check to be sure that the food doesn’t burn.

Step 6: Add the Seasonings

Once the French fries are done cooking, carefully remove them from their air-fryer basket. Transfer the French frites to a serving platter. To add more flavor you can also sprinkle on some parmesan, paprika or other spices.

Step 7: Enjoy!

Serve these hot with sauces that include ketchup and ranch dressing. The perfect snack for chicken nuggets and fish sticks or as a side with burgers.

you can watch video as well

The Best Fries

  • To get the best results, start by preheating your fryer.
  • Half-shake the basket: This ensures all of your pieces get crispy.
  • Do not use thick layers. Cook small batches in order to prevent soggy potatoes. When cooking in large quantities, it is best to do several rounds of cooking. This will ensure a consistent product and reduce the chances of overcrowding your frying basket.
  • Apply a Light Coating of Oil for Extra Golden Fries. Not much is needed–just one teaspoon or a spray.
  • Don’t Forget Seasoning:Get Creativity with Flavors Garlic powder and chili powder are great options.

Avoid These Mistakes

Even though they are simple, there can be a number of things that go wrong. You should be on the lookout for:

  1. Too many Fries in the Basket at Once:Don’t overload your basket. This will prevent the airflow required to cook fries evenly.
  2. Skipping the ShakeIf it isn’t shaken before putting the fry basket in the oven, some of the fries could stay soft. Others may be overcooked.
  3. Start off with a Fryer that is Cold:Preheat always. You can cook your food in just two minutes.
  4. Never check your fries: Perfect fries can easily turn to burnt fries. Be sure to keep an attentive eye on your food for the last couple of minutes.
  5. Too Little Oil: Using a little too much can result in greasy fries instead of crisp ones. Air fryers are easy to use.

When Does It Take to Complete?

The length of time it takes to cook fries depends on their thickness and whether you prefer them crispy or not. Shoestring cuts cook faster while thicker slices take longer. The average cooking time is 10-15 minutes. Cooking time can be extended by up to two minutes for a better crispiness. Watch the cooking process closely to prevent any burning.

You Will Love this Method

An air fryer makes it easy to prepare healthy and delicious fries. The fact that you use less oil means you can reduce the amount of calories you consume and also save some time. Additionally, this is a better option to deep fry. This is great for kids as well as adults.

Pair Them With Other Foods

Find out what pairs well with fries. Why not pair fries with?

  • Enjoy chicken tenders
  • Burgers
  • Hot dogs
  • Fish fillets
  • It’s possible to have eggs and bacon for breakfast.

The French fries are best accompanied by a wide variety of dipping condiments. Some options include classic cheese, honey mustard and sriracha for a sophisticated touch.

Final Thoughts

Making crisp fries in the air fryer with your is fun, easy and super simple. No advanced cooking knowledge is required to produce successful results. If you have a little patience and follow a few simple tips, it is possible to get the crispy crunch without a lot of grease. If you crave something delicious the next few times, use your air-fryer to try this recipe. This recipe yields an incredibly versatile dish, which is both flavorful and fast.

You Can Check Our Recipes Category For More Recipes 
Click!

How Long To Cook Hamburger Patties On Cuisinart Grill

How Long To Cook Hamburger Patties On Cuisinart Grill

https://sportsariseencyclopaedia.com/eb8i04p74?key=a13aad7d62fc71345a2bad80620f621e

Grilling can be a great way to prepare food. This is especially true when you are making burgers. Our guide will show you how to get the perfect burgers every time on a Cuisinart grilled. It will guide you in the right direction, step by step.

Hamburger Patties on a Cuisinart Grill

Start Your Grill

Be sure to clean your grill prior to cooking. Make sure your grill is clean. Brush off any bits of leftover food. To begin, turn on your Cuisinart Grill and allow it to heat. To cook your food evenly, you need a heated grill. Use the dials to set it at medium. It’s best to wait until the temperature is high enough for a water droplet to sizzle.

Tip Make sure to spray cooking oil or spray a few drops of cooking cream on the grates before you cook. This will prevent your food from sticking.

How To Prepare Burger

To begin, shape your burgers into round, evenly shaped pieces. These are called patties. They should be about the same thickness as a pack of cards. This will ensure even cooking. Your thumb can be used to poke a hole through the middle of every patty. The little trick allows them to remain flat as they are cooking. Remember to salt them and sprinkle some pepper on top!

No need to fret! It’s fine to place the patties directly on your grill. They will take a bit longer to cook if you give them more time.

pieces of patties
pieces of patties

The length of time to cook each side

As soon as your BBQ heats up and the burger is done, you can place it onto the surface. If you want to maintain the heat, close the lid of the grill while cooking. Here is the time needed by each side for various levels of doneness.

  • Rare After cooking for 2 or 3 minutes on the one side of your grill, turn over the griddle and continue to cook it for a further 2 minutes.
  • Medium Flip it and grill for 4 further minutes.
  • Cooked: Turn the patties and grill them for a further 5 minutes.

Be aware that times will vary depending upon the thickness and heat of the BBQ. In case you’re not sure, you can use a food thermometer. It is safe to cook beef at 160degF.

Hint: When grilling burgers, avoid pressing the burger down. By doing so, you will squeeze out all the delicious juices from your burger.

you can watch video as well

How to Flip

Flipping your burgers can be a huge moment. To flip the patty, use a heavy spatula. Do not flip it over. When the bottom of your burger is nicely browned, flip it. If you are too quick to start moving it, it may become stuck to the grill.

Rule-of-thumb: Turn your patties just once during the cooking process. If you flip your patties too often, they can lose their shape.

The Best Way to Flip

The Best Way to Flip

Safety Guidelines for Cooking

Securing meat is an important aspect of cooking. Ensure that the burgers you serve are fully cooked. Unsafe to eat is a burger that looks raw in the middle. A thermometer can help you determine if the food is safe to eat.

It is safe to use beef or poultry meat that has reached 165 degrees Fahrenheit. You should always wash both your hands and the utensils you use after touching any raw meat.

Top with Cheese or Toppings

For a delicious cheeseburger, you can add a few slices of cheese in the last couple of minutes. To melt the cheese to gooey perfection, you can cover your grill.

Do you want to raise the bar on your burgers still further? Special toppings can be added to burgers. These include grilled lettuce, tomato, pickles or onions. To add flavor, spread some mayo on top of your buns.

The Best Way to Check if It Is Complete

It’s ready for eating when your burger has an attractive brown exterior and its juices flow clear. Use a temperature gauge to achieve the desired results. 160degF should be your target. It is perfectly safe to cook burgers at 160degF. They are also deliciously juicy.

Cleaning Up

When you’re done, clean the grill. Let it cool down and then scrape gently any residue. Cleanliness will help it to last longer, and make it easier for you to use it next time.

A Final Thought

Cuisinart makes grilling easy and enjoyable. If you follow these simple tips, your guests and family will be impressed with the perfectly cooked patties each time. No matter if you prefer your patties rare, cooked medium, or done well, patience is the key. Then get out there and grill!

You Can Check Our Recipes Category For More Recipes 
Click!