How To Cook Turkey Bacon

How To Cook Turkey Bacon?

You know those packs of turkey strips in the grocery store? Yeah, that stuff. For the longest time, I was like, “Eh, is that really gonna hit the spot like regular bacon?” BUT. Big BUT. When you cook it right? O. M. G. It gets this amazing crispiness, this perfect salty, savory thing happening, and it’s just… chef’s kiss! It’s become my absolute go-to for when I want that bacon vibe without, you know, the whole bacon situation. And guess what? It’s ridiculously easy! Like, even-on-a-Monday-morning-easy. So grab your apron (or don’t, honestly, it’s that simple), and let me tell you how I make mine absolutely perfect every time.

How To Cook Turkey Bacon

First Off: What’s the Deal with These Turkey Strips Anyway?

Okay, real quick. Think of ’em as bacon’s slightly less greasy cousin. They’re made from turkey, sliced thin, and usually smoked and cured to give ’em that familiar breakfast meat flavor. You’ll find ’em chilling in the refrigerated section. A lot of people reach for them ’cause they tend to be a bit lower in fat, which is cool, but honestly? I’m here for the flavor and the CRISP!

Method 1: Pan-Frying – My Ride-or-Die for Ultimate Crispiness!

If you want that classic, perfectly crispy result, the stovetop is where it’s at. It’s quick, it’s satisfying, and you get to see the magic happen!

  • Get Your Pan Warm & Ready: Just grab any skillet, but if you have a non-stick one, grab that one! Put it on the stove over medium heat. You actually don’t need a ton of oil – the turkey lets off a little fat itself. I usually just do a tiny swirl of olive oil or a quick spray, just enough to coat the bottom lightly.
  • Lay ‘Em Down Nice: Okay, this is key! Carefully lay the turkey strips in a single layer. Pretend they need their personal space bubble! If you crowd the pan, they won’t get crispy; they’ll just kinda steam. Nobody wants soggy turkey bacon! Cook ’em in batches if you have a lot.
  • Watch ‘Em Sizzle & Flip! You’ll hear that glorious sizzle right away. Let them cook for maybe 2-3 minutes on one side. Keep an eye on them! Seriously, they can go from perfect to “oops!” pretty fast. When they’re golden brown and looking crispy around the edges, use a spatula to gently flip ’em over. Cook the other side for another 2-3 minutes until they look perfectly done and crispy all over.
  • Drain the Excess: As soon as they’re perfect, get ’em outta the pan! Pop them onto a plate lined with paper towels. This just catches any extra grease and helps keep them nice and crisp. Serve ’em immediately and just enjoy that amazing crunch!

Method 2: Baking – When You’re Feeling a Little Lazy (No Judgment Here!)

Okay, some days you just don’t want to stand over a hot stove, right? Baking is your best friend when you’re cooking a bigger batch or just want to be hands-off.

  • Heat the Oven! Turn your oven on to 375°F (190°C). Easy peasy.
  • Tray Prep = Easy Cleanup: Grab a baking sheet. Pro tip: Line it with parchment paper! Trust me, cleanup is a million times easier.
  • Single File, Please: Lay your turkey strips out on the parchment paper. Again, don’t let them overlap! Give ’em room to breathe and crisp up.
  • Into the Warm Bath (Err, Oven!) Slide the baking sheet into the preheated oven. Let them bake for about 10-12 minutes. Halfway through (around 5-6 minutes), peek in and maybe flip them over using tongs just to be sure they cook evenly. Keep an eye on them in the last few minutes – every oven is different! You’re looking for that golden, crispy look.
  • A Moment to Chill: Pull the sheet out of the oven and let the strips cool for just a minute before you devour them. Perfect!

Method 3: Air Frying – For the CRISPIEST Results Ever!

Okay, if you have an air fryer, you HAVE to try this. It gets turkey bacon unbelievably crispy with barely any oil. It’s magic!

  • Air Fryer Power On! Preheat your air fryer to 375°F (190°C).
  • Basket Layout: Put your turkey strips in a single layer in the air fryer basket. Yep, you guessed it – no overcrowding! Cook in batches if you need to.
  • Let the Air Do Its Thing! Cook for about 6-8 minutes. Around the 3-4 minute mark, give the basket a good shake or use tongs to flip them. Cook until they reach your desired level of crispness.
  • Eat ‘Em Right Away! Seriously, they are peak crispy right out of the air fryer. Don’t wait!

You Can Watch Video As Well

My Personal Tips for Making Your Turkey Bacon Dreams Come True!

Okay, learned these through trial and error (mostly error in the early days!). Here are my little secrets:

  1. Know When to Stop: This is key! Don’t overcook them thinking they’ll get crispier. They’ll just get dry and sad. As soon as they look golden and crispy, they’re done. Pull ’em!
  2. Keep the Heat Medium: Especially pan-frying! If the heat is too high, the outside will burn before the inside is cooked or before it gets properly crispy. Medium heat is your friend.
  3. Pat Them Dry! I know, simple, but it helps SO much. Give those strips a little pat with a paper towel before they go in the pan/oven /air fryer. Less moisture = more crisp!
  4. Spice It Up! They have flavor already, but sometimes I add a tiny sprinkle of extra black pepper, a pinch of garlic powder, or even a little smoked paprika. Adds a little extra something!
  5. Space Invaders are NOT Welcome: Seriously, can’t stress this enough. Give them space in the pan/basket! Batch cook if you have to. It makes all the difference between soggy and spectacular.

Fun Ways to Use Your Amazing Crispy Turkey Bacon!

Alright, you’ve got this pile of perfectly cooked, crispy goodness. Now what?!

  • The Ultimate Breakfast Sandwich: Slap those crispy strips onto your morning sandwich with eggs and cheese. Pure heaven.
  • Salad Upgrade: Crumble them up and sprinkle them over your salad. Instant flavor and crunch boost!
  • Wrap Stars: Tuck them into wraps with lettuce, tomato, maybe some avocado and ranch. So good!
  • Omelet or Scramble Booster: Chop ’em up and stir them into your morning eggs. Makes a regular scramble feel fancy!
  • Just Eat ‘Em! Honestly, sometimes I just grab a couple right off the plate as a quick, satisfying snack. No judgment here!

Leftovers? (Is That Even a Thing?)

If you actually manage to have some leftover (seriously, kudos!), just pop ’em in an airtight container in the fridge. They’ll be fine for a couple of days. To reheat, I usually just warm them up quickly in a pan on low heat or even a few seconds in the microwave.

So yeah! Cooking turkey strips is seriously one of the easiest ways to add something really yummy and satisfying to your meals. With these simple methods and little tricks, you are officially a turkey strip master! Go on, get that pan hot (or that oven/air fryer!). You are going to love this! Happy sizzling!

You Can Check Our Recipes Category For More Recipes Click! (Go find your next kitchen adventure!)
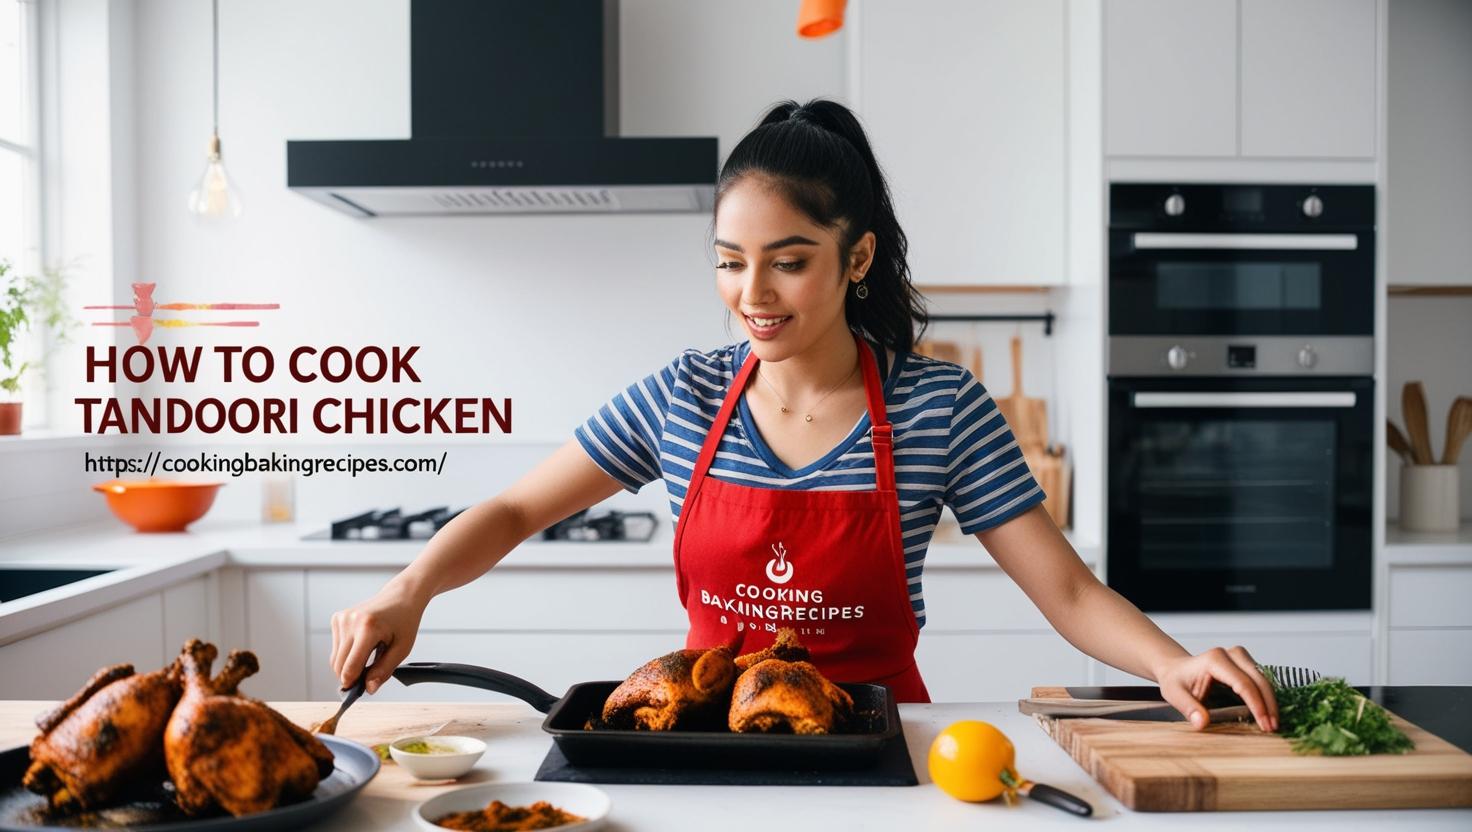

How to Cook Tandoori Chicken: A Simple Guide for Beginners

How to Cook Tandoori Chicken: A Simple Guide for Beginners

YOU. Yes, YOU! Come here for a second. I need to tell you about something that’s gonna make you feel like a total kitchen rockstar. Tandoori Chicken! I know, right? Sounds fancy, sounds complicated, sounds like something you only get at restaurants. WRONG! My friend, you can make this at home, and it is NOT hard. Like, at all. It’s juicy, it’s got this incredible flavor, and it’s got that cool color that just screams “yum!” If you’ve never cooked anything more complicated than toast, you can do this. Pinky promise.

How To Cook Tandoori Chicken

Quick Chat: What’s Up With “Tandoori” Anyway?

So, the name “Tandoori” just comes from the Tandoor, which is basically a super hot clay oven they use in India. They marinate chicken in this amazing yogurt-y, spicy mix and then cook it crazy fast in there. That high heat and the marinade? That’s what gives it that special taste and smokiness. But guess what? Your regular oven or even your grill can totally nail this flavor at home. No special oven required! 🙌

Okay, What Stuff Do We Need? (The Shopping List!)

Don’t freak out, the list isn’t scary! You probably have a lot of this already.

  • Chicken: Grab maybe 4 to 6 pieces. Honestly, chicken thighs and drumsticks with the bone in are the BEST here. They stay SO juicy. If you only have breast, it’s okay, but the bone-in is just next level for this!
  • Yogurt: About a cup of plain yogurt. This is the secret sauce for tender chicken! Don’t skip this.
  • Lemon juice: Like, a squeeze or two, 1-2 tablespoons. Adds a little brightness and tang! 🍋
  • Garlic paste: Maybe a tablespoon? You can buy the little jars of paste, or just mince a couple of garlic cloves until they’re super super fine.
  • Ginger paste: Same deal, about a tablespoon. Jar is easy, or grate fresh ginger really finely.
  • Garam masala: Just a teaspoon. This is the magical Indian spice mix! You can find it in the spice aisle.
  • Ground cumin: 1 teaspoon. Classic!
  • Ground coriander: 1 teaspoon. Also classic, has a nice, almost citrusy flavor.
  • Turmeric powder: 1 teaspoon. This helps with the color and has a nice earthy taste.
  • Red chili powder: 1 teaspoon. This is where the heat comes from! Adjust based on how much spice you like! 🔥
  • Paprika: 1 teaspoon. Gives more color and a mild, sweet pepper flavor.
  • Salt: 1 teaspoon. Gotta season!
  • Vegetable oil or melted butter: Like 2 tablespoons. This is for brushing on the chicken while it cooks – keeps it moist and yummy!

Ingredients-For-Tandoori-Chicken

Let’s DO This! Making the Tandoori Magic Happen! 

Ready? It’s seriously just a few simple steps.

Step 1: Chicken Prep – The Little Secret!

Okay, first thing, give your chicken a rinse and pat it dry with paper towels. Now, grab a knife and make a few good, deep cuts – slashes! – right into the thickest parts of the chicken pieces. Don’t be gentle! You want that awesome marinade to really sink in there and flavor the meat all the way to the bone. This is a pro move! 😉

Step 2: The Marinade Party Bowl!

Get a big bowl out. Like, bigger than you think you’ll need, so you can mix easily. Now, just dump everything from the ingredients list (except the oil/butter) into this bowl: the yogurt, lemon juice, garlic, ginger, ALL the spices (garam masala, cumin, coriander, turmeric, chili powder, paprika), and the salt. Grab a spoon and stir it all together until it’s a smooth, beautiful, reddish-orange paste. It should smell AMAZING already! Give it a little taste test if you’re brave, and if you’re thinking, “Needs more heat!”, just add another tiny pinch of chili powder.

Step 3: Chicken’s Spa Day!

Okay, gently put your slashed chicken pieces into that bowl with the marinade. Now, get your hands in there (wash ’em first, obviously!) or use tongs, and make SURE every single piece is absolutely covered in that marinade. Get it into those cuts! Once they’re all beautifully coated, cover the bowl (plastic wrap is your friend here!) and put it in the fridge. Now, for the hardest part: waiting! Let it hang out in the fridge for at least 2-3 hours. If you can remember to do it the night before? DO IT. The longer it sits, the more flavor soaks in, and the more tender it gets. Overnight is seriously the best!

Step 4: Time to Get HOT! (Oven or Grill Time!)

When you’re ready to eat (yay!), preheat your cooking device! If you’re using your oven, crank it up to 400°F (200°C). If you’re grilling, get that grill heated up to medium-high heat. Both work great, just pick whichever feels easier right now!

Step 5: Let’s Cook This Yummy Chicken!

  • Oven Method: Grab a baking tray. PLEASE line it with aluminum foil or parchment paper. Trust me, cleanup is a breeze if you do this! If you have one of those wire racks that fits on the tray, use it! It helps the chicken cook evenly all around. Lay your marinated chicken pieces on the rack (or directly on the foil if no rack).
  • Grill Method: Carefully place the marinated chicken pieces right onto the hot grill grates.

Now, let ’em cook! This usually takes about 20-30 minutes total, depending on how big your chicken pieces are. You’ll want to flip them over about halfway through (so, around 10-15 minutes in). And hey, remember that oil or melted butter from the ingredients list? If you’re grilling (or even if you’re oven baking and want extra moisture/color), brush some of that onto the chicken every 10 minutes or so. It keeps it nice and juicy and helps with the color.

Step 6: Is It Done Yet?! (How to Tell!)

The best way to know for sure is to use a meat thermometer! Carefully peek under the lid/check the grill, and stick the thermometer into the thickest part of the biggest chicken piece (avoid hitting the bone!). You’re looking for it to read 165°F (74°C). Visually, it should look like that beautiful reddish-orange color, maybe with some nice little charred spots, and when you cut into a piece, the inside should be totally white and the juices should run clear.

Step 7: EAT IT! (And Enjoy the Applause!)

You did it!!! 🎉 Carefully get the chicken off the heat. Let it sit for just 5 minutes before serving – this lets the juices redistribute and makes it extra tender. If you have fresh cilantro, chop some up and sprinkle it on top. A little extra squeeze of lemon juice is also perfect! Serve your amazing homemade tandoori chicken with some warm naan bread, some rice, or a simple salad. Prepare for people to ask, “OMG, where did you buy this?!” 😉


You Can Watch Video As Well 

My Personal Top Secret (Okay, Just Good Advice!) for Nailing It!

Just a few things from my own kitchen adventures:

  • Bone-In IS Better for This: Seriously, the bone adds flavor and helps keep it moist. If you can get bone-in thighs or drumsticks, do it!
  • MARINATE LONGER! I know I said it, but it’s the biggest flavor booster. Plan ahead if you can and let it chill in that marinade overnight. Life changing.
  • Give Them Space! I know we already talked about it, but seriously, don’t overcrowd the pan/rack/grill. They need room to get crispy, not steamy!
  • Adjust the Spice! That chili powder is just a starting point. If you like things HOT, add more! If you’re nervous, start with less and you can always add a spicy sauce later.
  • Trust Your Gut (and a Thermometer): Once you make this a few times, you’ll get a feel for it. But the thermometer is always your best friend for knowing it’s safely cooked!

Quick Recap: You Got This!

See? Tandoori chicken at home is totally doable and SO rewarding. It’s mixing, waiting (the hardest part!), and then cooking. You don’t need fancy equipment, just some yummy ingredients and these simple steps. You’re going to make juicy, flavorful chicken that tastes incredible.

So please, please try this! It’s way easier than you think and tastes amazing. You’re going to love making this! Happy cooking (and eating!)! ❤️

You Can Check Our Recipes Category For More Recipes Click! (Go find your next kitchen adventure, champ!)

How Long To Cook Hot Dogs In Oven

How Long To Cook Hot Dogs In Oven

Let’s talk about hot dogs. I mean, who doesn’t love a good hot dog, right? They’re like, the ultimate comfort food – quick, simple, and just plain tasty. Most of the time, you probably boil ’em or throw ’em on the grill if the weather’s nice. But lemme tell you, cooking them in the oven? Mind. Blown. It’s unbelievably easy, way less messy than boiling, and they get this perfect texture that I am obsessed with. If you’ve never tried it, or if you’re just wondering exactly “how long do hot dogs go in the oven for?”, you are in the right place! Get ready to make some perfect oven dogs.

How Long To Cook Hot Dogs In Oven.

Why the Oven, You Ask? Let Me Tell You!

Okay, so grilling is great and all, but let’s be real, sometimes you don’t want to fire up the grill just for a few hot dogs. And boiling? Gets the job done, but it’s not exactly exciting. The oven? It’s got some secret superpowers for hot dogs!

  • Making a Bunch? Easy Peasy: Got a few hungry people? Or maybe you just really love hot dogs (no judgment!). You can load up a baking sheet with tons of hot dogs at once. Perfect for feeding the fam or getting ready for game night!
  • Perfectly Cooked Every Time: The oven gives them this nice, even heat. They get all juicy on the inside, and the outside gets this slightly firm, almost crispy bite that is just chef’s kiss.
  • Weather? Don’t Care! Rainy day? Snowing? Doesn’t matter! You can have perfect hot dogs any time of year without even going outside. Winner!

What Stuff Do You Need? (Spoiler: Not Much!)

You probably have all this stuff already. It’s THAT simple.

Stuff to Eat:

  • Hot dogs: As many as your heart desires (and can fit on a pan!).
  • Hot dog buns: (Optional, but highly recommended for the full experience!)
  • Your fave toppings: Ketchup, mustard, that weird neon green relish, cheese, onions, whatever makes you happy! (Optional, but crucial for customization!)

Stuff You’ll Cook With:

  • A baking sheet: Any one you have will do!
  • Aluminum foil or parchment paper: YES. Use this. Your future self cleaning the pan will thank you. 🙏
  • Tongs or a spatula: For flipping those dogs safely.

Got your gear? Let’s get cooking!

Your Super Simple, Step-by-Step Guide to Oven Hot Dogs!

Seriously, you are like, five minutes away from deliciousness once the ovenheats up.

Step 1: Get That Oven Warm!

First things first! Preheat your oven. Set it to 400°F (that’s 200°C). While it’s heating up, grab your baking sheet and cover it with aluminum foil or parchment paper. Seriously, do not skip this – cleanup will be a breeze later!

Step 2: Hot Dog Layout!

Okay, take your hot dogs and just place them on the lined baking sheet. Give each one a little space; they don’t need to be touching. If you’re thinking about toasting the buns (highly recommend!), just set those aside for a couple more minutes.

Step 3: Bake ‘Em! (Here’s the Time!)

Slide that baking sheet into your preheated oven. Now, How long? Usually 10 to 15 minutes is the sweet spot!

  • If you like them just heated through and a little soft: Check around the 10-minute mark.
  • If you like those slightly crispy edges (my fave!): Let ’em go closer to 15 minutes.

Crucial Move: Around the halfway mark (so, about 5-7 minutes in), use your tongs or spatula to give each hot dog a flip! This helps them get nice and evenly browned on all sides.

Step 4: Toast Those Buns! (Optional but Awesome!)

If you want warm, slightly toasty buns (and why wouldn’t you?), this is the time! In the last 2-3 minutes that the hot dogs are baking, just pop your buns onto the same baking sheet around the hot dogs. They’ll get perfectly warm and slightly toasted just as the dogs finish.

Step 5: Serve and ENJOY!

Ding! Timer’s off! Carefully (oven mitts, people!) take that baking sheet out. Grab those perfectly cooked hot dogs, pop ’em in their warm buns (if you’re using them), and load ’em up with ALL your favorite toppings! Ketchup? Mustard? A mountain of cheese? Go wild! Now, sink your teeth into that perfection. So good!

My Little Tips for Oven Hot Dog Greatness!

Want to take your oven hot dogs from “good” to “OMG, tell me your secret!”? Try these:

  • Give ‘Em Some Cuts: Before you bake them, make a few small diagonal cuts along the length of the hot dogs with a knife. They curl up slightly when they cook, get extra crispy edges, and cook just a tiny bit faster! Plus, it looks cool. 
  • Elevate for Extra Crisp: Got a wire rack? Put it on the baking sheet before you put the hot dogs on. This lifts them up so the air circulates all around, and they don’t sit in any little juices. Maximum crispness unlocked!
  • Cheese Please (Before Baking)! If you want melted cheese on the hot dog itself (not just shredded on top), add it during the last couple of minutes in the oven. Same goes for things like pre-cooked bacon bits you want to crisp up onto the dog.

How to Tell They’re Ready (Besides Checking the Time!)

Hot dogs are already cooked when you buy them, so baking is mostly about heating them through and making the outside nice. You’ll know they’re good to go when:

  • The skin gets a little plump and turns a light golden-brown color.
  • You might see tiny little bits of juice sizzling out of the ends.
  • They feel firm but still have a little give when you gently press them (careful, they’re hot!).
  • If you want to be super extra sure (totally fine!), you can use a meat thermometer. Poke one in the end – it should be at least 140°F (60°C).

What NOT to Do! (Learned These the Hard Way!)

Even something this simple has tiny pitfalls. Avoid these!

  • Skipping the Preheat: Don’t just shove ’em in a cold oven! Preheating makes sure they cook evenly.
  • Baking TOO Long: They will get tough and dry and sad. Stick to the 10-15 minute window and check on them!
  • Not Flipping: Seriously, flip them halfway through. One side will get way crispier than the other if you don’t!
  • Ignoring the Pan Liner: Just… no. Use the foil or parchment. Trust me.
  • Packing Them In: Give those dogs their space! Crowding means steaming, not baking.

Why Oven Hot Dogs Are Just… The Best.

Honestly, baking hot dogs in the oven is just the ultimate easy button. It’s perfect for those crazy weeknights, feeding a bunch of kids (or adults!), or just when you want a quick, satisfying meal without a lot of fuss. 10-15 minutes and you get warm, juicy, slightly crispy hot dogs ready for ALL the toppings. Pair them with some chips, a quick salad, or some baked beans, and you’ve got dinner sorted!

Final Verdict: Go Bake Some Hot Dogs!

Seriously, if you haven’t tried oven-baked hot dogs yet, you’re missing out on a little piece of culinary convenience heaven. It’s foolproof, fast, and gives you perfect results every time. The next time you’re thinking hot dogs, forget the pot of boiling water or messing with the grill. Just heat up the oven, pop ’em in, and get ready to enjoy. Happy hot dogging! 😉🌭

You Can Check Our Recipes Category For More Recipes Click!(Find your next kitchen adventure)

Our Website Pages  


Cooking Baking Recipes Home

Cooking Baking Recipes About Us

Cooking Baking Recipes Contact Us

Cooking Baking Recipes Privacy Policy

Cooking Baking Recipes Terms & Condition

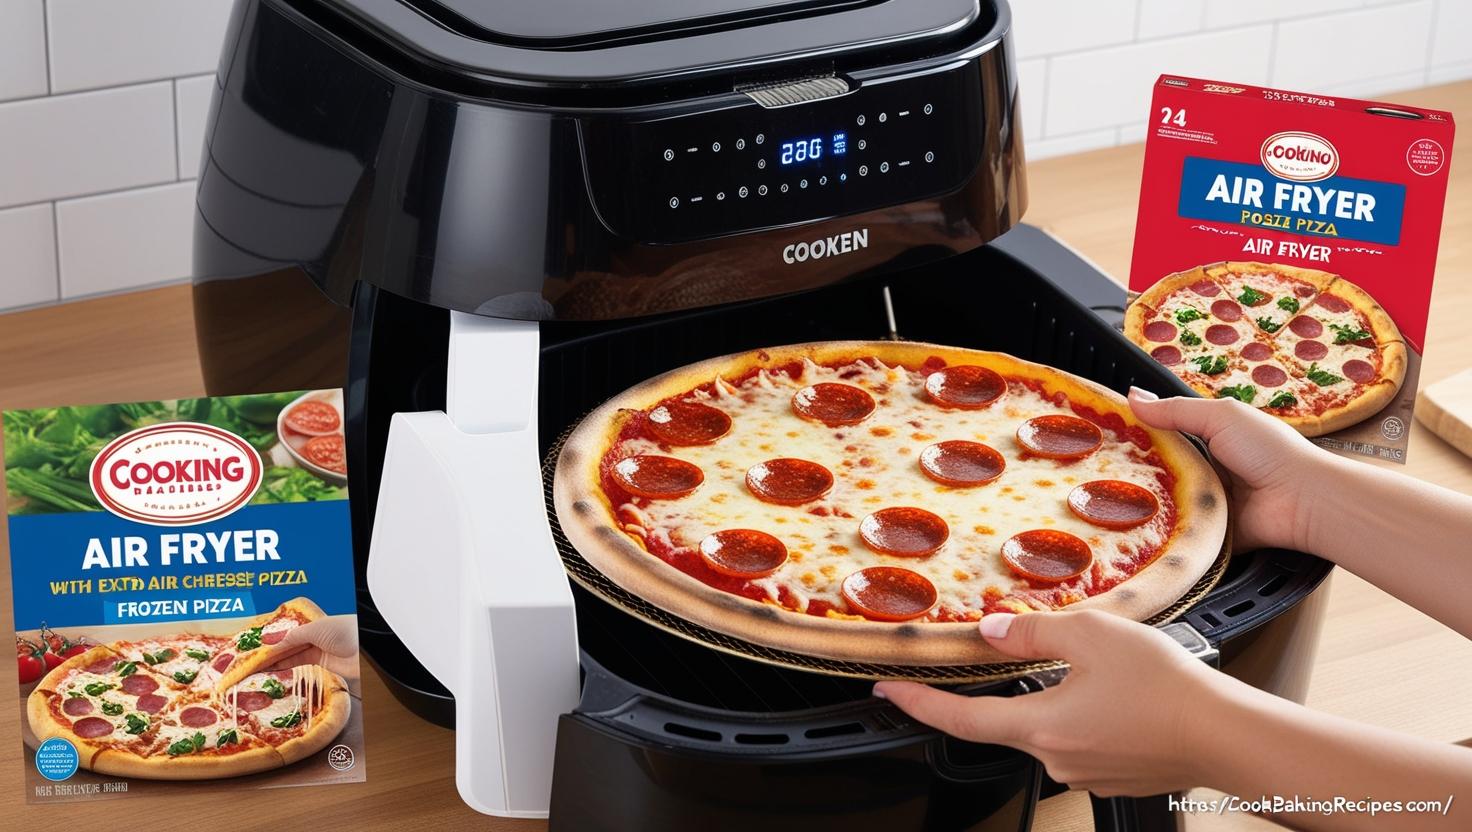
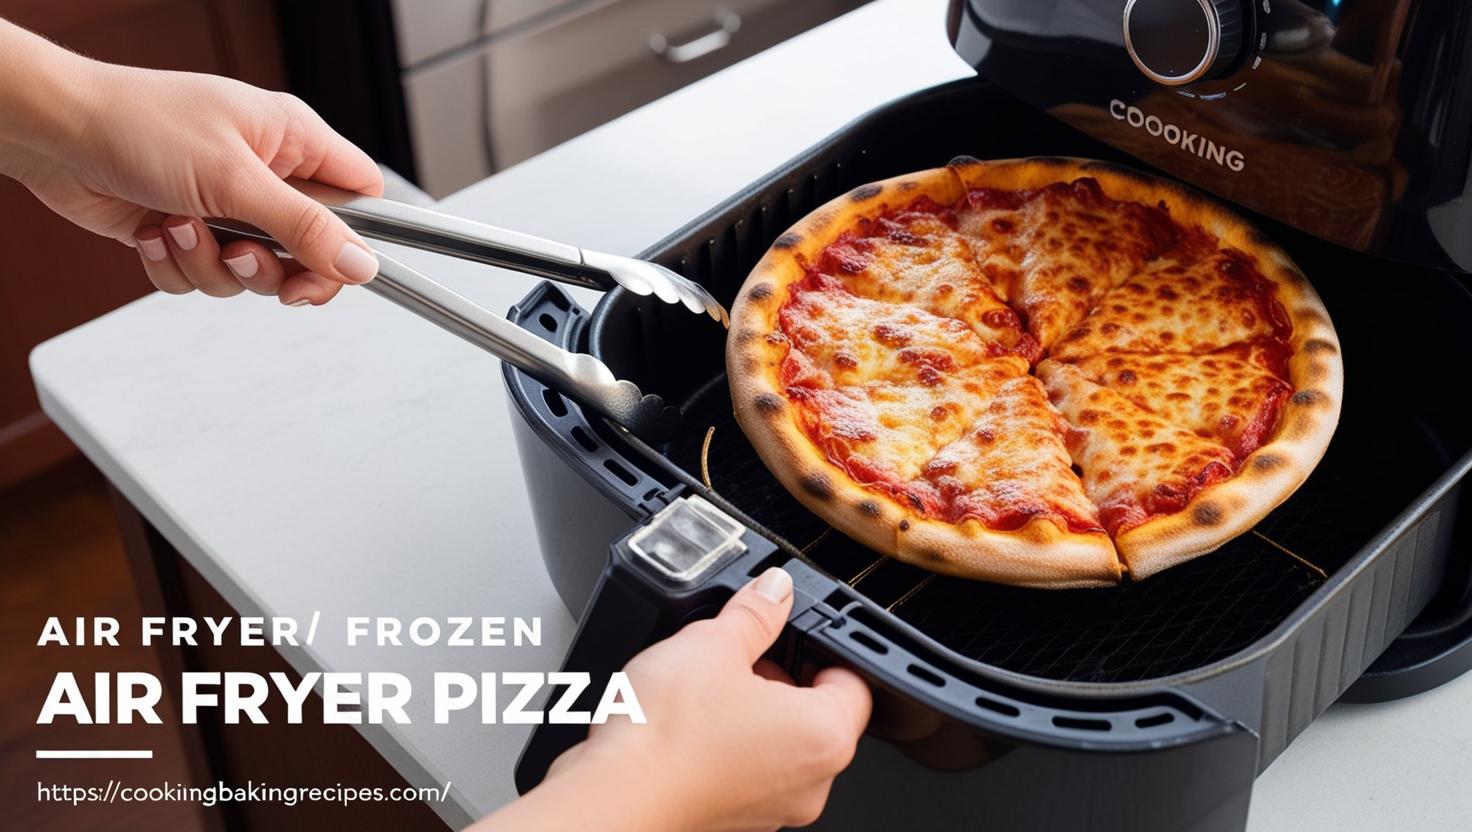
How Long To Cook Frozen Pizza In Air Fryer

How long to cook frozen pizza in air fryer?

If you love pizza but don’t want to wait forever for the oven, no problem! Using an air fryer is a quick and easy way to make this yummy treat. It doesn’t take long, and the crust becomes crispy while the cheese melts perfectly. If you’re hungry and ready for pizza, here’s how you can do it!

cooked frozen pizza
cooked frozen pizza

Why Use an Air Fryer for Pizza? 

The air fryer is awesome for cooking! It uses heated air to make food crispy and enjoyable. When you make pizza in it, you don’t need to preheat a big oven. It also takes less time, which is great if you’re really hungry. Plus, the cleanup is fast and simple.

This method is ideal for small pizzas, like personal-sized ones. It’s also perfect for reheating leftover slices and keeping them crispy instead of soggy.

What You Need 

Before you start, gather these items:

Ingredients:

  • A frozen pizza (choose the size that fits inside your air fryer) 
  • Optional toppings like extra cheese, pepperoni, or vegetables 
Ingradeint for fronzen pizza

Tools:

tools for fronzen pizza

Once you have these ready, you’re set to start making your cheesy treat. 

Steps to Make Pizza in an Air Fryer 

Step 1: Preheat the Air Fryer 

Preheating helps everything cook evenly. Turn on the air fryer to 380°F degrees and let it get hot for a little while. If your model doesn’t need preheating, you can skip this step. 

Step 2: Carefully place the Pizza in the Basket 

Takings the pizza outside of the box and the plastic it’s wrapped in. Carefully place it in the basket. Make sure it fits well and doesn’t overlap on the sides. If it’s too big, you may want to cut it into smaller pieces. 

Step 3: Set the Timer 

Set your air fryer timer for 6-10 minutes. The exact time depends on the size and thickness of the pizza. A smaller one will need less time, while a thicker crust might need more. 

Step 4: Check While It Cooks 

Halfway through, check the pizza. If it’s cooking unevenly, turn it carefully or rotate the basket. This helps the crust get crispy on all sides, and the cheese melts evenly. 

Step 5: Look for Melted Cheese 

You’ll know your pizza is all set when the cheese is bubbly and melted, and the crust is golden brown. Make sure it doesn’t overcook, as that could make the edges too hard.

Step 6: Remove and Cool 

Once it’s done, use a spatula   or tongs  to take the pizza out. Put your pizza on a plate and wait a little while before you eat it. It needs to cool down a bit!  Remember, it will be very hot!

Tips for the Best Results 

  • Don’t Overload With Toppings: If you add too many extra toppings, the pizza might cook unevenly. Stick to light add-ons. 
  • Use a Lower Setting for Crispier Results: If you like a crispier crust, you can lower the temperature to 360°F and cook it a little longer. 
  • Cook in Batches if Needed: If you’re making more than one pizza, cook them one at a time. This ensures each one gets even heat. 
  • Add Cheese Late: If you love extra cheese, sprinkle it on halfway through cooking. This stops it from overcooking. 

you can watch video as well

 Common Mistakes to Avoid 

Even though an air fryer makes cooking easy, here are some mistakes to watch out for:

  1. Crowding the Basket: For a frozen pizza, the air fryer works best when there’s space for air to flow. If you put too much stuff in the air fryer, it won’t cook everything evenly.
  2. Skipping Preheating: Starting with a warm air fryer ensures improved results. 
  3. Cooking Too Long: Check your pizza often so it doesn’t burn. It’s okay to cook it a bit more, but don’t let it get too brown.
  4. Not Rotating or Flipping: If the crust cooks faster than the top, rotate it gently to fix this. 
  5. Using Pizza That’s Too Large: Make sure your pizza fits inside safely. If it’s too big, try cutting it into smaller pieces before cooking. 

How Long Does It Take to Cook? 

Heating pizza in an air fryer usually takes 6 to 10 minutes. Small, thin pizzas will be ready sooner, while thicker ones or those with more toppings might take longer. Checking on it halfway is always a good idea to get it just right.

Why You’ll Love This Way 

Pizza in an air fryer is super fast, easy, and mess-free. You won’t have to wait for your oven to preheat, and the pizza turns out crispy and delicious. Plus, since the air fryer uses less energy than an oven, it’s great for saving time and effort. The result tastes like a mini pizza shop right in your kitchen! 

Pair It With Fun Sides 

Want to make your meal even better? Serve your pizza with some fun sides like:

  • Garlic breadsticks 
  • A small salad 
  • Mozzarella sticks 
  • Veggie sticks with ranch dip 

And don’t forget your favorite drink or dessert for a perfect meal. 

Final Thoughts 

It’s easy and enjoyable to make pizza in the air fryer! It’s a great way to enjoy a quick snack or meal without any fuss. Whether you’re in a hurry or just love the crispy crust this method gives, it’s worth a try. Follow these easy steps, and you’ll have a tasty pizza ready in minutes. 

Next time you’re hungry, grab your air fryer and your favorite pizza. Love every bite and share it with your family and friends. Happy cooking! 

You Can Check Our Recipes Category For More Recipes 
Click!

How To Cook Frozen French Fries In Air Fryer

How To Cook Frozen French Fries In Air Fryer?

It has never been so easy to make crispy, golden-brown fries. The frying machine will allow you to make tasty and quick snacks with little oil. You can fry them faster and more healthily than you would by deep-frying. With this guide, you can make delicious fries whether they are for your family or just yourself.

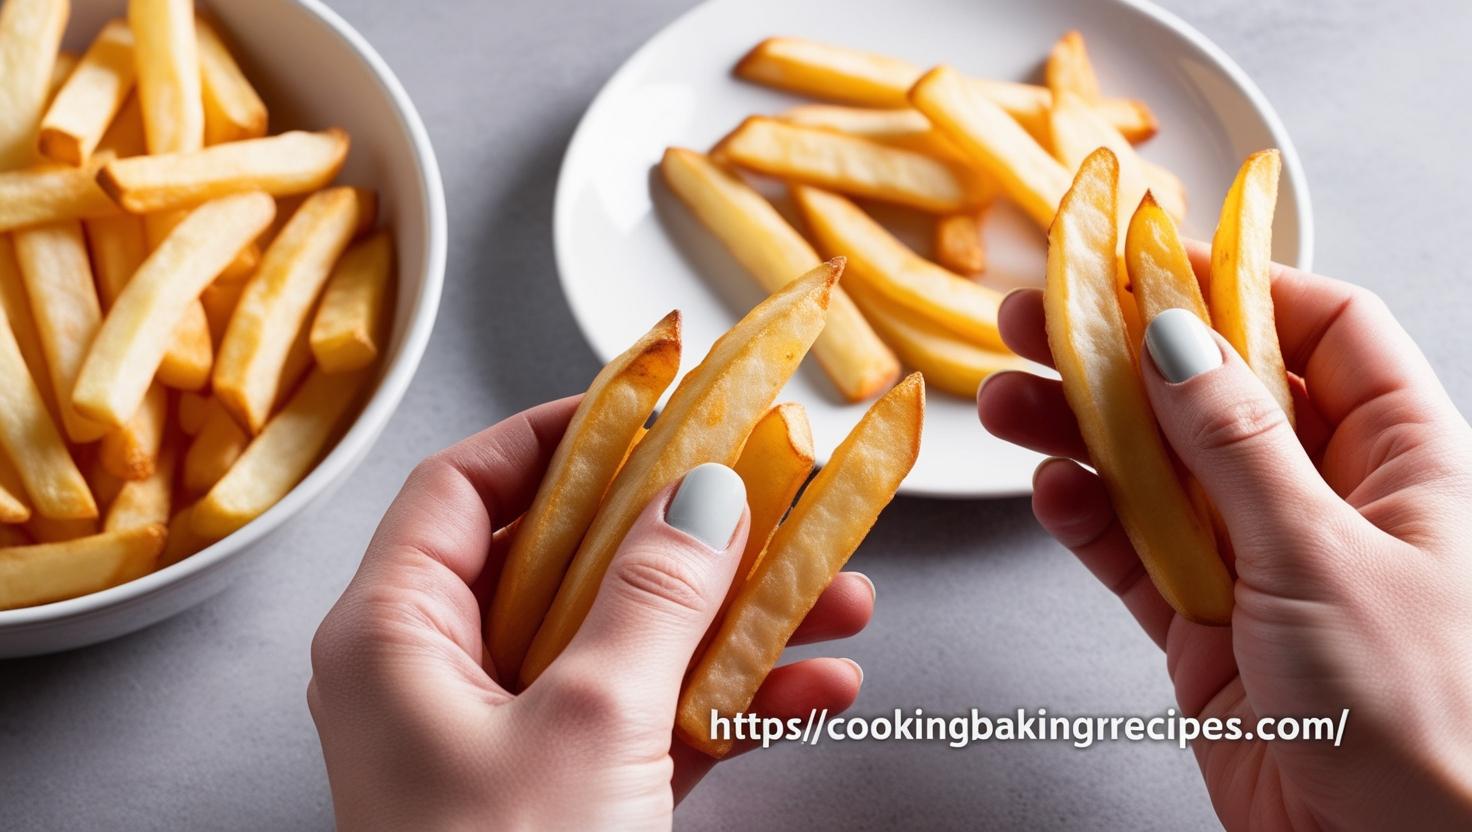
cooked frozen french fries

Why Use an Aerofryer?

The air fryer makes a great kitchen gadget. Food is cooked using hot air, so it doesn’t need much oil. The crunch that you crave is now possible with less grease. The design is intuitive, allowing for effortless use. Detachable pieces and non-stick surface make it easy to clean. The oil does not have to be heated up.

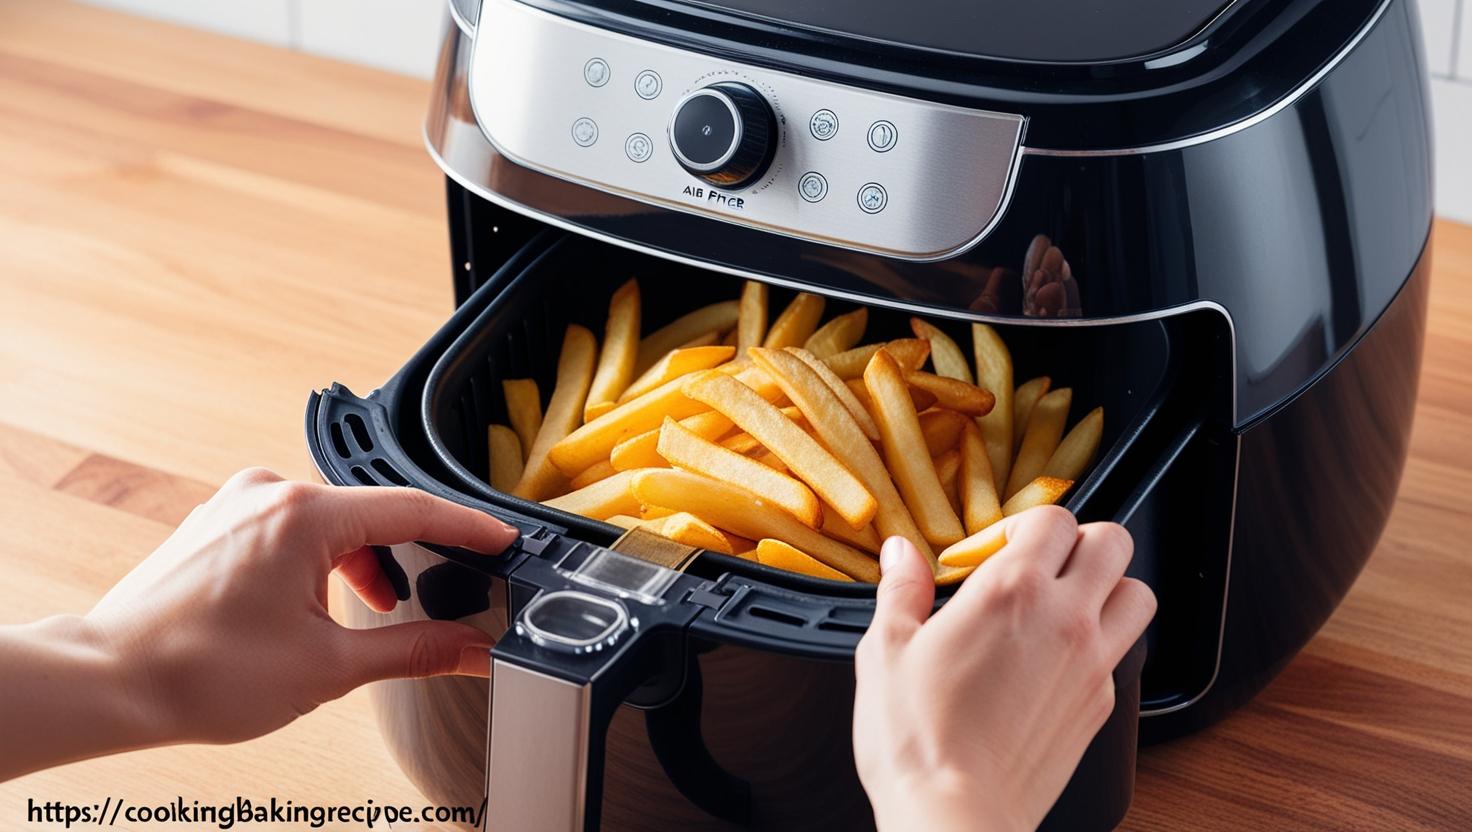
how to cook frozen french fries in an air fryer
air fryer

Why You Need

Gather everything you will need before starting to cook:

Ingredients:

This bag of frozen potatoes strips contains:

A minimal amount of oil, cooking sprays or other non-stick products can be used.

Use salt or seasonings as desired

Tools:

air frother

Tongs or a spatula

The time has come to start your project!

Step by step instructions


Step 1. Preheating the air Fryer

Preheating the fryer helps to cook them evenly. For 2-3 minutes, preheat the frying machine at 400degF. It will warm up while you prepare food.

Step 2: Lightly Coat Basket

You can spray a thin layer cooking oil into the fryer’s basket. If you spray the fryer basket with oil, it will keep fries from sticking. To spread the oil, you can also use paper towels if there is no spray.

Step 3: Add your Fries

The potatoes should be placed in the basket. You don’t want to pack them too tightly. Don’t overcrowd your basket. It will lead to suboptimal results. The air will circulate better if you spread them apart.

Set the timer

Cook at least 10-15 minutes. Remove the basket carefully from the air fryer at mid-cycle and shake it gently. This will ensure an even browning and cooking of French fries. This ensures the food cooks uniformly and gets maximum crispiness across all surfaces.

Step 5: Make sure you have enough food and cook it more, if needed

You can check after 10 minutes to see if your fries are golden-brown and crispy. If the potatoes need more time to cook, add another 2-3 minutes. Always check to be sure that the food doesn’t burn.

Step 6: Add the Seasonings

Once the French fries are done cooking, carefully remove them from their air-fryer basket. Transfer the French frites to a serving platter. To add more flavor you can also sprinkle on some parmesan, paprika or other spices.

Step 7: Enjoy!

Serve these hot with sauces that include ketchup and ranch dressing. The perfect snack for chicken nuggets and fish sticks or as a side with burgers.

you can watch video as well

The Best Fries

  • To get the best results, start by preheating your fryer.
  • Half-shake the basket: This ensures all of your pieces get crispy.
  • Do not use thick layers. Cook small batches in order to prevent soggy potatoes. When cooking in large quantities, it is best to do several rounds of cooking. This will ensure a consistent product and reduce the chances of overcrowding your frying basket.
  • Apply a Light Coating of Oil for Extra Golden Fries. Not much is needed–just one teaspoon or a spray.
  • Don’t Forget Seasoning:Get Creativity with Flavors Garlic powder and chili powder are great options.

Avoid These Mistakes

Even though they are simple, there can be a number of things that go wrong. You should be on the lookout for:

  1. Too many Fries in the Basket at Once:Don’t overload your basket. This will prevent the airflow required to cook fries evenly.
  2. Skipping the ShakeIf it isn’t shaken before putting the fry basket in the oven, some of the fries could stay soft. Others may be overcooked.
  3. Start off with a Fryer that is Cold:Preheat always. You can cook your food in just two minutes.
  4. Never check your fries: Perfect fries can easily turn to burnt fries. Be sure to keep an attentive eye on your food for the last couple of minutes.
  5. Too Little Oil: Using a little too much can result in greasy fries instead of crisp ones. Air fryers are easy to use.

When Does It Take to Complete?

The length of time it takes to cook fries depends on their thickness and whether you prefer them crispy or not. Shoestring cuts cook faster while thicker slices take longer. The average cooking time is 10-15 minutes. Cooking time can be extended by up to two minutes for a better crispiness. Watch the cooking process closely to prevent any burning.

You Will Love this Method

An air fryer makes it easy to prepare healthy and delicious fries. The fact that you use less oil means you can reduce the amount of calories you consume and also save some time. Additionally, this is a better option to deep fry. This is great for kids as well as adults.

Pair Them With Other Foods

Find out what pairs well with fries. Why not pair fries with?

  • Enjoy chicken tenders
  • Burgers
  • Hot dogs
  • Fish fillets
  • It’s possible to have eggs and bacon for breakfast.

The French fries are best accompanied by a wide variety of dipping condiments. Some options include classic cheese, honey mustard and sriracha for a sophisticated touch.

Final Thoughts

Making crisp fries in the air fryer with your is fun, easy and super simple. No advanced cooking knowledge is required to produce successful results. If you have a little patience and follow a few simple tips, it is possible to get the crispy crunch without a lot of grease. If you crave something delicious the next few times, use your air-fryer to try this recipe. This recipe yields an incredibly versatile dish, which is both flavorful and fast.

You Can Check Our Recipes Category For More Recipes 
Click!

How Long To Cook Hamburger Patties On Cuisinart Grill

How Long To Cook Hamburger Patties On Cuisinart Grill

Grilling can be a great way to prepare food. This is especially true when you are making burgers. Our guide will show you how to get the perfect burgers every time on a Cuisinart grilled. It will guide you in the right direction, step by step.

Hamburger Patties on a Cuisinart Grill

Start Your Grill

Be sure to clean your grill prior to cooking. Make sure your grill is clean. Brush off any bits of leftover food. To begin, turn on your Cuisinart Grill and allow it to heat. To cook your food evenly, you need a heated grill. Use the dials to set it at medium. It’s best to wait until the temperature is high enough for a water droplet to sizzle.

Tip Make sure to spray cooking oil or spray a few drops of cooking cream on the grates before you cook. This will prevent your food from sticking.

How To Prepare Burger

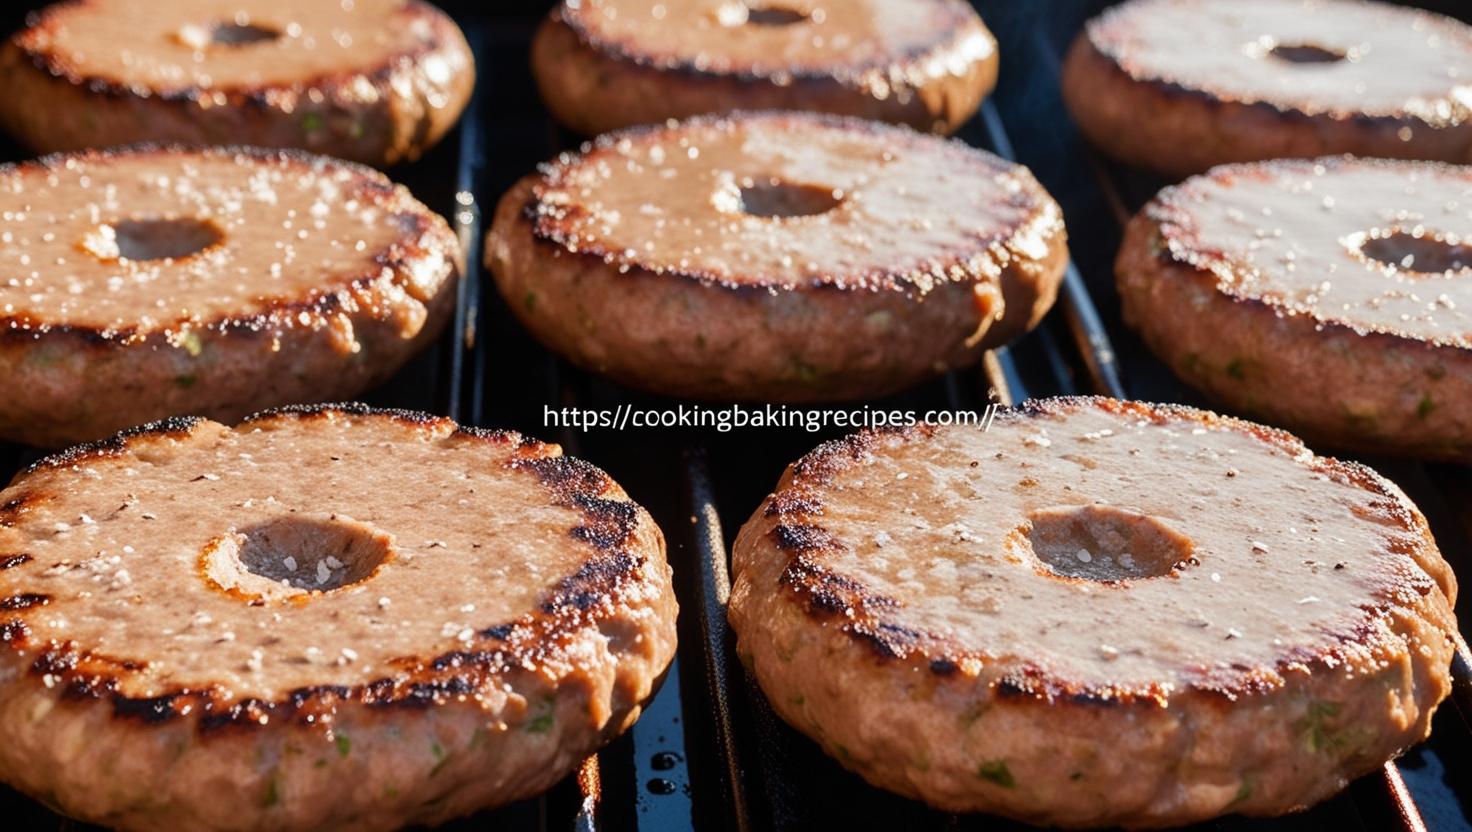
To begin, shape your burgers into round, evenly shaped pieces. These are called patties. They should be about the same thickness as a pack of cards. This will ensure even cooking. Your thumb can be used to poke a hole through the middle of every patty. The little trick allows them to remain flat as they are cooking. Remember to salt them and sprinkle some pepper on top!

No need to fret! It’s fine to place the patties directly on your grill. They will take a bit longer to cook if you give them more time.

pieces of patties
pieces of patties

The length of time to cook each side

As soon as your BBQ heats up and the burger is done, you can place it onto the surface. If you want to maintain the heat, close the lid of the grill while cooking. Here is the time needed by each side for various levels of doneness.

  • Rare After cooking for 2 or 3 minutes on the one side of your grill, turn over the griddle and continue to cook it for a further 2 minutes.
  • Medium Flip it and grill for 4 further minutes.
  • Cooked: Turn the patties and grill them for a further 5 minutes.

Be aware that times will vary depending upon the thickness and heat of the BBQ. In case you’re not sure, you can use a food thermometer. It is safe to cook beef at 160degF.

Hint: When grilling burgers, avoid pressing the burger down. By doing so, you will squeeze out all the delicious juices from your burger.

you can watch video as well

How to Flip

Flipping your burgers can be a huge moment. To flip the patty, use a heavy spatula. Do not flip it over. When the bottom of your burger is nicely browned, flip it. If you are too quick to start moving it, it may become stuck to the grill.

Rule-of-thumb: Turn your patties just once during the cooking process. If you flip your patties too often, they can lose their shape.

The Best Way to Flip

The Best Way to Flip

Safety Guidelines for Cooking

Securing meat is an important aspect of cooking. Ensure that the burgers you serve are fully cooked. Unsafe to eat is a burger that looks raw in the middle. A thermometer can help you determine if the food is safe to eat.

It is safe to use beef or poultry meat that has reached 165 degrees Fahrenheit. You should always wash both your hands and the utensils you use after touching any raw meat.

Top with Cheese or Toppings

For a delicious cheeseburger, you can add a few slices of cheese in the last couple of minutes. To melt the cheese to gooey perfection, you can cover your grill.

Do you want to raise the bar on your burgers still further? Special toppings can be added to burgers. These include grilled lettuce, tomato, pickles or onions. To add flavor, spread some mayo on top of your buns.

The Best Way to Check if It Is Complete

It’s ready for eating when your burger has an attractive brown exterior and its juices flow clear. Use a temperature gauge to achieve the desired results. 160degF should be your target. It is perfectly safe to cook burgers at 160degF. They are also deliciously juicy.

Cleaning Up

When you’re done, clean the grill. Let it cool down and then scrape gently any residue. Cleanliness will help it to last longer, and make it easier for you to use it next time.

A Final Thought

Cuisinart makes grilling easy and enjoyable. If you follow these simple tips, your guests and family will be impressed with the perfectly cooked patties each time. No matter if you prefer your patties rare, cooked medium, or done well, patience is the key. Then get out there and grill!

You Can Check Our Recipes Category For More Recipes 
Click!


How Long To Cook Nachos

How Long To Cook Nachos?

It’s easy and delicious to prepare at home. Perfect for movies, parties, and even a quick snack. The time it takes to make nachos can be a concern for those who are just starting out. Don’t worry! It’s easy to learn with this guide.

How Long to Cook Nachos
Nachos

What Are Nachos?

It is a delicious dish that consists of tortilla chips covered in melted cheese. You can add toppings, such as fresh vegetables or meat, to customize your nachos. This is a favourite for casual parties, such as game nights.

When Do You Need to Work?

The process of making nachos can be done quickly and easily. Even if you cook nachos by baking in an over, or using a microwave oven, they only take about 10 to 15 minutes. For sure, cooking times will differ depending on how many toppings or methods you are using. Oven is best for a crispy and evenly browned plate.

Step-by-Step Guide to Make Nachos

This is how to prepare delicious nachos with just a couple of minutes.

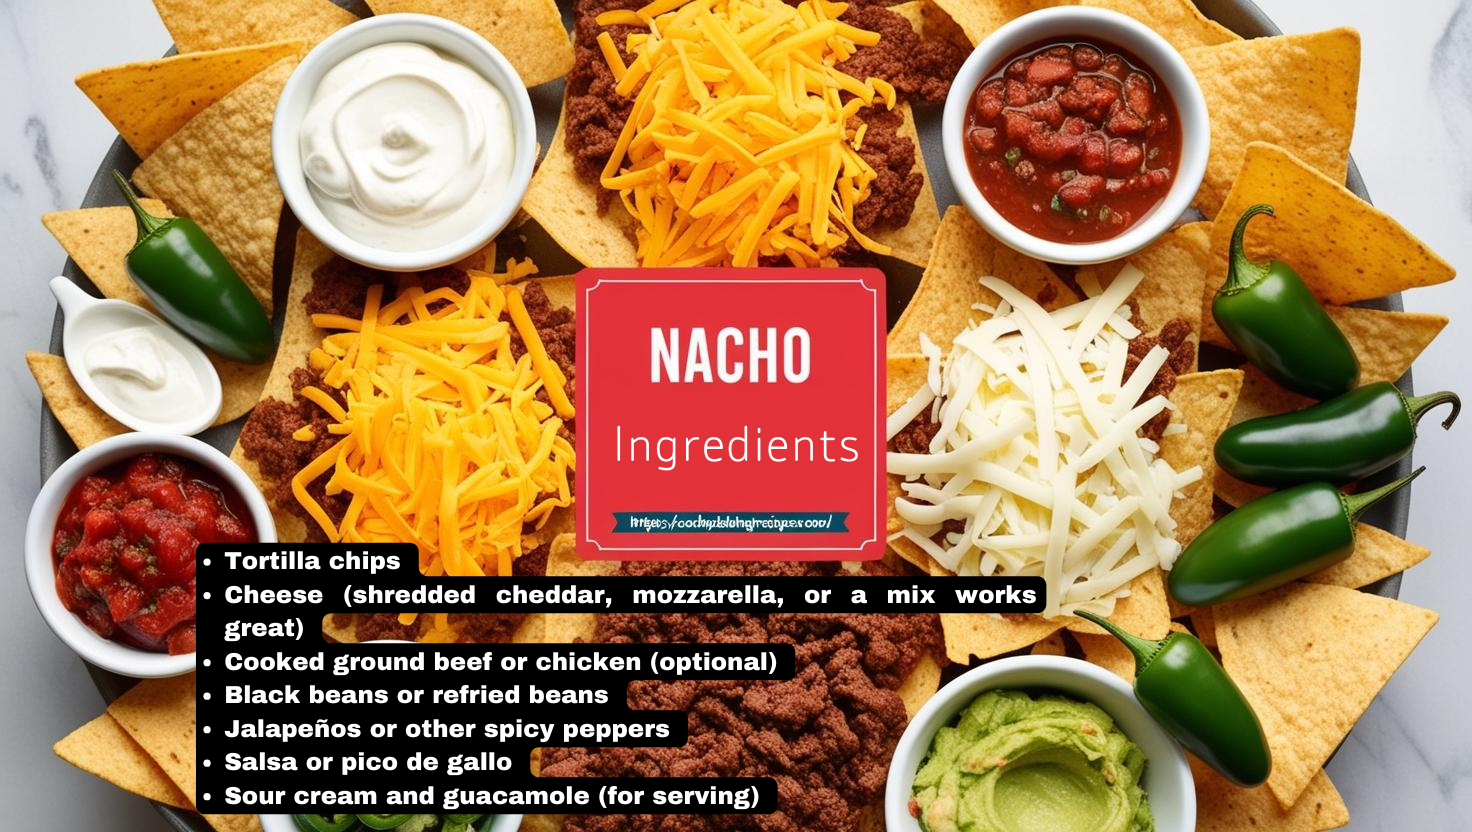
1. The Ingredients

Before you start, gather all the materials that you will need. Check out this simple checklist:

  • Tortilla chips
  • A cheese mixture (shredded cheddar and mozzarella works best)
  • Ground chicken or ground beef cooked (optional).
  • Beans or black beans
  • Jalapenos (or other spicy peppers)
  • Salsa or pico de gallo
  • Sour cream and Guacamole
Ingredients that are used to cook Nachos

Pro tip: Fresh ingredients always taste better, so try to use high-quality cheese and toppings.

2. How to Lay out the Chips

Choose a large dish that can be used in the oven. Keep the crumbs from piling up. Avoid overlapping them too much. The toppings will be evenly distributed on every chip.

3. Add Toppings

Starting with the Cheese Then, generously sprinkle the cheese on top. Then add the extras of your choice, whether it’s cooked meat, bean or vegetable. If you pile it too high, your chips will get soggy.

4. Bake or Microwave
  • Oven method: Place nachos tray in preheated (350degF) oven. It takes about 5-7 minutes to melt the cheese and get it bubbling and gooey. Keep an eye on them so that they do not burn.
  • The Microwave Method If in a pinch, microwavable the nachos high for 1 to 2-minutes. Check to see if the cheese has melted evenly.

The best results are usually achieved by using the oven. You can make the tortilla chips crispier while heating all of the toppings.

5. Enjoy Cold Toppings

Finish the nachos with cold toppings. You can use salsa, sourcream avocado or fresh herb. Because they’re fresh, these ingredients make food taste better.

6. Enjoy and Serve

The nachos you made are ready. The cheese will still be melted and gooey, so eat the nachos as soon you can! It’s best to consume them fresh. Leftovers will keep in your fridge for one or two days.

Tips for Amazing Nachos

  • Layer With Care : If you want to ensure that each bite contains the perfect combination of toppings and ingredients, it is best to stack chips, cheeses, or other ingredients on multiple levels instead of piling all your ingredients onto the top.
  • The Right Cheese: Certain cheeses melt better. Monterey Jack cheese and cheddar work great. Mozzarella makes a tasty addition but is not very flavorful.
  • Pick Crunchy Chips– Use chips thicken enough to hold your toppings. Chips that are too thin may crumble or become soggy.
  • Be careful not to overload. A lot of toppings such as beans or salsa will make the tortilla chips soggy. Keep them to a minimum.

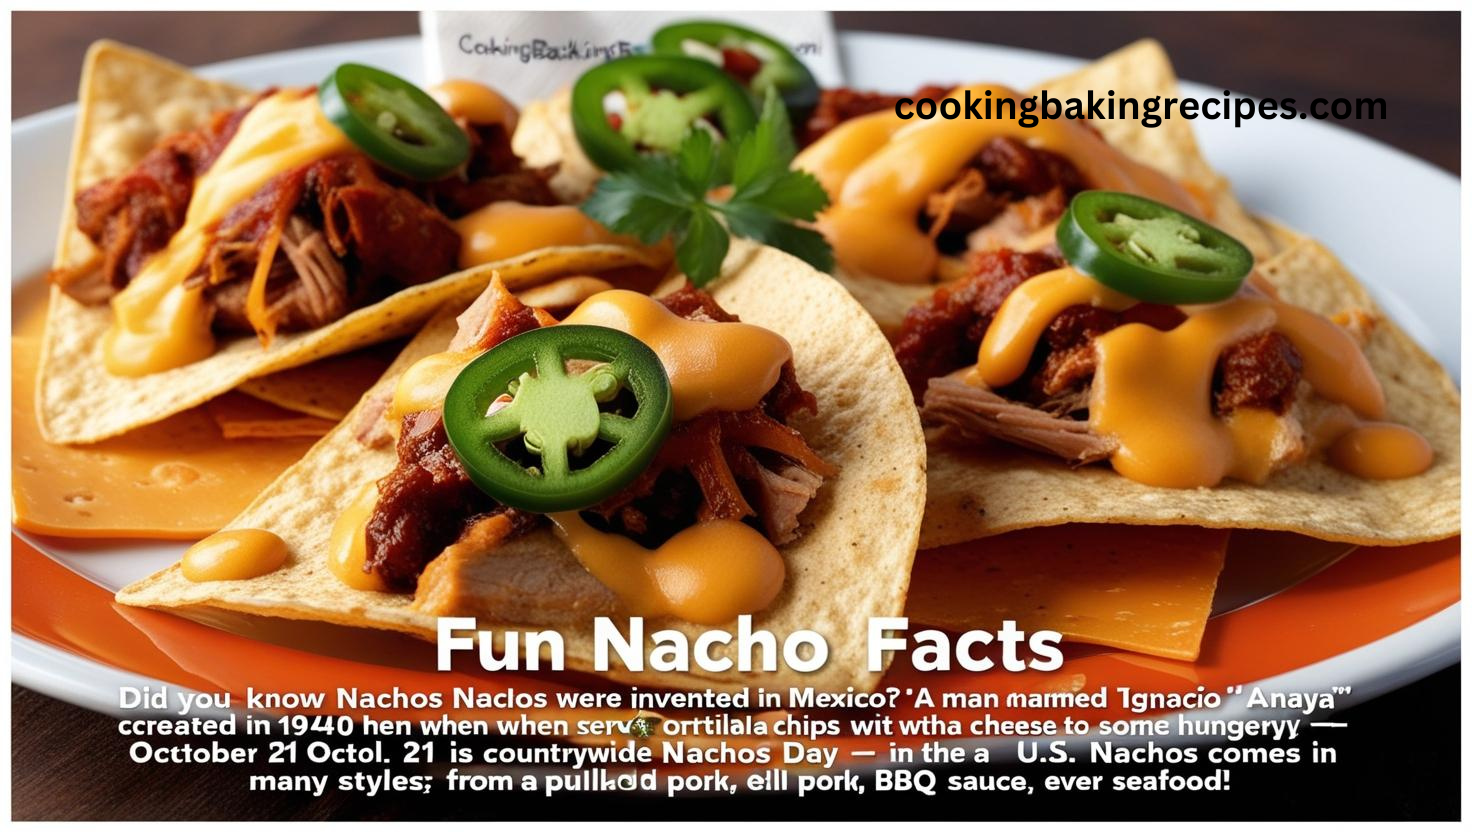
Fun Nacho Facts

  • You may not know, but nachos came from Mexico. Ignacio Anaya aka Nacho created Nachos back in 1940 after he gave tortilla chips and some cheese to hungry clients.
  • Countrywide Nachos Day occurs on the 21st October in the U.S.
  • Many different types of nachos are available, including those made with pulled-pork, BBQ sauce and seafood.
These are some fun facts about nachos
These are some fun facts about nachos 

Common Questions 

Is it possible to prepare nachos in advance?

Nachos should be prepared fresh. It is possible to prepare the toppings for your nachos before baking them. It’s best to keep cold foods separate and only serve them when you are ready.

How Do You Reheat Nachos?

Reheat leftover nachos at 350degF in the over for about 5-7 mins. You should avoid using the microwave because it will make the tortilla chips mushy.

Are Nachos Healthy?

The traditional nachos are high in calories. However, you can create healthier versions. Add fresh veggies, low-fat cheese and baked chips. Also, black beans and avo add nutrients without compromising flavor.

What Is important about the cooking time?

When you cook nachos correctly, they will have the perfect texture. Overcooked nachos might burn or turn too hard. The cheese may remain unmelted in undercooked nachos. It’s important to have every bit warm and happy.

The time you need to bake your chips is 5 to 10 minute at 350degF. This allows for the cheese and toppings to be heated without causing the chips to become overcooked.

Get Creative

Nachos are the coolest because you can add anything to them. The ingredients can be changed to suit your taste. Here are a few fun ideas.

  • Consider using sweet potatos instead of chips.
  • Shredded BBQ chicken will make this dish taste smoky.
  • The topping is a delicious Mexican street corn! Enjoy the cheese and lime!

They are limitless!

Considerations

This is a quick and fun way to enjoy nachos. You can prepare the snack in just a few seconds, either by using the oven or microwaving. Following the instructions and tips will result in a delicious plate of crispy nachos. Share it with your buddies? It’s up to you! Your choice!

Make nachos next time. The smoothness of the nachos is amazing!

You Can Check Our Recipes Category For More Recipes 
Click!

How Long To Cook Cheesecake

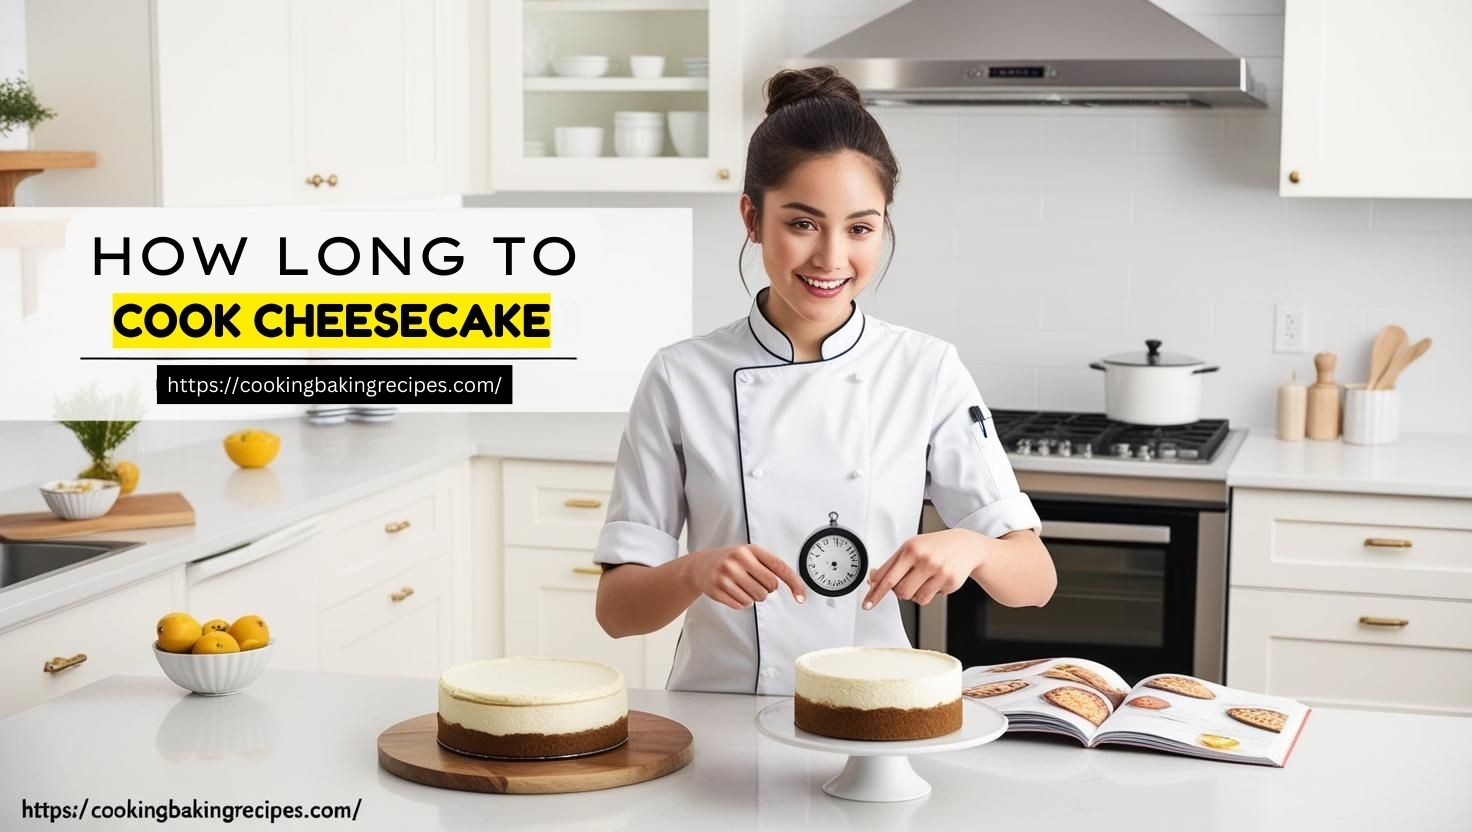
How Long To Cook Cheesecake? You can follow this simple guide.

It’s one of the best desserts you can eat! The creamy centre and crust are sure to be a hit with everyone. It’s the best place to find out exactly how to do it! Step by step, we will show you how to make the best cheesecake. Do not worry! This isn’t as difficult as you think.

How long to Cook Cheesecake - Beginners Guide
Discover the most perfect way of how to cook cheesecake


Get Started With Cheesecake

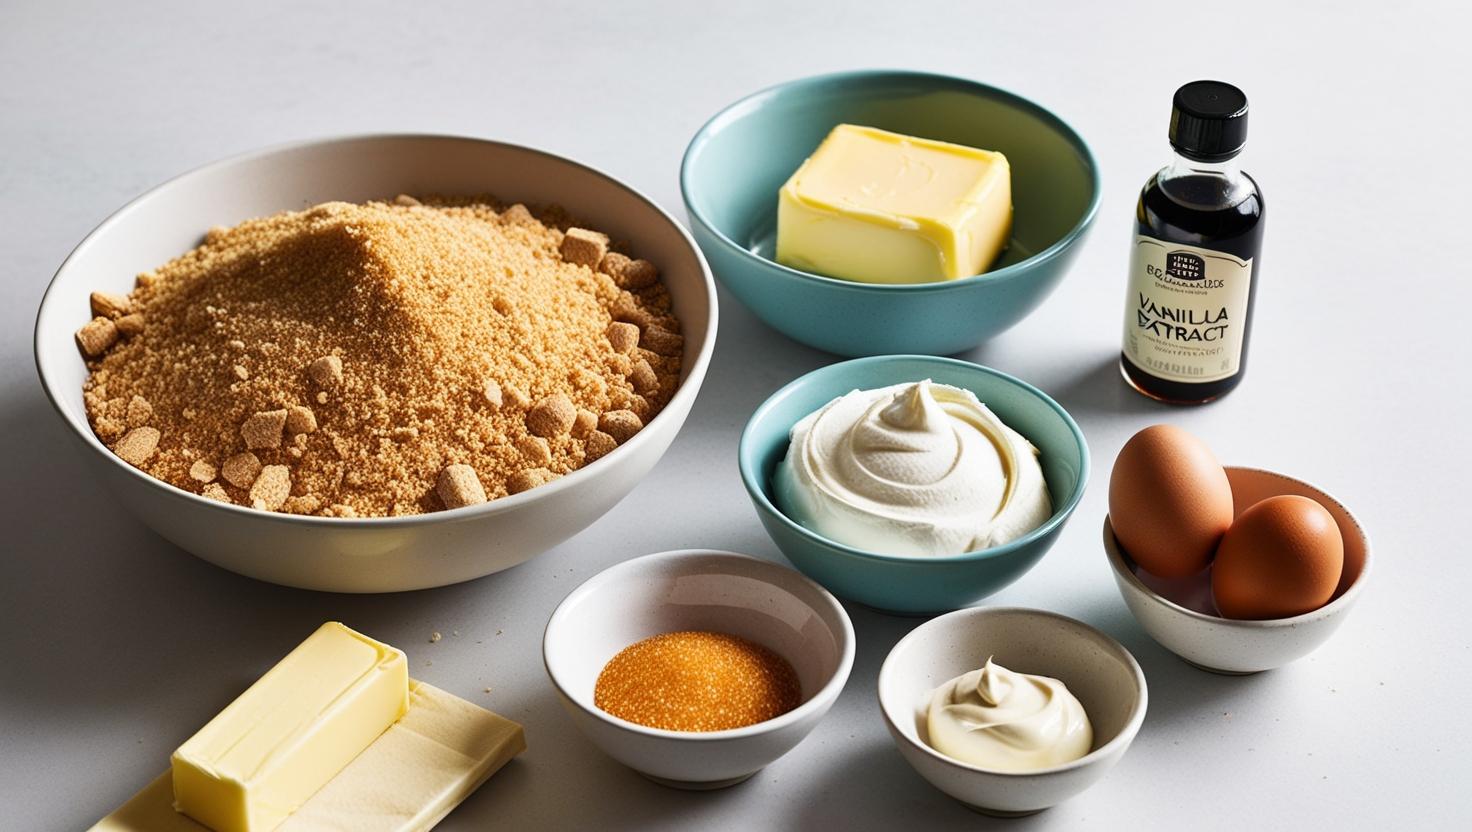
Check that you have everything you need before baking. Check out this quick list for some tips on getting ready.

Ingredients:

  • The crust can be made with crushed biscuits or Graham crackers
  • Melted butter
  • Cream cheese, the main ingredient!
  • Sugar
  • Eggs
  • Vanilla extract
  • Cream or heavy cream for that creamy look
Ingredients needed to make cheesecake

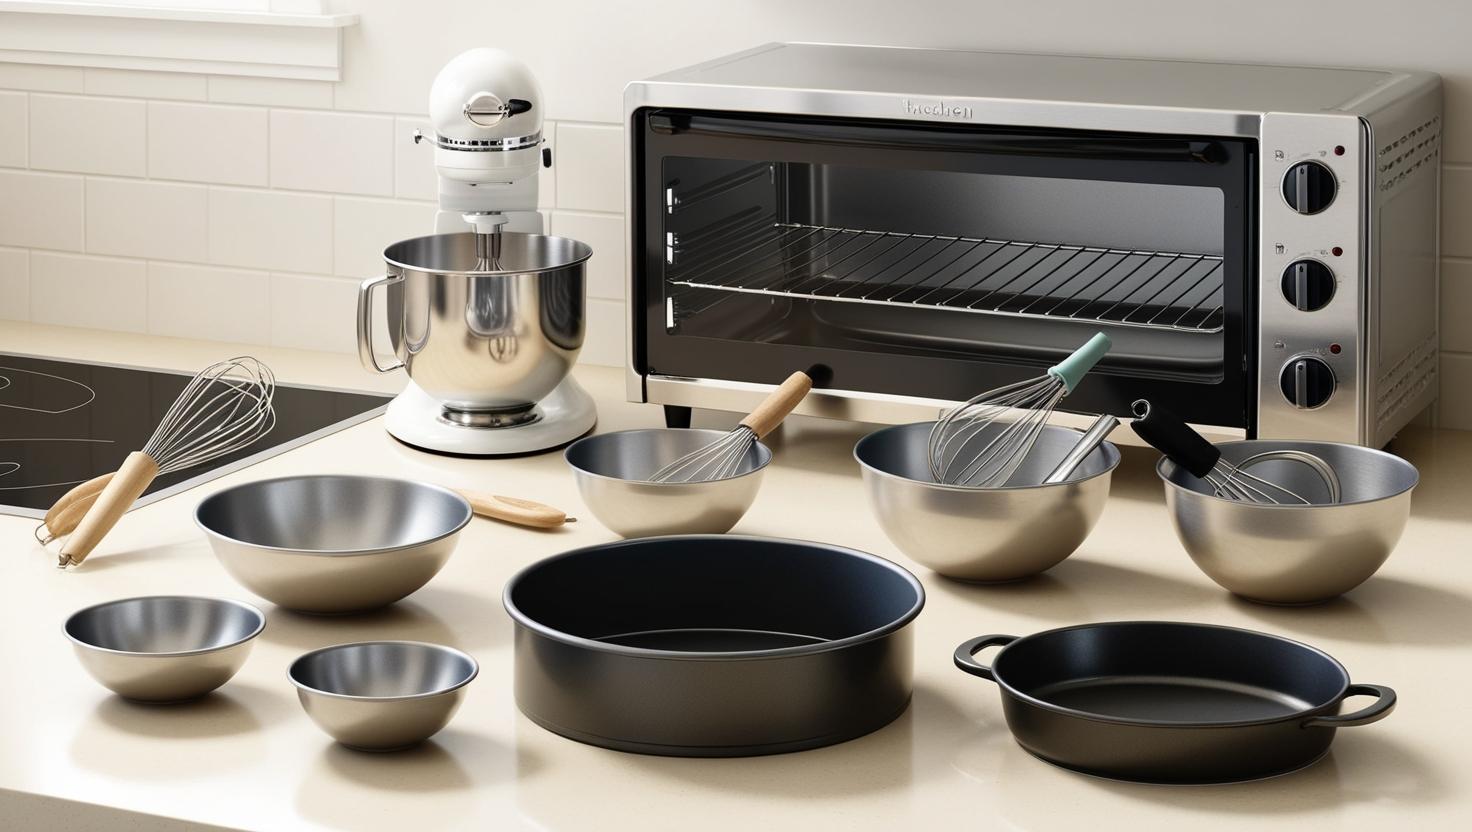
Tools:

Tools
Tools

Now that you’re set, it’s time to talk about baking times and techniques!

How long should you cook a cheesecake for?

How long it takes to bake cheesecake depends on its type and how hot your oven is. Most of them are cooked between 15 minutes up to one hour. Do not just forget the timer! Bake it with care, as baking is both science and an art. This is the perfect time to make sure it’s not over-cooked but still fully cooked.

This is a brief guide on the various baking styles, including their times.

  1. Traditional New York Cheesecake
    This kind is gooey and thick. Set your oven at 325degF. For about 50-60 minute, bake the dessert. While the edges of the dessert should appear cooked, it should still shake a little when you move it.
  2. No bake cheesecake
    Surprise! Many cheesecakes do not require an oven. To set, you can leave the creamy mix to chill in your fridge overnight or for a couple of hours. This recipe is equally delicious even if you skip the baking process.
  3. Mini Cheesecakes
    Making smaller batches will only take 20-25 minutes when you are at 325degF. The perfect treat for parties, or whenever you just want to have a sweet snack.
  4. Water Bath Cheesecake
    This gives you a very smooth treat. Set your cheesecake dish in a larger pan of hot water, about half way up the sides. Bake it at 325 degrees for approximately an hour. It gives a glossy look because the water prevents cracking at the edge.

You now know how to prepare a cheesecake that is delicious.

Easy Tips to Make a Perfect Cheesecake

The recipe for this sweet treat is not easy to bake, but by following these simple tips you will be able to do it with ease!

1. The Crust should be Prepared with Care

Like the base of any house, it holds everything together. Combine crushed biscuits or crackers with butter and press firmly into your pan. Add the filling after baking for 10 minutes. Your crust will remain crispy.

2. The batter shouldn’t be over-mixed

Do not overmix the batter. Overmixing can add too much air to your cheesecake, which could cause it to crack during baking. Once the mixture becomes smooth and creamy stop mixing.

3. Use Room-Temperature Ingredients

The cream cheese and eggs should be taken out of the refrigerator an hour or so before cooking. It is easier to mix soft ingredients, which gives the pudding a silky consistency.

4. You Should Not Overbake

A cheesecake that is too hot will not taste good. You know it’s finished when the sides have set and the middle is still moving a bit after you shake the cake. Cooking it too long can cause it to become crackly and dry.

5. Cool Down Slowly

After you have taken it out of your oven, do not immediately cut it. Then, let it cool in a pan at least for one hour. Chill it in your fridge overnight. This will help it to firm up.

How to solve common cheesecake problems

There will be times when your first cheesecake does not turn out well. That’s fine! These tips will help you when something goes wrong.

  • Cracks On Top: Try the water bath next time or top cracks off with fruits or whipped cream.
  • A Soft Center: The next time it wobbles, you can leave it in for a few minutes longer.
  • Leaky Pan Cover the springform pan with aluminum foil before placing in water bath. This will prevent any leaks.

Toppings for

It’s amazing to eat cheesecake on its own. But toppings can make it more tasty! Check out these great ideas!

  • Strawberries and blueberries, for example.
  • You can use caramel or chocolate sauce
  • Whipped Cream
  • Candy or cookies crushed
  • Cinnamon or cocoa can be added to the mix.

Here’s your chance to be extra creative.

Fun Toppings to Add
 Toppings to Add on

Final Thoughts

The cheesecake is ready! If you are an expert or novice, you can use these tips to create a delicious, creamy dessert. It’s all about patience. Always bake your cakes at the proper temperature, gently treat them, and let them cool completely. You can have fun with your cake baking!

Won’t it make a great gift to give a friend or relative if they enjoyed slicing the cake? It’s likely they’ll want seconds.

More recipes can be found in our category of Recipes
Click!