Delicious and Nutritious: Mastering Healthy Instant Pot Chicken Recipes
Have you ever heard of the Instant Pot? It’s like a super-smart kitchen helper that can cook food really fast! Lots of grown-ups love it because it helps them make yummy and healthy meals for themselves and their families, even when they don’t have a lot of time. If you want to eat more chicken because it’s good for you, the Instant Pot is a super cool way to cook it in lots of different ways. This article is like a guide that will show you how to make healthychicken recipes in your Instant Pot. Get ready to learn how to make tasty meals that everyone will enjoy!
Mastering Healthy Instant Pot Chicken Recipes
Why the Instant Pot is Great for Healthy Chicken
The Instant Pot is really awesome for cooking healthy chicken, and here’s why:
First, it’s super speedy! 1. It cooks chicken much faster than if you used a regular pot or the oven. What might take hours to cook slowly can be ready in just a little while in the Instant Pot. For example, you can cook a whole chicken so it’s nice and tender in less than an hour, and chicken pieces can be ready in just minutes! 2 This is a big help when you’re busy and want to eat something healthy that you made at home.
Second, it’s easy and you don’t have to watch it all the time! 2 Unlike cooking on the stove where you need to keep an eye on things, you just put your chicken and other stuff in the Instant Pot, close the lid, and it does the work for you. This frees up your time to do other things, like play or help with chores, while your healthy dinner is cooking. Many Instant Pots even have a special setting that lets you cook the chicken and veggies in the same pot before you pressure cook them. 2 This makes the food taste even better and means fewer dishes to wash! Plus, Instant Pots have lots of safety features, so they’re safe to use.
Last but not least, the Instant Pot helps keep the good stuff (like vitamins) in your chicken, and it makes it taste really yummy! 1 Because the Instant Pot cooks chicken faster, it helps keep more of the good vitamins and minerals inside compared to cooking it for a long time, like boiling it. 1 Also, because the pot is closed tight, the chicken stays moist and juicy, so it tastes super good! 1 It’s like the Instant Pot locks in all the healthy and tasty parts of the chicken.
Lots of Healthy Chicken Recipes You Can Make in Your Instant Pot
The Instant Pot is so cool because you can make all sorts of different healthy chicken recipes in it! Whether you’re cooking for your family, trying to eat a certain way, or just want a quick and tasty meal, there’s a chicken recipe for the Instant Pot that you’ll like.
If you want to make something for the whole family, the Instant Pot is great. Imagine a Rotisserie Chicken that’s so tender it falls off the bone, with skin that’s a little bit crispy – perfect for a weekend dinner or to have chicken ready for other meals during the week! 4 You can use a little stand inside the pot to keep the chicken off the bottom so it cooks evenly, and then put it under the broiler for a bit to make the skin crispy. 4 Another family favorite is Chicken and Rice, and the Instant Pot makes it super easy to cook everything together in one pot! 8 You can use lean chicken pieces with fluffy rice, or chicken with brown rice that has lots of fiber – it’s a simple and yummy meal with not much to clean up.
If you’re trying to eat less carbs (like on a keto diet), the Instant Pot can help too. You can make BBQ Chicken with a special sauce that doesn’t have much sugar, so it’s good for you. 10 You can eat it with cauliflower rice or a salad. Another idea is a Chicken and Kale Stew that’s warm and healthy. 11 It has lots of protein from the chicken and healthy kale, which is great for a keto diet.
For people who can’t eat gluten, the Instant Pot has some yummy recipes too. You can make a Chicken Pot Pie without the crust, but it still has all the yummy flavors of a regular pot pie. 12 You just use something like cornstarch to make the sauce thick. You can also make Honey Sesame Chicken Thighs that are gluten-free and taste like a dish you’d get at a Chinese restaurant, but healthier! 13
You can even try recipes from other countries in your Instant Pot! Chicken Tikka Masala is an Indian dish with lots of flavor from spices and creamy coconut milk, and it’s a healthier version of the regular dish. 14 Or you can try Chicken Adobo, a dish from the Philippines where the chicken is cooked in a tangy sauce with soy sauce and garlic. 5
On busy weeknights, the Instant Pot is a real lifesaver because it can make meals super fast. You can make a big batch of Shredded Chicken that you can use in lots of different meals during the week, like salads or tacos. 15 Another easy weeknight meal is Lemon Garlic Chicken, which is bright and flavorful with fresh lemon and garlic. 17
Chicken: A Super Food That’s Good for You
Chicken is like a superhero food because it has lots of good things for your body! It’s a great way to get lean protein, which helps your muscles grow and stay strong. 19 Protein also helps you feel full, so you don’t get hungry again too quickly, and it can help you manage your weight. 21
Besides protein, chicken has lots of important vitamins and minerals that help your body work properly. 19 It has B vitamins, which give you energy, and other things like iron, potassium, and selenium, which are good for your blood, heart, and keeping you healthy. 19
If you want to be extra healthy, you can choose chicken without the skin, especially chicken breasts, because they have less fat and fewer calories. 20 But even chicken thighs, which have a little more fat, still have lots of good protein and other important stuff like iron and zinc. 20 Both types of chicken are good for you!
Cooking chicken in an Instant Pot is also a great way to keep all those good nutrients inside. 6 Because the Instant Pot cooks chicken quickly, it helps save more of the vitamins and minerals compared to cooking it for a long time. 1 So, eating chicken and cooking it in an Instant Pot is a healthy and easy way to get the good stuff your body needs!
Tips for Making Healthy Chicken in Your Instant Pot
Making healthy chicken in your Instant Pot is pretty easy, but here are some tips to make it even better:
Tips for Making Healthy Chicken in Your Instant Pot
First, always handle raw chicken safely so you don’t get sick. Make sure to wash your hands and anything that touches the raw chicken. Use a different cutting board for raw chicken than for other foods.
Next, you need to know how long to cook the chicken in the Instant Pot. Here’s a little chart to help you, but remember that the time can change depending on how big the chicken pieces are. 25 Always use a special thermometer to make sure the chicken is cooked to 165°F (74°C) inside. 26 You can even cook chicken that’s frozen, but you’ll need to cook it for about half again as long.. 2
Chicken Type
Fresh/Frozen
Weight Range (per piece)
Recommended Cooking Time (High Pressure)
Pressure Release Method
Boneless Skinless Breasts
Fresh
6-8 oz
8-10 minutes
Quick
Boneless Skinless Breasts
Frozen
6-8 oz
12-15 minutes
Quick
Boneless Skinless Thighs
Fresh
3-4 oz
6-8 minutes
Quick
Boneless Skinless Thighs
Frozen
3-4 oz
10-12 minutes
Quick
Bone-In Breasts (per lb)
Fresh
–
5-6 minutes
Natural (5-10 min)
Bone-In Breasts (per lb)
Frozen
–
8-9 minutes
Natural (5-10 min)
Bone-In Thighs (per lb)
Fresh
–
6-8 minutes
Natural (5-10 min)
Bone-In Thighs (per lb)
Frozen
–
9-11 minutes
Natural (5-10 min)
Whole Chicken (per lb)
Fresh
–
6 minutes
Natural (15-20 min)
Whole Chicken (per lb)
Frozen
–
10 minutes
Natural (20-25 min)
It’s also important to understand the different settings on your Instant Pot. Most healthy chicken recipes use the high-pressure setting. Make sure the rubber ring inside the lid is in place and the valve is set to “Sealing” so the pressure can build up. 39 When the chicken is done cooking, you’ll need to let the pressure out. For chicken, it’s often best to let the pressure go down slowly on its own for at least 10 minutes, especially for bigger pieces. 26 If you’re cooking smaller pieces or need the chicken right away, you can quickly release the pressure.
Here are some other helpful tips: Make sure you put at least 1 cup of liquid in a 6-quart Instant Pot so it doesn’t get a “burn” warning. 27 If you cooked onions or garlic first, add a little liquid and scrape any browned bits from the bottom of the pot. 8 To keep the chicken from getting dry, don’t cook it for too long, and you can try soaking it in salt water for about 30 minutes before cooking. 26 If the sauce is too watery after cooking, you can use the sauté setting to make it thicker, and you can even add a little cornstarch mixed with water. 17
If you need to shred the chicken after it’s cooked, you can use two forks to pull it apart. Or, if you have a lot of chicken, you can use a hand mixer on low speed to shred it quickly right in the Instant Pot. 15
Finally, remember to store any leftover chicken safely in a sealed container in the fridge for up to 3-4 days, or in the freezer for up to 3 months. 15
Yummy Chicken Recipes for Every Season
The Instant Pot makes it easy to cook healthy chicken dishes that taste great, no matter what time of year it is.
In spring, when new fruits and veggies start growing, try making Lemon Garlic Chicken with Asparagus. 18 The lemon makes it taste bright and fresh, and the asparagus is tender and yummy. You can also try a Strawberry Balsamic Chicken for a sweet and tangy flavor.
In summer, there are lots of fresh vegetables that go well with chicken. You could make BBQ Chicken and serve it with a fresh salad made with corn and tomatoes. The Instant Pot cooks the chicken quickly so you have more time to play outside! You can also try Pineapple Chicken with Coconut Rice for a taste of the tropics.
When it gets cooler in fall, you might want to make something warm and comforting. An Instant Pot Chicken and Butternut Squash Stew 65 is perfect, with the sweet squash and savory chicken. You can also use fall fruits like apples and cranberries to make delicious sauces for chicken, like Apple Cider Chicken with Cranberries.
In winter, when it’s cold outside, try making a Chicken and Root Vegetable Stew with carrots and potatoes. The Instant Pot makes the root vegetables nice and tender quickly. You can also make Orange Glazed Chicken with Rosemary for a bright and flavorful winter meal.
Your Questions About Healthy Instant Pot Chicken Answered
Is chicken cooked in an Instant Pot healthy? Yes, it can be very healthy if you use good ingredients. It can even help keep more of the good nutrients in the chicken. 2
Can I cook chicken that’s still frozen in the Instant Pot? Yes, you can! Just cook it for about 50% longer than fresh chicken, and make sure the pieces aren’t stuck together so they cook evenly. 2
How can I keep the chicken from getting dry in the Instant Pot? For juicy chicken, let the pressure go down naturally for at least 10 minutes and don’t cook it for too long. Soaking it in salt water before cooking can also help. 26
What’s the best way to shred chicken after it’s cooked in the Instant Pot? You can use two forks to pull it apart. For a faster way, especially if you have a lot of chicken, use a hand mixer on low speed while the chicken is still warm. 53
How much liquid do I need to put in the Instant Pot when I cook chicken? For a 6-quart Instant Pot, you need at least 1 cup of liquid so the pressure can build up properly. 27
Can I cook my favorite chicken recipes in the Instant Pot? Yes, you can often change your favorite recipes to work in the Instant Pot by cooking them for a shorter time and making sure there’s enough liquid for pressure cooking. 3 You can look for similar Instant Pot recipes online to get an idea of how to adjust the cooking time.
How do I clean my Instant Pot after cooking chicken? For a quick clean, put 1/2 cup of water and a drop of dish soap in the pot, close the lid, and pressure cook on high for 1-2 minutes, then rinse it out well.
What are some common mistakes people make when cooking chicken in the Instant Pot? Some common mistakes are not using enough liquid, forgetting to close the pressure valve, cooking the chicken for too long, and using the wrong way to release the pressure. 39
Making Your Recipes Easy to Find Online
If you share your yummy Instant Pot chicken recipes online, here are some tips to help people find them on Google:
Think about what words people might type into Google when they’re looking for easy and healthy chicken recipes for their Instant Pot. Use those words in your article, especially in the titles and subtitles. For example, instead of just saying “Chicken Recipe,” you could say “Easy Healthy Instant Pot Chicken Recipes for Beginners.” 68
Also, try to answer common questions directly in your article. This can help your recipe show up in the “featured snippets” at the top of Google’s search results. 75 Make sure your recipe is easy to read with clear steps and lists of ingredients. 77
If you have a website or blog, you can also use special codes called “schema markup” to help Google understand your recipe better. 78
Remember to keep your recipes updated, especially the ones that use fruits and vegetables that are in season at different times of the year. 75 This helps keep your recipes relevant and fresh for people searching online.
Conclusion: Enjoy Easy and Healthy Chicken with Your Instant Pot
The Instant Pot is a really great and easy way to cook lots of different healthy chicken dishes. It’s fast, simple to use, and helps keep the good nutrients in the chicken. Whether you’re making a quick weeknight dinner or cooking for a crowd, the Instant Pot can help you get delicious and healthy chicken on the table without spending a lot of time in the kitchen. So, get your Instant Pot ready and try out some of these yummy and healthy chicken recipes!
Stop Stressing, Start Prepping: Your Fun Guide to Meal Prep for Weight Loss!
Ever feel like healthy eating is some kind of complicated puzzle you just can’t solve? Like, you want to eat better, maybe lose a little weight, feel more energetic… but life just gets in the way? Yeah? You are SO not alone! Between work, family, assignments, and just trying to have a life, figuring out healthy meals every single day can feel totally overwhelming.
That moment hits – maybe it’s lunchtime and you forgot to pack anything, or it’s evening and cooking from scratch feels like mounting a mountain – and all of a sudden, the fast-food drive-thru or the delivery app starts looking really appealing. It’s easy! It’s quick! But… it often leaves you feeling kinda sluggish and doesn’t exactly help with those weight loss goals, right?
What if I told you there’s a way to make healthy eating the easy choice? A way to have delightful, good-for-you meals ready and waiting on, even on your craziest days? Enter the wonderful world of meal prep!
Seriously, it sounds fancy, but it’s just a simple idea: preparing your meals or meal components ahead of time. Think of it as being your own friendly future-self helper! And guess what? It’s become a massive trend, especially here in the US, with tons of people using it to smash their fitness and weight loss goals. Why? Because it WORKS!
Meal preparation isn’t about rigid rules or uninteresting food. It’s about taking control, saving yourself time and stress, and making your weight loss adventure feel less like a battle and more like a smooth, tasty ride. It helps you know exactly what you’re eating, keeps those tempting junk foods at bay, and makes portion control practically automatic.
So, are you ready to ditch the daily mealtime panic? Ready to open your fridge and feel happy about your options? This guide is your friendly deep dive into meal prep ideas for weight loss. We’ll explore why it’s such a fantastic tool, break down how to get started step-by-step (no fear!), share mouth-watering recipes, give you practical tips, talk about success stories, and answer all those little questions buzzing in your head. Let’s make healthy things happen together!
Meal Prep For Weigth Loss
Your Quick-Start Cheat Sheet: Meal Prep Magic!
Dream & Scheme: Figure out what healthy meals sound good for the week. Make that grocery list!
Grocery Quest: Grab your list and hunt down those ingredients. Stay focused!
Kitchen Jam Session: Wash, chop, cook! Crank up the tunes while you prep grains, proteins, and veggies.
Build-a-Meal Workshop: Divide your cooked goodies into containers. It’s like edible LEGOs!
Cool & Store: Let food cool, then tuck it into the fridge (good for ~3-5 days) or freezer (longer storage).
Eat & Enjoy: Grab, heat (if needed), and savor your awesome homemade meal! You rock!
Why Meal Prep is Like Having a Weight Loss Superpower
Okay, okay, maybe not a superpower like flying, but honestly, when it comes to losing weight, meal prep feels pretty close! It tackles some of the biggest hurdles we face when trying to eat healthier. Let’s unpack why this simple strategy is such a heavyweight champion for your goals:
Portion Puzzle Mastered: Restaurants often give you HUGE portions. It’s like they want you to eat for two! This makes it super hard to manage calories. But when you prep, you hold the measuring cups! You decide how much rice, chicken, or veggies go into each container. It’s like built-in portion control. Your containers become visual guides, teaching you what a balanced serving actually looks like without needing a complicated chart. Boom! Calorie control just got way easier. (Sources: Beaumont.org, Everlywell, TexomaCare)
Temptation Tamer: We all have weak moments. You’re tired, strained, maybe bored… and all of the sudden that cookie jar or bag of chips starts whispering sweet nothings. Or maybe it’s the ease of swinging through the drive-thru. Meal prep acts like your personal willpower booster! When you have a delicious, healthy meal ready and waiting, it’s SO much simpler to walk past those temptations. The healthy choice is right there, calling your name, making it the path of least resistance. (Sources: Beaumont.org, ACAC Fitness)
Time Traveler Trick: “But prepping takes time!” Yes, it takes a couple of hours upfront. But think about the daily grind: deciding what to eat, finding ingredients, chopping, cooking, cleaning… it adds up! By dedicating a block of time once or twice a week, you basically buy back all that daily time and mental energy. Weekday lunches? Ready in minutes. Dinners? Just reheat! More time for you, less time stressing in the kitchen. It’s a time-saving miracle in disguise! (Sources: Beaumont.org, ACAC Fitness, Everlywell)
Wallet Woa: Eating out, grabbing coffee and snacks, ordering delivery – it costs a small fortune! Meal prepping is almost always cheaper. You buy ingredients based on a plan (hello, less impulse buying!), often utilize sales or bulk deals for staples, and drastically cut down on restaurant spending. Plus, planning means less food waste – no more finding sad, forgotten veggies liquefying in your crisper drawer! Your budget will breathe a sigh of relief. (Sources: Beaumont.org, ACAC Fitness, TexomaCare)
Stress Squasher: The constant “What should I eat?” “Is this healthy?” “Do I need to go shopping?” can create a low-level hum of stress. Meal prep silences that noise! You make the decisions during your calm planning time. During the busy week, food is one less thing to worry about. It simplifies life and frees up precious brainpower. Ahh, the peace! (Sources: Everlywell, TexomaCare, ACAC Fitness)
Consistency Kingmaker: Weight loss isn’t about perfection; it’s about consistency. Doing the healthy things most of the time is what drives results. Meal prep makes consistency SO much easier. Even on chaotic days, your healthy meals are there, keeping you on track. It helps build those healthy eating habits that last. (Sources: TexomaCare, NDTV)
Ingredient Investigator: No more mystery sauces or hidden sodium bombs! When you cook, you definitely know what’s in your food. You choose lean proteins, whole grains, colorful veggies, and healthy fats. You control the seasonings and the cooking methods. Total transparency, total control over your nutrition. (Sources: EatingWell article on meal prep success)
So, you see? Meal prep information for weight loss isn’t just about ability; it fundamentally supports the habits needed for success. It’s about making healthy choices easy, convenient, and stress-free. Pretty cool, right?
Gearing Up for Glory: Your Meal Prep Starter Kit (No Fancy Gadgets Needed!)
Hold on, don’t run off thinking you need a kitchen that looks like it belongs on TV! Starting meal prep is way simpler than that. You just need a few trusty sidekicks to make the process smooth and, dare I say, even fun? Let’s assemble your basic meal prep toolkit:
The Container Crew (Your Food’s Best Friends): These are arguably the stars of the show. Good containers are worth their weight in gold (or at least, in perfectly prepped lunches!).
Mix & Match Sizes: Grab some bigger ones for main courses, medium ones for sides or smaller meals, and little guys for snacks, dressings, or dips. Variety is good!
Leak-Proof Lids are Life: Nothing ruins a day faster than finding salad dressing all over your bag. Make sure those lids snap on TIGHT and create a good seal. Bonus: Airtight keeps food fresher longer!
Microwave Ready? If you plan to reheat right in the container, double-check that it’s microwave-safe. Most are, but it’s good to be sure.
Dishwasher Duty: For easy cleanup (because who loves washing dishes?), look for dishwasher-safe containers.
Going Sub-Zero? Planning to freeze some meals? Make sure your containers say “freezer-safe.”
Material World (Glass vs. Plastic):
Glass: Tough, doesn’t hold stains or smells (yay!), often oven-safe too. Feels substantial. Downsides? Heavier, can break if dropped.
BPA-Free Plastic: Lightweight, portable, stacks easily, usually more budget-friendly. Make sure it’s BPA-free. Downsides? Can sometimes stain over time (especially with tomato sauce!) or hold onto strong smells. Choose sturdy ones!
Compartment Champions: Containers with dividers are fantastic for keeping foods separate – think keeping crunchy granola away from yogurt, or veggies separate from chicken.
The Measure-Up Posse (Cups & Spoons): Remember our chat about portions? These tools are key! Don’t just eyeball everything, especially when you’re starting. Use measuring cups for grains, liquids, oats, and measuring spoons for oils, spices, nut butters, etc. Accuracy helps!
The Dynamic Duo (Sharp Knife & Cutting Board): You’ll likely be doing a fair bit of chopping. A decent chef’s knife that feels comfortable in your hand makes this task faster, easier, and safer (dull knives are accident-prone!). A solid cutting board gives you a stable surface and protects your countertops. (Tip: Many people use separate boards for raw meat and produce for food safety!).
Mixing Bowl Brigade: Having a few bowls in different sizes is super helpful for tossing salads, mixing ingredients for meatballs or energy bites, or marinating proteins.
Baking Sheet Heroes: These flat pans are workhorses! Roasting veggies until they’re sweet and delicious? Baking chicken? Making sheet pan dinners where everything cooks at once? Yes, please! Pro tip: Lining them with parchment paper makes cleanup almost non-existent. Amazing!
Pot & Pan Partners: A medium-sized pot is crucial for cooking things like quinoa, rice, pasta, or soup. A generous skillet is your go-to for sautéing veggies, cooking ground meat, or making stir-fries.
Nice-to-Have Extras (Totally Optional!):
Food Scale: For ultimate portion precision, especially with calorie-dense foods or if you’re tracking macros closely.
Slow Cooker (Crock-Pot): A lifesaver for making large batches of tender shredded meats, soups, or stews with minimal hands-on time.
Instant Pot/Pressure Cooker: Seriously speeds up cooking for things like dried beans, rice, or pot roast.
Blender: Great for smoothies (prep ingredients in bags, blend fresh) or making smooth soups and sauces.
Muffin Tin: Perfect for portion-controlled goodies like egg muffins, baked oatmeal cups, or mini meatloaves.
Labels & Markers: Simple masking tape and a permanent marker work wonders for labeling containers with the contents and date. Helps you avoid playing “mystery meal roulette”!
Your meal prep starter kit
Don’t feel like you need to buy everything at once! See what you already own, and start there. The containers are probably the most important initial purchase.
Let’s Do This! Your Simple Meal Prep Playbook
Okay, enough talk, let’s walk the walk! How do you actually start prepping without feeling like you’ve run a marathon in your kitchen? Just follow these friendly steps. Think of it as your recipe for meal prep success, especially if you’re looking for easy meal prep for weight loss beginners.
Phase 1: The Master Plan (Don’t Skip This!)
What’s the Goal? Which meals stress you out the most? Lunch? Dinners? Start there! How many days do you want to cover? Maybe just 2-3 days to dip your toes in? Perfect! Don’t try to do everything at once right away.
Recipe Brainstorm: What sounds yummy AND fits your weight loss goals? Flip through cookbooks, browse online (search for healthy meal prep recipes!), or use the ideas below. Keep it simple initially! Bonus points if you pick recipes that share ingredients (like using bell peppers in both a stir-fry and a salad).
Pantry Raid: Check your fridge, freezer, and cupboards. What heroes are already hiding in there? Make a note so you don’t buy things you already have.
Map It Out (Grocery List Time!): List every single ingredient you need. Group items by store section (produce, dairy, meat, aisles) – this makes shopping SO much faster and prevents aimless wandering (which often leads to impulse buys!).
Phase 2: The Supermarket Sweep (Mission: Stick to the List!)
Armed with Your List: Go into the store like a ninja on a mission! Your list is your guide. Try your best to resist those tempting end-cap displays and checkout goodies that aren’t on your plan. Maybe have a small snack before you go so you’re not shopping hangry?
Smart Savings: Look for sales on items you use often. Buying staples like oats, rice, beans, or frozen veggies in larger quantities can sometimes be cheaper per serving.
Produce Picks: Choose fruits and veggies that look vibrant and fresh. Think about how long they need to last – heartier greens like kale last longer than delicate lettuce. Firm apples, bright peppers, sturdy carrots – you get the picture.
Phase 3: Prep Central Station (Let the Fun Begin!)
Find a chunk of time that works for you – maybe it’s Sunday afternoon, maybe it’s Tuesday evening. Put on some energizing music, catch up on a podcast, or have a show playing in the background. Make it your dedicated “me time” in the kitchen!
Wash & Chop Crew: Give all your produce a good rinse. Then, get chopping! Dice onions (maybe wear goggles, haha!), slice mushrooms, chop broccoli, cube sweet potatoes, and wash and spin your salad greens. Store pre-chopped items in airtight containers if you’re not using them right away.
Get Your Grain On: Cook up your batch of brown rice, quinoa, farro, barley, or whatever whole grain you chose. Let it cool down before you start packing it.
Protein Prep Power: Time to cook the main event! Bake, grill, or pan-sear chicken breasts or fish. Brown some lean ground turkey or beef. Hard-boil eggs. Cook lentils or beans if you’re using dried ones. Let all cooked proteins cool thoroughly.
Roast for Flavor: Roasting vegetables brings out their natural sweet! Toss chopped veggies (broccoli, cauliflower, carrots, Brussels sprouts, bell peppers, zucchini, sweet potatoes) along with a slight olive oil and your favorite seasonings (salt, pepper, garlic powder, paprika, Italian herbs – whatever!). Spread them on a baking sheet (lined alongside parchment paper for easy cleanup!) and roast as far as tender and slightly caramelized. So good!
Sauce & Dressing Station: If you’re making homemade dressings or sauces, whisk them stable now. Store them in small jars or containers severally from salads to prevent sogginess.
Phase 4: The Grand Assembly (Putting it All Together!)
This is where your meals actually take shape! It can feel really satisfying.
Organize Your Workspace: Lay out your clean containers. Arrange your prepped components nearby – grains here, proteins there, veggies over yonder. Like setting up your own little food assembly line!
Portion Patrol: Using your measuring cups, scale, or just your trained eye, divide the cooked grains, proteins, and veggies among your containers according to your plan. Aim for that balance!
Keep ‘Em Separated (Sometimes): Use compartment containers if you have them, especially if you want to keep sauces or crunchy toppings separate until eating time. For jar salads, remember the layering trick (dressing on bottom, greens on top).
Cool Down is Crucial: Cannot stress this enough! Make absolutely sure all cooked food is completely cool before you seal the containers and refrigerate. Putting hot food in the fridge is bad for food safety and leads to condensation (aka soggy food). Let it sit out for a bit (but no longer than 2 hours!).
Label Like You Mean It: Stick a label (even tape works!) on each container saying what it is and the date made (e.g., “Salmon & Sweet Potatoes – 4/20”). Trust me, you’ll appreciate this later!
Store Safely: Meals for the next 3-5 days go in the fridge (make sure it’s cold enough, below 40°F/4°C). Anything for later, or specific freezer-friendly meals (soups, stews!), goes into the freezer.
Phase 5: Enjoy Freedom All Week!
Pat yourself on the back! You did it! Now, throughout your busy week, you get to reap the rewards. Grab a delicious, healthy, homemade meal from your fridge, heat it if necessary, and enjoy knowing you’re fueling your body right without the last-minute scramble. It feels amazing!
Remember, this is your process. If prepping 5 days feels like too much, start with 2. If you only want to prepare lunches, great! Find what works for you and makes your life easier, not harder.
Time to Feast! Fun & Filling Meal Prep Recipes for Your Weight Loss Wins
Alright, enough logistics – let’s talk about the delicious payoff! Here are some healthy meal prep recipes designed with weight loss in mind. They aim for a good balance of protein (to keep you full), fiber (also for fullness and gut health), and healthy carbs and fats (for energy and satisfaction). Plus, they taste great! I’ve included rough nutritional estimates, but remember these are just guides.
Good for Weight Loss Because: Loaded with fiber from beans, corn, veggies, and whole grains – super filling! Plant-based protein powder. Relatively low fat.
Dinner Done Right: Easy & Comforting Preps
Big Batch Lentil Veggie Soup (Freezer Friendly!) (Makes 6-8 servings)
The Vibe: Cozy, nutritious, packed with plant-based protein and fiber. Tastes even better the next day!
Gather Your Goods:
1 tbsp olive oil
1 large onion, chopped
2 carrots, chopped
2 celery stalks, chopped
3 cloves garlic, minced
1 cup brown or green lentils, rinsed well
1 can (28 oz) crushed tomatoes
6-8 cups vegetable broth
1 tsp dried thyme
1 tsp dried oregano (or Italian seasoning)
Salt & pepper to taste
Optional: Bay leaf, handful of spinach stirred in at the end.
Make the Magic:
Heat olive oil in a large pot or Dutch oven over medium heat. Add onion, carrots, and celery. Cook until softened, about 5-7 minutes.
Add garlic and cook for 1 more minute until fragrant.
Stir in the rinsed lentils, crushed tomatoes, broth, thyme, oregano, salt, pepper, and bay leaf (if using).
Bring to a boil, then reduce heat, cover, and simmer for 30-45 minutes, or until lentils are tender.
Remove bay leaves. Taste and adjust seasonings. If using spinach, stir it in until wilted.
Let cool completely before portioning into fridge or freezer-safe containers.
Good for Weight Loss Because: Lean protein powerhouse! Low fat, low carb base. You control how you serve it (on salad, with veggies, in lettuce wraps…).
Snack Saviors: Healthy Bites for Hangry Moments
Apple Slices & Nut Butter Packs: Portion 1-2 tbsp of peanut, almond, or sunflower seed butter into small containers. Pack with pre-sliced apple wedges (toss apples in a tiny bit of lemon juice to prevent browning). Good for Weight Loss Because: Fiber from apple + protein/fat from nut butter = satisfying snack.
Cottage Cheese & Fruit Bowls: Scoop 1/2 cup cottage cheese (great protein source!) into containers. Top with berries or chopped peaches. Good for Weight Loss Because: High protein, relatively low calorie, calcium boost.
“Tuna Salad” Lettuce Cups (No Mayo!): Mix a can of drained tuna with plain Greek yogurt, chopped celery, a squeeze of lemon juice, salt, and pepper. Spoon into crisp lettuce cups (butter lettuce or romaine work well). Prep the “salad” ahead, assemble cups just before eating. Good for Weight Loss Because: Lean protein, veggies, uses yogurt instead of higher-fat mayo.
Phew! That’s a whirlwind of ideas! Find what sounds good, don’t be afraid to try new things, and remember – flavor is your friend!
You Can Watch a Video On Meal Prep Ideas for Weight Loss
Your Meal Prep Tool Belt: Awesome Tips for Success
You’ve got the plan, you’ve got the recipes… Now let’s load up your tool belt with some extra tips and tricks! These little nuggets of wisdom can make your meal prep journey smoother, tastier, and way more sustainable. Think of these as leveling up your prep game!
Become a Portion Pro (Without the Stress!)
Visual Aids Rock: Get familiar with simple visual cues. A deck of cards is about 3-4 oz of protein. Your fist is roughly a cup (good for cooked grains or starchy veggies). Half your plate or container should ideally be filled with colorful, non-starchy veggies. It makes portioning less about exact numbers and more about balance. (Source: Nourish blog)
Container Guidance: Use those meal prep containers with dividers! They literally build the portions for you. Fill the big part with veggies, the smaller parts with protein and carbs. Easy peasy.
Mindful Mealtime: Prepping your portions ahead of time can actually help you eat more mindfully. When you sit down with your container, you know exactly how much food is there. Try to eat slowly, savor the flavors, and notice when you start to feel full.
Ace Your Storage Game (Keep Food Fresh & Safe!)
Airtight All the Way: Can’t say this enough – good, airtight containers are essential! They lock in freshness, keep weird fridge smells out of your food, and prevent disastrous leaks. Worth the investment! (Source: Meal Village, Ideal Nutrition)
Cool Down Completely: Remember the golden rule? Let cooked food cool down significantly (but not more than 2 hours at room temp!) before sealing and refrigerating. This prevents soggy food and keeps your fridge temperature stable. (Source: Meal Village)
Fridge Feng Shui: Stackable containers are space savers! Try dedicating one shelf in your fridge just for your prepped meals so they’re easy to see and grab. Put the ones you need to eat first at the front (FIFO – First-In, First-Out!). (Source: Ideal Nutrition, Harvard Nutrition Source)
Label Everything: Date and label your containers! “Lentil Soup – 4/20”. It takes 5 seconds and saves you from guessing later, especially with frozen stuff. (Source: Ideal Nutrition, Harvard Nutrition Source)
Fridge Life vs. Freezer Life: Generally, 3-5 days is the sweet spot for fridge storage for most cooked meals. If you won’t eat it by then, freeze it! Soups, stews, chilis, cooked meats/grains freeze well. Avoid freezing delicate greens or creamy sauces. (Source: High Speed Training, Box Bistro, Harvard Nutrition Source)
Reheating Like a Rockstar (No More Sad Leftovers!)
Choose Your Method:
Microwave: Fastest. Best for bowls, soups, casseroles. Add a splash of water/broth, cover loosely, stir halfway.
Oven/Toaster Oven: Better for things you want crispy (roasted veggies) or heated evenly (chicken breast). Use an oven-safe dish, maybe cover with foil.
Stovetop: Ideal for soups, stews, chili, stir-fries. Gentle heat in a pot or skillet.
Keep it Fresh: Remove any fresh toppings (lettuce, fresh herbs, yogurt) before reheating. Add them back after.
Don’t Overdo It: Reheat gently until just heated through. Overcooking can dry things out or make textures weird.
Battle Boredom: Keep Your Taste Buds Happy!
Variety is Spice: Prep 2-3 different meals for the week, not just one type on repeat.
Sauces & Spices Save the Day: A simple grilled chicken breast tastes totally different with salsa vs. presto vs. lemon-herb dressing. Prep versatile bases and change up the flavors! Pack sauces separately. (Source: TexomaCare)
Theme It Up: Make planning fun! “Taco Tuesday Prep,” “Mediterranean Thursday Prep.”
Switch Cooking Methods: Grill one week, roast the next, slow cook the week after. Adds different textures.
Embrace Seasons: Use produce that’s in season – it tastes better and is often cheaper!
Master Batch Cooking (Cook Smart, Not Hard!)
Component Power: Cook big batches of versatile building blocks: a pot of quinoa, roasted veggies, grilled chicken, hard-boiled eggs, a batch of lentils.
Mix & Match Freedom: Assemble different meals throughout the week using these prepped components. Offers more flexibility than having identical pre-portioned meals every day. (Source: TexomaCare, Everlywell)
Implement these tips, and you’ll find your meal prep ideas for weight loss flow becomes even smoother and more enjoyable!
Dodging Detours: Avoiding Common Meal Prep Mistakes
Even seasoned meal preppers hit bumps in the road sometimes! Knowing what potential pitfalls look like can help you steer clear or recover quickly if they happen. Let’s chat about a few common oopsies and how to avoid them.
Mistake #1: Going All-Out Overboard Right Away
What it looks like: Trying to prep 3 meals and 2 snacks for 7 days on your very first attempt. Result? Total kitchen chaos and burnout!
The Smarter Path: Start small! Seriously. Pick ONE meal (like lunch) for 2-3 days. Get comfortable with the process – the planning, shopping, cooking, storing flow. Once that feels easy, maybe add breakfasts, or prep for more days. Gradual steps build confidence and prevent overwhelm. (Source: Everlywell, Harvard Nutrition Source)
Mistake #2: Forgetting About Food Safety
What it looks like: Leaving cooked food on the counter for hours to cool, not washing hands between handling raw meat and veggies, using containers that aren’t truly airtight, or eating food that’s been in the fridge for a week.
The Smarter Path: Food safety is crucial!
Wash hands often, especially after handling raw meat.
Use separate cutting boards for raw meat and produce if possible.
Cool cooked food promptly, but don’t leave it at room temperature for more than 2 hours before refrigerating or freezing.
Make sure your fridge is cold enough (below 40°F / 4°C) and your freezer is at 0°F (-18°C).
Use airtight containers.
Pay attention to recommended storage times (usually 3-5 days fridge, longer in freezer) and when in doubt, throw it out! (Source: Ideal Nutrition, Meal Village)
Mistake #3: Making Only One Type of Meal (Hello, Boredom!)
What it looks like: Prepping five identical containers of chicken, broccoli, and rice. By Wednesday, you’d rather eat cardboard.
The Smarter Path: Variety keeps things interesting!
Aim for at least 2 different types of meals for the week.
Utilize component prepping – cook bases (grains, proteins, veggies) and assemble differently with various sauces, spices, or fresh additions each day.
Don’t underestimate the power of different textures and flavors!
Mistake #4: Not Planning for Your Real Life
What it looks like: Prepping 5 lunches, even though you know you have a team lunch outing planned for Friday. Result? Wasted food and frustration.
The Smarter Path: Look at your actual schedule for the week before you plan your prep! Any dinners out? Lunch meetings? Be realistic. Only prep for the meals you know you’ll need and eat. It’s okay not to prep every single meal!
Mistake #5: Prepping Foods That Reheat Badly
What it looks like: Prepping beautiful salads with dressing already mixed in (soggy mess by day 2), or trying to prep delicate fried foods (limp disappointment later).
The Smarter Path: Think about how food holds up and reheats.
Pack dressings separately.
Layer jar salads strategically (wet on bottom, dry on top).
Stick to foods that reheat well: soups, stews, chilis, casseroles, grain bowls, roasted veggies, grilled/baked proteins.
Accept that some things (like a perfectly crispy fried chicken) are just better fresh!
Mistake #6: Not Having the Right Containers
What it looks like: Trying to cram food into random old takeout containers with ill-fitting lids, leading to leaks and food not staying fresh.
The Smarter Path: Invest in a decent set of meal prep containers! Airtight lids, appropriate sizes (maybe some with compartments), and stackability make a HUGE difference in convenience and food longevity.
Don’t let the fear of mistakes stop you! Everyone learns as they go. Just keep these common detours in mind, be flexible, and find the prepping style that makes your healthy eating journey easier, not harder.
Looking for meal prep ideas for weight loss on a budget? You can find a helpful video
Real People, Real Results: Meal Prep Wins & Wisdom
It’s one thing to read about how to do something, but hearing from people who’ve actually done it can be super motivating! Plus, health experts often have simple, powerful advice that cuts through the noise. Let’s hear some relatable (though imagined) success stories and key takeaways from the pros.
Sarah’s Story: The Time-Strapped Teacher
“Teaching was exhausting, leading to quick, unhealthy dinners like pizza. Feeling tired and guilty, the teacher started simple Sunday meal prep (chicken, roasted veggies). This made healthy dinners easy, requiring just heating. Adding prepped lunches like salads further improved things. It wasn’t a diet, but making healthy food accessible. The result was significantly more energy, less stress, and weight loss was a happy side effect.“
Mike’s Journey: From Desk Lunches to Deliciousness
“My office is surrounded by tempting (and expensive) lunch spots. I was spending a fortune and usually felt like taking a nap by 2 PM. I decided to try prepping lunches to save money initially. I started with really basic stuff: turkey meatballs with zucchini noodles, big batches of lentil soup, chicken and rice bowls. I got some good containers, spent a couple hours Sunday afternoon prepping while watching football. Man, not only did I save money, but having those tasty, healthy lunches waiting felt awesome. No more decision fatigue at noon! I had more energy, felt lighter, and it made me more mindful about my dinners too. It created this positive snowball effect.”
Jessica’s Discovery: Kitchen Confidence
“I always thought I was a ‘bad cook.’ Healthy recipes looked intimidating. Then I discovered sheet pan meals for meal prep. Chop veggies, toss with chicken or fish and some spices, bake. That’s it! I could do that! Seeing those colorful pans come out of the oven, knowing I’d made multiple healthy meals? It was huge for my confidence. I started trying slightly more complex recipes, like simple stir-fries or slow cooker shredded chicken. Meal prep wasn’t just about weight loss for me; it was about proving to myself I could cook nourishing food. It totally changed my relationship with my kitchen – from a place of stress to a place of creativity.”
Wisdom from the Health Pros (The Simple Truths):
When you talk to registered dietitians, nutrition coaches, and doctors about sustainable weight loss, meal prep often comes up. Here’s the essence of what they often emphasize:
You’re in Command: They stress that prep gives you control – over ingredients (less processed stuff, more whole foods), cooking methods (less frying, more baking/roasting), and, critically, portions. This control is fundamental for managing calorie intake effectively. (Sources: TexomaCare, ACAC Fitness, Beaumont.org)
Consistency is Queen (and King!): Perfection isn’t the goal; consistency is. Meal prep makes it vastly easier to eat balanced, planned meals day after day, building healthy habits that lead to lasting results, even when motivation wavers. (Source: NDTV, TexomaCare)
Planning Prevents Problems: Taking time to plan meals helps you avoid impulsive, unhealthy choices driven by hunger, stress, or convenience. A plan acts as your guide for the week. (Source: Everlywell, Beaumont.org)
Fuel with Fiber & Protein: Meals built around lean protein, lots of non-starchy vegetables, and whole grains or legumes (fiber!) are key for satiety – feeling full and satisfied – which is crucial for weight management. Meal prep makes it easier to build these balanced plates. (Source: ACAC Fitness tips)
Stress Less, Live More: By reducing the daily “what’s for dinner?” decision fatigue, meal prep frees up mental energy and reduces stress around food, which can positively impact overall well-being and adherence to healthy habits. (Source: Everlywell, ACAC Fitness)
The underlying message? Meal prep is a powerful behavioral strategy. It sets up an environment where making healthy choices is easier, more consistent, and less stressful, directly supporting your weight loss efforts.
Burning Questions Answered: Your Meal Prep FAQ Corner
Got questions swirling around? Perfect! It means you’re thinking critically about how this fits into your life. Let’s tackle some of the most frequently asked questions about meal prepping for weight loss.
Q1: Okay, for real though, how long will my food actually last in the fridge?
A: It’s the million-dollar question! The general guideline is 3 to 5 days for most properly cooked and stored meals in a cold fridge (below 40°F/4°C). But listen to the food:
Eat Me Sooner: Cooked fish and seafood are usually best within 2-3 days.
Pretty Hardy: Cooked meats, poultry, roasted veggies, cooked grains (rice, quinoa), beans, lentils, soups, and stews often hold up well for 4-5 days.
Handle with Care: Delicate salads or anything with a dairy-based sauce might only be good for 2-3 days.
Sniff Test is Legit: Always use your eyes and nose. If it looks weird, smells off, or the texture seems wrong, better safe than sorry – toss it! (Sources: High Speed Training, JoyJolt, Box Bistro, Harvard Nutrition Source)
Q2: Can I freeze prepped meals? What works best?
A: Absolutely! Freezing is a meal prepper’s best friend for extending shelf life.
Freezer All-Stars: Soups, stews, chilis, curries, casseroles (like shepherd’s pie or lasagna – assemble unbaked sometimes too!), cooked meatballs, cooked ground meat, cooked shredded/diced chicken, cooked grains (rice/quinoa freeze fine, might need moisture when reheating), cooked beans/lentils, broth, muffins, energy bites.
Freezer Fails (Usually): Anything you want to stay crisp (like fried foods), salads with lettuce, veggies with super high water content (cucumbers, celery – get mushy), creamy/yogurt sauces (can separate), mayo salads.
Tips: Cool completely first. Use freezer-safe, airtight containers or bags (push out air). Label clearly! Thaw overnight in the fridge for best results. Aim to use within 2-3 months for best quality. (Source: Box Bistro, Harvard Nutrition Source, Meal Village)
Q3: Isn’t buying all those containers and ingredients expensive?
A: There’s a small upfront cost for good containers, true. But think long-term: meal prepping almost always saves money. You cut way down on expensive restaurant meals, delivery fees, impulse snack buys, and coffee shop stops. You buy ingredients with a plan, reducing waste. It adds up fast! (Source: Beaumont.org, ACAC Fitness)
Q4: Help! I’m scared I’ll get bored eating the same thing!
A: Totally normal fear! Beat boredom by:
Prepping 2-3 different meals for the week.
Using the “component prep” method (cook bases, assemble differently).
Having fun with sauces, spices, and fresh toppings (packed separately!).
Trying theme nights for planning inspiration.
Remembering you don’t have to eat prepped food for every single meal if you don’t want to!
Q5: Does it still “count” if I only prep lunches? Or just snacks?
A: YES! A million times yes! Any amount of prep is better than none.
Prepping just lunches can make a massive difference, as lunch is often a tricky meal for people trying to eat healthy during a busy workday.
Prepping healthy snacks prevents reaching for less ideal options when hunger strikes.
Focus on YOUR biggest pain point. If dinners derail you, prep dinners. If mornings are chaos, prep breakfasts.
Start small and build up if you want, but even minimal prep helps! (Source: Everlywell, Nourish blog)
Q6: My meals don’t look like those perfect photos online. Is that okay?
A: Oh goodness, yes! Those online photos are styled! Real-life meal prep is about function and fuel. If your container holds delicious, healthy food that helps you reach your goals, it is PERFECT, regardless of whether it’s “Instagrammable.” Don’t let comparison steal your prepping joy! Focus on taste and nutrition.
Hopefully, tackling these common questions makes you feel even more ready and confident to give meal prep a try!
You’ve Got This! Your Meal Prep Journey Starts Now
Whew! We’ve covered a TON of ground together on this journey into meal prep ideas for weight loss. From understanding why it’s such a fantastic ally, to getting your kitchen geared up, walking through the prep process, exploring yummy recipes, gathering pro tips, dodging common mistakes, and hearing words of wisdom – you are seriously equipped!
The biggest takeaway? Meal prep isn’t about adding another complicated task to your life. It’s about simplifying healthy eating. It’s about giving yourself the gift of time, reduced stress, and delicious, nourishing food that’s ready when you need it most. It puts you in control, helps you build consistency, and makes reaching your weight loss goals feel achievable and sustainable.
Don’t feel pressured to become a prepping expert overnight. Start where you are. Pick one small thing – maybe just prepping snacks for the week, or cooking a double batch of your next healthy dinner to have leftovers for lunch. Celebrate that win! Then, maybe try a little more next week.
Find recipes that genuinely excite you. Put on some music and make the prep process enjoyable. Remember why you started – to feel better, have more energy, reach your health goals.
You have the knowledge, you have the ideas. Now it’s time to take that first small step. You can absolutely do this, and your future self will thank you for it! Happy prepping!
Friendly Health Reminder:Just remember, this info is for general guidance! Everyone’s body and health needs are different. It’s always super smart to chat with your doctor, a registered dietitian, or a qualified health professional before making big changes to your eating habits or starting a weight loss plan. They can help create a strategy that’s perfect and safe just for you.
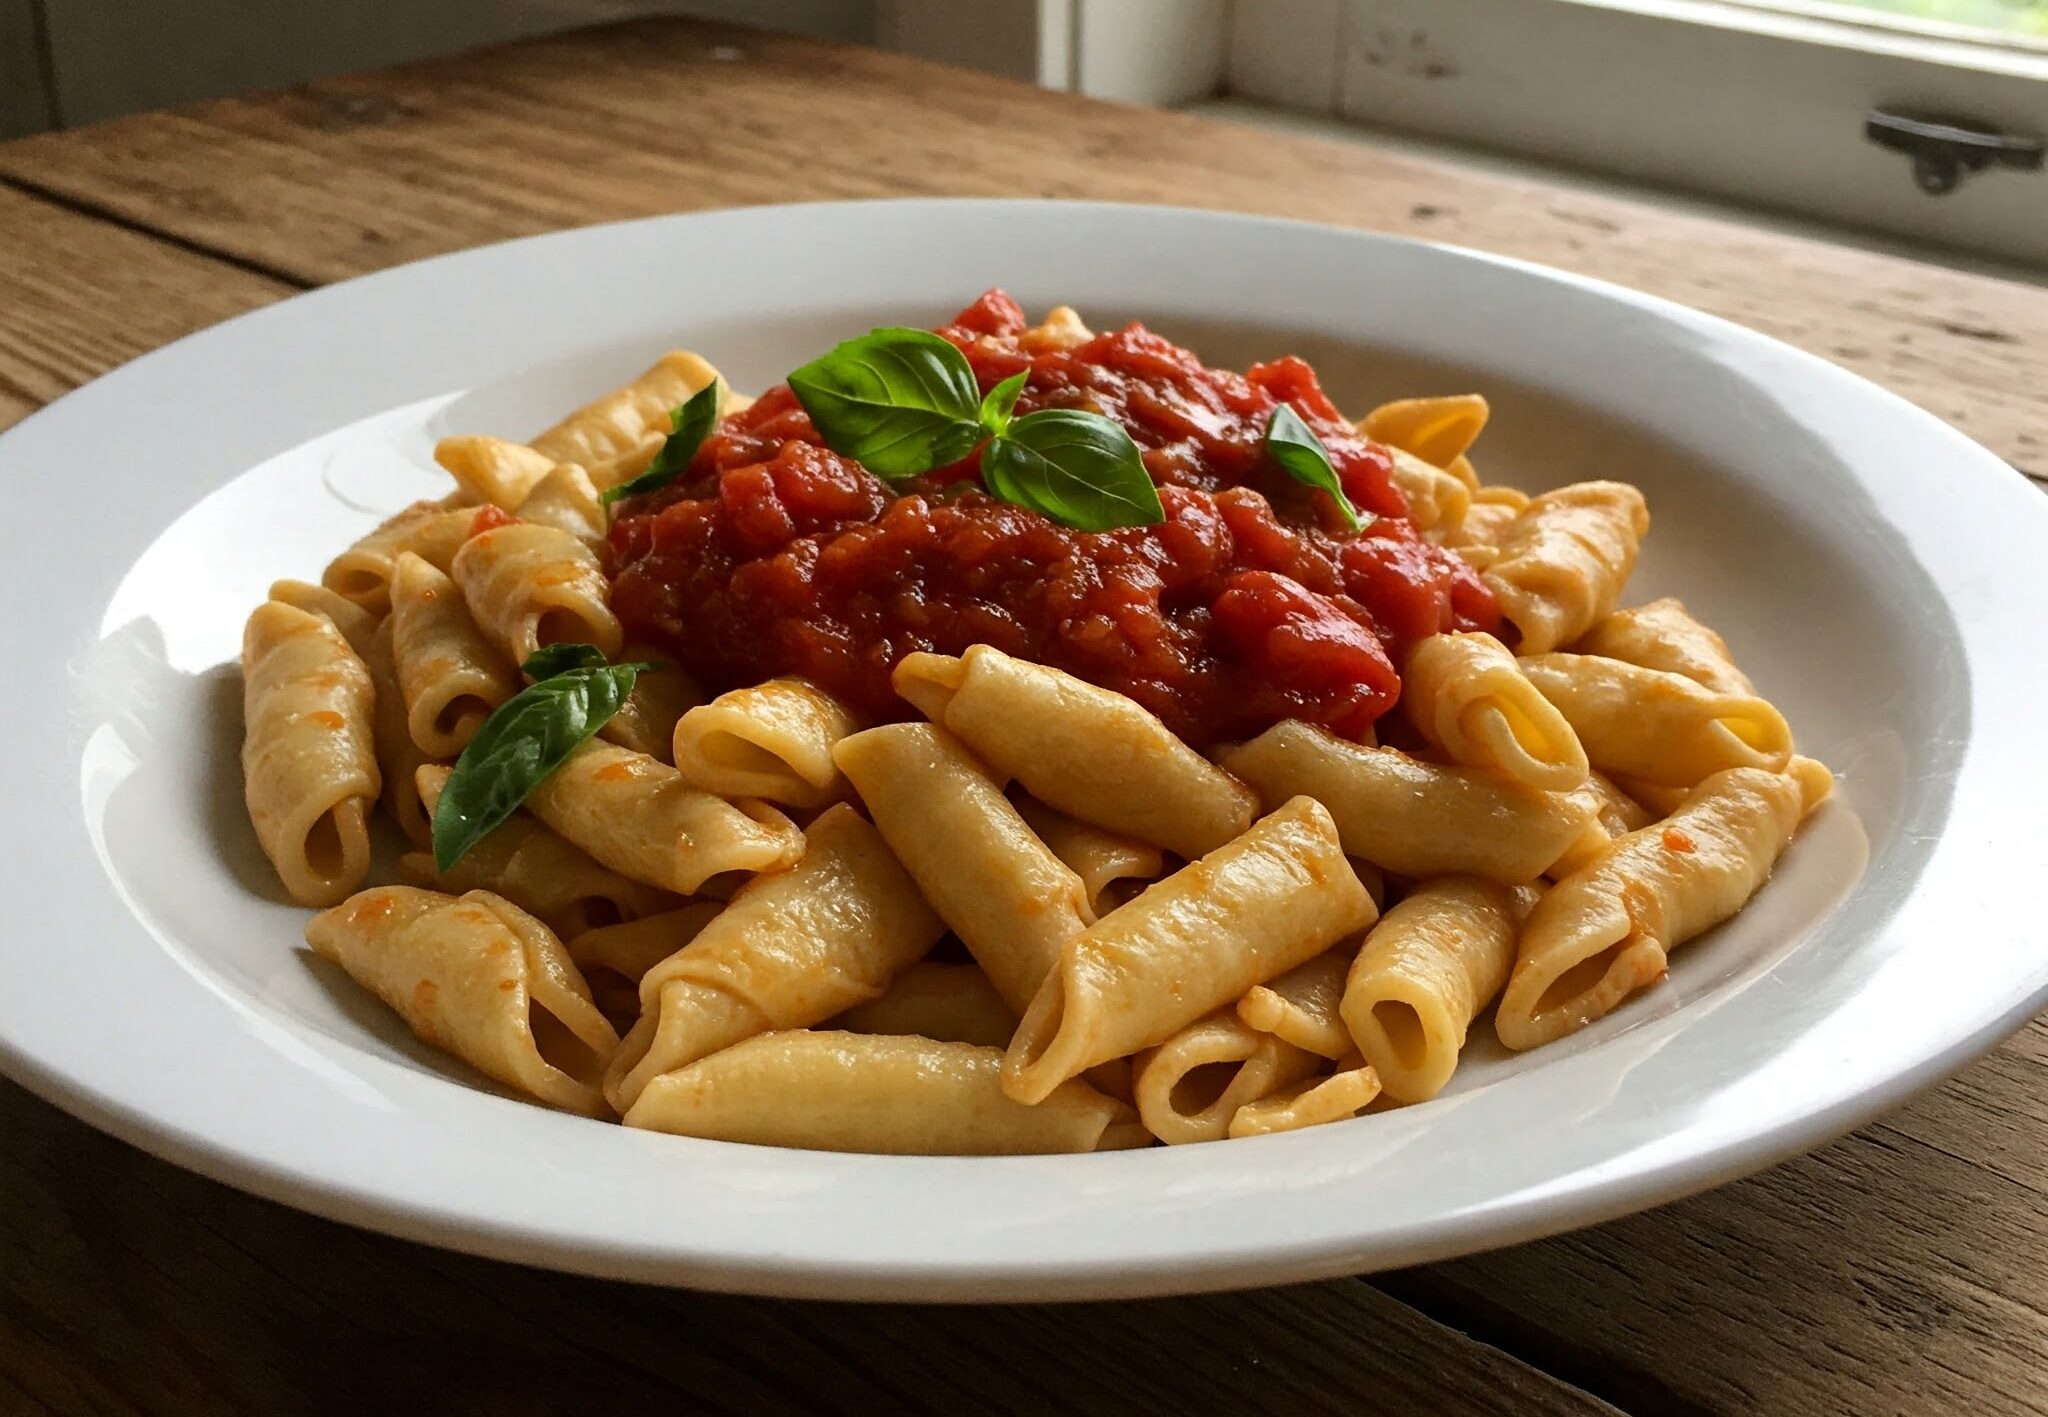
Hey there! So, you wanna make pasta from scratch but don’t have one of those shiny machines? No sweat—you don’t need one! I’m gonna show you how to whip up fresh, chewy noodles with just your hands and a few things you’ve probably got in your kitchen. It’s like playing with dough and ending up with dinner. Whether you’re a kid messing around or a grown-up craving something homemade, this is stupidly fun and easier than it looks. By the end, you’ll be tossing noodles in a pot like you’ve been doing it forever. Let’s do this!
Why Homemade Pasta Rocks
Okay, real talk: homemade pasta is way better than the boxed kind. It’s soft, it’s flavorful, and it feels like a warm hug in your mouth. Plus, you get to roll, cut, and shape it however you want—no rules! It’s cheaper than buying fancy stuff, and you can say, “Yup, I made that,” when everyone’s scarfing it down. No machine? Doesn’t matter. Just bring your enthusiasm, and we’re golden.
Stuff You’ll Need
Don’t worry about hunting down weird ingredients or tools. This is as basic as it gets.
Ingredients
Flour: 1 cup of all-purpose flour—the stuff you’d grab for pancakes.
Egg: 1 big ol’ egg. It’s what makes the dough hold together and taste awesome.
Salt: A tiny pinch, like ¼ teaspoon. Just enough to wake up the flavor.
Water: A splash or two, but only if your dough’s acting stubborn.
Tools
Bowl: A decent-sized one for mixing. Anything you’d eat cereal out of works.
Fork: To mash everything together.
Rolling Pin: Wooden’s great, but a clean bottle or even a tall mug can pinch-hit.
Knife: A butter knife or pizza cutter for slicing. Nothing scary-sharp needed.
Clean Counter: Clear some space to get messy.
Spoon: For scooping flour or water if you wanna be precise (I usually eyeball it).
That’s it. No fancy gadgets, just you and the kitchen basics.
Let’s Get Cooking: The Step-by-Step
I’m gonna walk you through this like we’re elbow-to-elbow at the counter, probably giggling when flour gets everywhere. It’s super doable—promise.
Step 1: Make the Dough
Toss that 1 cup of flour into your bowl and add the pinch of salt. Swirl it around with your fork to say hi.
Crack your egg into a little cup first (keeps rogue shells out), then dump it right into the flour. It’ll sit there looking like a bright yellow puddle.
Grab your fork and start stirring, pulling the flour into the egg. Keep at it until it turns into a crumbly mess, like lumpy oatmeal. If it’s too dry and won’t stick together, drizzle in 1 tablespoon of water and mix again. You’re going for dough that feels like soft clay—not gloopy, not falling apart.
Scrape it all onto your counter. Now comes the fun part: kneading. Push the dough down with your palms, fold it over, and push again. It’s like squishing a stress ball. Keep going for about 5 minutes until it’s smooth and bounces back a little when you poke it.
Little hint: If your hands get tacky, rub a bit of flour on them. Don’t overdo it, or the dough’ll get grumpy.
Step 2: Give It a Nap
Wrap your dough ball in plastic wrap or tuck it in the bowl with a plate over it. Let it chill for 20-30 minutes. This makes it less stretchy and easier to roll later. While it’s snoozing, you can wipe down the counter or sneak a sip of juice (no judgment here).
Step 3: Roll It Flat
Unwrap the dough and slice it in half with your knife—two pieces are way easier to wrangle.
Dust your counter with a pinch of flour to keep things from sticking. Take one half, pat it into a flat blob, and get ready to roll.
Use your rolling pin (or whatever you’re rocking) and push down, rolling back and forth. Flip the dough now and then to keep it even. You want it thin—like a piece of cardboard or just a hair thicker. If you lift it, you should kinda see your hand through it. Sticking? Sprinkle a smidge more flour, but don’t go crazy.
Step 4: Slice It Up
Now we’re making pasta shapes, and this is where you get to play! Lay the rolled dough flat and grab your knife or pizza cutter. Try these:
Long Noodles: Fold the dough loosely (like a soft burrito), slice it into thin strips, then unfold. Instant spaghetti vibes!
Little Chunks: Chop it into small squares for cute, bite-sized pieces.
Silly Shapes: Cut wiggles, stars, or whatever makes you laugh.
Toss the cut pasta with a tiny bit of flour and spread it out so it doesn’t glue itself together.
Step 5: Boil and Eat
Fill a pot with water and get an adult to help you heat it up. Add a pinch of salt and wait for big, happy bubbles (that’s boiling).
Drop your pasta in gently and stir it with a spoon to keep it from sticking. Fresh pasta’s quick—2-5 minutes tops. Nibble a piece to check: it should be soft but still have a little bite.
When it’s ready, have an adult help you pour it into a colander to drain. Hot water’s not your friend, so let them handle that part.
Step 6: Chow Down!
Your pasta’s done, and it’s time to dig in! I love mine with a blob of butter and a sprinkle of cheese, but you do you—maybe some tomato sauce or just a drizzle of olive oil. Eat it hot, and give yourself a high-five. You just made pasta!
Tricks I’ve Learned the Hard Way
Wanna make this foolproof? Here’s some stuff I figured out after a few doughy disasters:
Go Slow: Rolling takes a minute. Don’t rush—thin pasta’s the best kind.
Keep It Airy: If you’re saving some for later, lay the cut pasta out with a dusting of flour so it doesn’t turn into a blob.
Shape It Crazy: Pinch it, twist it, make it weird. The wonkier, the better.
Grab Backup: Knives or boiling water feel iffy? Pull in an adult. They’ll probably want a taste anyway.
Why This Is the Best Kitchen Project
Making pasta by hand is like building a Lego set you can eat. You get to squish dough, cut it into goofy shapes, and then—bam!—it’s dinner. It’s not just food; it’s a story you get to tell: “I made every noodle in this bowl!” Plus, it’s cheap, and you can make it with anyone—friends, family, even your dog watching from the floor (no dough for them, though).
If It Goes Sideways
Messed up? Happens to everyone. Here’s how to fix it:
Dough’s a Sticky Monster? Knead in a pinch of flour, bit by bit.
Dough’s Crumbling? Add a drop of water and squish it some more.
Ripping While Rolling? Ease up and roll gently—it’ll get there.
Pasta’s Clumping? More flour, more space. Spread it out after cutting.
You’ll get the hang of it. Every batch is a little better.
Stashing Extra Pasta
Got leftovers? Here’s the deal:
Fridge: Sprinkle with flour, pop it in a container, and it’s good for a couple days.
Dry It Out: Let it sit on a tray till it’s hard (a few hours), then store in a bag for weeks. Dried takes a tad longer to cook.
Turn It Into a Party
Make it a group thing! Drag your family or friends into it—one rolls, one cuts, someone picks the music. Bet you can’t cut shapes without laughing. Try a contest: who makes the longest noodle? It’s dinner and a good time.
You Can Watch Video As Well
Sauces That Slap
Your pasta’s the star, so keep the sauce chill:
Butter and Cheese: Melt some butter, toss in grated cheese. Done.
Tomato Vibes: Warm up canned tomatoes with a pinch of salt. Easy.
Herby Oil: Mix olive oil with a shake of dried oregano or basil. Fancy but not.
No need for chef-level stuff—just let your noodles shine.
That’s a Wrap!
There you have it—homemade pasta without a machine, straight from my heart to your kitchen. It’s just flour, an egg, and a little love, and you’ve got noodles that taste like you meant it. Make long strings, tiny squares, or shapes that make no sense—it’s all good. Get messy, have fun, and eat like a champ. What’s the first shape you’re gonna try?
Now go make it happen! If you love it, pass this on to someone else who needs pasta in their life. Happy cooking!
riends so they can make homemade pasta too. Happy cooking!
Learn how to cook brown rice on a rice cooker. A nutritional powerhouse with fiber, vitamins, and minerals, brown rice can be a challenge to cook.When cooking, it’s a gamble to get the right texture – either too mushy and too difficult, or uneven.No need to worry.This is where your trusted rice cooker comes in.How to always make perfectly cooked brown rice.
How to cook brown rice in a rice cooker? Why is Brown Rice Good for You?
Before cooking brown rice, we should discuss the benefits of this superfood.
The bran is still present in brown rice.All the nutrition is still there.Consider eating the whole fruit instead of the peeled portion.It is good for your heart, helps you feel satisfied, and boosts energy.
How to Cook Brown Rice on a Rice Cooker
The Rice Cooker
It is important to use a rice cooker because it takes all of the guess work out of cooking.It is important to control the temperature of your rice and how long it takes for you to cook.The brown rice needs more care, so this can be especially useful.
Cooking Brown Rice Step by Step
1. Rinse, Measure, and Wash:
To begin, determine how much uncooked brown rice each person will require.According to a good rule, each person should have about 1/2 cup brown uncooked raw rice.
Rice should be measured out and poured into fine-mesh strainers or bowls.
Rinse rice in cold water and run it until water clears.This will remove the excess starch, and help to avoid sticky rice.
2. The golden ratio of water and rice
Water-to-rice is critical.We generally use a 1:1 ratio when cooking brown rice.You’ll require 2 cups for every 1 cup of rice.
Place the rinsed risotto in your rice cooker.
Water should be the exact amount.
A pinch of sea salt or one teaspoon of olive oil can be added to the water for flavoring and to avoid it sticking.
3. When it’s time to cook, patience is key
Then, close the lid on your rice cooker.
Brown rice will take longer to prepare than white rice.Don’t peek!Leave the rice cooker to its own devices.
Modern rice cookers often have an “oven brown” option, which is a great way to simplify the process.
4. The rest period: Letting things settle
If the rice cooker is set to warm or has turned off, wait a few minutes before opening the lid.
Wait about 10 to 15 minutes before you start.As the steam is redistributed, it will produce perfectly fluffy white rice.
This step allows for the rice to be cooked evenly.
Enjoy the Fluff and Serve!
Utilizing a spoon or rice paddle, fluff gently the rice grains to separate them.
Now it is ready to be used!
Easy Tips to Perfect Brown Rice
Refining: You can make the rice even softer by soaking in water at least 30 mins before cooking.This will also allow you to reduce your cooking time.
Broth Rather Than Water: If you want to enhance the flavor of your broth, try using chicken or vegetable broth in place of water.
Use Flavorings. Test out adding herbs or spices to the water as you cook.
Storage:The leftover brown grain can be stored for up to 4 days in an airtight storage container.
The Texture: To get a chewier, more bouncy texture, you can add a bit less water.To make the rice softer, you can add a few more drops of water.
Rice cooker variations: Consult your manual to get specific instructions. As cooking times, water ratios and other factors may vary from model to model.
Video For Better Understanding
Revisiting The Health Benefits
By cooking brown rice correctly, you can unlock its potential.Regular consumption helps with weight management and digestion.This simple step can help you improve your overall health.
Concluding: Brown Rice Made Easy
A rice cooker is the easiest way to make perfect brown risotto.The guesswork is gone, as are the mushy results.Delicious, nutritional rice is ready to serve with any meal.Take your rice cooker out, read these tips, then enjoy the goodness of brown rice that is perfectly prepared.
Mediterranean Diet: Easy, Healthy, and Tasty Recipes
Welcome! Learn how to make Mediterranean diet recipes for beginners.Are you new to Mediterranean food and wonder what the diet is about? You are in the right spot.Enjoy a delicious diet that is good for you.Inspired by how the people of Greece, Italy, Spain, and other countries eat, think lots of vegetables, fruits, and olive oil.No need to be worried if this is your first time cooking. These recipes are suitable for both adults and children.Come and explore the Mediterranean diet recipe for beginners.
What is the Mediterranean Diet recipes for beginners?
First, let’s take a look at the main points.Mediterranean dieting isn’t all about rigid rules, or refusing fun food.You’ll find that the Mediterranean diet is all about colorful, fresh foods.The foods you’ll be eating include tomatoes, cucumbers, nuts, fish, and whole grains such as bread or pasta.Your new friend is olive oil, which is far healthier than regular butter.This diet will keep your heart healthy and give you plenty of energy.Ready to try this diet?You can start off with simple and quick recipes.
Mediterranean diet recipes for beginners
Recipe 1: Cheesy Veggie Pita Pizzas
Who doesn’t love pizza?For beginners, try this Mediterranean variation.The ingredients you will need are:
Ingredients:
You will need 2 pita breads made of whole wheat (round plates).
One cup diced veggies, such as tomatoes, bell peppers, or spinach
1/2 cup shredded mozzarella cheese
Use 1 tablespoon dried oregano.
Make It:
As a child you can get an adult to help set the temperature of your oven.
The pita breads should be placed on a baking pan.
Olive oil is a great way to add flavor and color to pita bread.
Spread the chopped veggies over top. Next, add cheese.
Add a sprinkle of oregano to everything.
Bake 10 minutes or until the bubbly cheese starts to melt.
Cool it down, then enjoy!
This recipe is popular because it uses Mediterranean favorites, like olives oil and vegetables.Plus, any type of vegetable will do!
Recipe 2 Lemon Fish with rice
It’s no secret that fish plays a major role in Mediterranean cuisine. With this simple recipe, you’ll be feeling like a gourmet in notime.Let’s get the details:
If you want to eat the ice cream right away, let it sit in your fridge.
This is a fantastic salad, because chickpeas provide oodles of protein and keep the dish fresh.A perfect Mediterranean recipe for newbies–no need to cook!
This recipe is great for beginners
The Mediterranean diet can seem daunting, but this recipe is for everyone.There’s no need for expensive equipment or ingredients that are hard to find.These items can all be bought at your local store.The best part is that they are all quick–none takes more than 30-minutes.So you spend less time on the stove and can focus more time on enjoying your meals.It’s easy to make, but the flavors are strong.
You Can Watch Video As Well
How to stick with the Mediterranean Diet
Are you still interested in healthy eating?Want to keep going with this healthy eating thing? Here are a couple of easy ideas.
Substitute olive oil for butter: You can cook or use the oil on your bread.
Consume more veggies. Add them into every meal. They are the star here.
Every week, eat some fish.
Pick up some fruit and nuts in place of chips.
Why is this the best part of all?There’s no need to eliminate treats.If you want to keep your diet healthy, a few pieces of dark-colored chocolates or some yogurt with honey are perfect!
It’s a diet that adults love
The recipes in this book are simple enough to be understood by a young child, yet they have been designed for the adults that want to look and feel their best.Mediterranean food is high in nutrients and helps you maintain a healthy weight.This is not about starving; it is about eating healthy, tasty foods that you love.Many doctors and experts recommend it. Mediterranean people live long and full lives by eating this way.What a cool idea, right?
Start Your Mediterranean Adventure
Three simple Mediterranean diet recipes are presented here for those who want to get started. The recipes are delicious and easy.Whatever you do, from making a tasty pita to baking fish in lemon, to tossing chickpeas or even making a simple salad with chickpeas you are well on your path to becoming a Mediterranean expert.Not only is this food delicious, it’s also an enjoyable way to care for yourself.Get cooking! Enjoy each and every bite.You got this!
Vegan protein rich recipes: easy and delicious meals for everyone
You guys are foodies?Looking for tasty meals with lots of protein but without any dairy or meat?This is the place for you!You’re at the right place! Today we dive into the world of vegan, protein-rich, kid-friendly recipes.These recipes are full of nutrients and will make you feel strong.These recipes are also delicious and easy to prepare.Here are some delicious recipes to get you started!
Why Vegan Protein-Rich Meals Matter
Why is protein cool?You need protein to grow your muscles and keep your body strong. Protein also gives you more energy so that you can play, learn and run.Normal people assume that things like chicken and eggs are the main sources of protein. Guess what?Plants contain protein, too!If you choose to be vegan, this means that no animal-based products are allowed.You know what’s even better?This vegan recipe is good for the earth and your health!
These are the perfect meals for kids, regardless of whether they love animals or not.It’s easy to understand for 10-11-year-olds, and anyone who has completed the first grade can also enjoy them.Now let’s get to some yummy recipes!
Vegan protein-rich recipes
1.Smoothie made with peanut butter and bananas
Smoothies are delicious and quick.It’s packed with protein from vegan sources!
What You need to know:
The banana is a big one (without peeling, of course)
Use 2 tablespoons (the creamiest kind) of peanut butter
One cup almond milk, or any other plant milk of your choice
1 tablespoon chia (they are tiny but they’re mighty!)
Making It Easy:
Add the banana, almonds milk, peanut butter and chia to a food processor.
Blend until smooth, almost like a creamy milkshake.
Pour in a cup.
What makes it awesome: Chia seeds and peanut butter are both high in protein.The smoothie is a great way to fuel your entire day.Plus, it tastes like dessert!
2.Cheesy Chickpea Quesadillas
Who doesn’t love a gooey, cheesy snack?This quesadilla uses vegan cheese with chickpeas to pack a punch of protein.
Mix together the soy and paprika.It is then dipped into the tofu.
The tofu should be coated in breadcrumbs.
Then, fry them for 2-3 minutes each on one side.
The ketchup sauce is delicious!
Tofu’s sneaky, it doesn’t even taste that great on its own. But when you add flavors to it, the flavor is absorbed like a spongy.These crunchy nuggets contain a lot of protein.
5.Black Bean Brownie Bites
Desserts with proteins?Yes, please!This brownie is fudgy with healthy black beans.
What You need to know:
Drain and rinse 1 can of black beans
12 cup cocoa Powder
14 cup of sweet maple syrup
Use 1 teaspoon of Vanilla Extract
The vegan Chocolate Chips
Making It Easy:
Blend together the cocoa powder with maple syrup, vanilla, and black beans in a high-speed blender.
Pour the chocolates in by hand.
Spread out the mixture in a small baking pan and bake for 20mins at 350degF.
Once cooled, cut it into squares.
This brownie is packed with black beans. They are also a great source of protein.The brownies are a delicious, but sneaky dessert!
Vegan protein-rich Recipes Can Be Fun!
Use different seeds, nuts and beans in your cooking.Each one is a protein powerhouse!
Color your Food: Add vibrant vegetables, such as spinach and carrots to give it a colorful appearance.
Bring a friend to the kitchen: Have a party in your own home!
You Can Watch a Video As Well
The Kids Will Love These Vegan Protein Rich Recipes
You’ll enjoy eating these healthy meals!It’s easy to make and follow for anyone over the age of 1st.There are no special tools needed, you just need a good appetite and some curiosity.Also, veganism is good for animals and the Earth.
The Final Thoughts
There you have them: five awesome, delicious and easy to make vegan recipes packed with protein. They are perfect for growing children like you.Everything from brownies to smoothies is available.The next time you get hungry, try one of these.Your body will feel super-powered with the protein that comes from plants!
You’re excited about which recipe you want to cook first.Please let me know and have fun cooking!
Hey guys! Want to learn How to steam Broccoli in the microwave? It’s quick, smooth, and an awesome way to make a healthy snack or side dish. In case you’re helping out in the kitchen or just interested in cooking, this guide is perfect for you! We’ll walk over every step together, and I’ll even share some cool alternative ways to steam broccoli if you don’t have a microwave available. Let’s get started!
How to Steam Broccoli in the Microwave? Why Steam Broccoli in the Microwave?
Steaming broccoli keeps it brilliant green, crunchy, and full of good stuff like vitamins. Using the microwave makes it quick than boiling or using a stove, and you don’t need complicated tools. Plus, it’s so easy that even a 10- or 11-year-old can do it with a grown-up’s help if needed.
how to steam broccoli in the microwave
What You’ll Use
Before we begin, grab these things:
Fresh broccoli: Look for a bunch with tight, green florets (the tree-like tops). Approximately 1 cup is good for one person.
Microwave-safe bowl: Glass or ceramic works best. No metal!
Water: Just a little bit—about 2 tablespoons.
A microwave-safe lid or plate: To cover the bowl. Plastic wrap works too, but ask an adult to help with it.
A spoon or fork: To stir and check the broccoli.
Optional: Salt, butter, or lemon juice to make it yummy later. Got everything? Awesome! Let’s steam that broccoli.
Step-by-Step: Guide for Steam Broccoli in the Microwave.
Step 1: Cleaning the Broccoli First, clean your broccoli beneath cold water. This gets eliminate of dirt or tiny bugs hiding in the florets. Shake it off or pat it dry with a paper towel. Clean food is happy food!
Step 2: Cut It Up Use a knife (with an adult’s help if you’re not used to it) or just break the broccoli into smaller pieces with your hands. Aim for bite-sized chunks—about the size of a big grape. Cut off any tough stems if you don’t like them, but the thin ones are yummy and soft when steamed.
Step 3: Put It in a Bowl Place your broccoli pieces in the microwave-safe bowl. Evenly out them so they’re not all accumulated up. This helps them cook evenly.
Step 4: Add Water Pour 2 tablespoons of water into the bowl. That’s about the size of a small puddle! The water turns into steam in the microwave, which cooks the broccoli.
Step 5: Cover the Bowl Put a lid, a plate, or some plastic wrap over the bowl. If you use plastic wrap, leave a tiny corner open so steam can escape. This keeps the heat inside but lets extra steam out safely.
Step 6: Microwave It Pop the bowl into the microwave. Set the timer for 2 to 3 minutes on high power. Start with 2 minutes if your microwave is strong (like 1000 watts or more). Microwaves are different, so we’ll check it soon.
Step 7: Check If It’s Done Carefully take the bowl out (it’s hot—use oven mitts or ask for help!). Lift the cover (watch out for hot steam!) and poke the broccoli with a fork. If it’s soft but still a little firm, it’s perfect. If it’s too tough, microwave it for 30 more seconds and find out again.
Step 8: Enjoy! Let the broccoli cool for a minute so you don’t burn your tongue. Add a sprinkle of salt, a dab of butter, or a congestion of lemon if you want.
Tips for the finest Microwaved Broccoli Don’t overcook it:
If it’s mushy or turns dark green, it’s been in too long. Start with less time and add more if needed.
Use fresh broccoli: Frozen works too, but it might get a little soggy. If you use frozen, skip the water and microwave for 3–4 minutes.
Even sizes: Cut the pieces about the same size so they cook at the same speed.
You Can Watch Video As Well
Alternative Ways to Steam Broccoli (No Microwave? No Problem!)
What if your microwave is broken or you want to try something else? here are some enjoyable and simple options.
1.Steaming on the Stove with a Pot What you need:
A pot, a steamer basket (or a metal colander), and a lid.
How to do it: Fill the pot with about an inch of water (not too much!).
Put the steamer basket in the pot—the water shouldn’t touch it.
Add your broccoli to the basket. Cover the pot with a lid and turn the stove to medium-high.
Let it steam for 4–5 minutes. Check with a fork—it’s done when it’s bright green and soft but not mushy. Why it’s cool: You can listen the water bubbling, and it feels like absolute cooking!
2. Using a Steamer tool
What you use: An electric steamer (some kitchens have these). How to do it:
Fill the water tank as the insistence say. Put the broccoli in the steaming tray. Set the timer for 5–7 minutes and press start.
Wait for the beep, then check if it’s ready. Why it’s cool: It’s like a robot cooking your food!
3. Boiling (Not Really Steaming, But Close!)
What you need: A pot and water.
How to do it:Fill a pot halfway with water and boil it on the stove. Drop in the broccoli for 2–3 minutes. Use a spoon with holes (a slotted spoon) to scoop it out.
Why it works: It’s super fast, but it might not stay as crunchy as steaming.
Fun Facts About Broccoli
Broccoli looks like tiny trees, right?
It’s actually a flower that hasn’t bloomed yet!It’s packed with vitamin C, which helps you stay strong and fight colds.
In 2025, some people even grow broccoli indoors with special lights—pretty neat! Frequently Asked Questions (FAQs) Can I steam broccoli without water? Not really! The microwave needs water to prepare steam. Without it, the broccoli might dry out or burn.
How long does it take to steam broccoli in the microwave?
Commonly 2–3 minutes, but it be based on your microwave and how much broccoli you have. Check after 2 minutes to be safe.
What if I don’t have a lid?
No worries! A big plate works, or you can use plastic wrap with a tiny vent. Just don’t seal it tight.
Can I add cheese?
Yes! After steaming, sprinkle some shredded cheese on top and microwave it for 20 seconds to melt it. delightful!
Final Thought
Steaming broccoli in the microwave is one of the simple ways to prepare a healthy meal. It takes lesser than 5 minutes, and you can do it all by yourself. extra, if you don’t have a microwave, you can try the stove or a steamer rather. Now you’re a broccoli-steaming pro! What will you cook next? Got questions or ideas? Let me know—I’d love to hear how your broccoli turns out! Happy cooking!
Learn How to Make Sweet Potato In An Air Fryer. These are not just big tubers but also a healthy source of vitamins, fiber, and antioxidants. One of the simplest and healthiest methods to prepare them as the superfood they are, is in an Air fryer. In this article, we will show you how to air fry a sweet potato perfectly with tips, alternatives, and frequently asked questions. Let’s get started!
How to Cook a Sweet Potato in the Air Fryer? Why Use an Air Fryer To Cook Sweet Potatoes?
The reason behind air fryers being so wonderful is because they:
Cooks quicker:Air fryer uses hot air to quicken the entire cooking procedure.
Use minimum oil: In order to get to crispy, all we need is a little bit reduce of oil.
Easy Cleanup: No pots or pans to wash! Achieve Right
Texture: Sweet Potatoes, using an air fryer ends up crispy inside out and fluffy on the inside.
Ingredients
1–2 sweet potatoes (or other starchy vegetables)
1 teaspoon olive oil, Salt, pepper, or any seasoning of your choice, an air fryer. Directions
Step 1: Prepare the Sweet Potatoes Wash the Potatoes: Use cold water to rinse the sweet potatoes to remove dirt. Dry Them: Use a towel and dry them properly. Poke holes: With the help of a fork poke Holes are in each potato. This allows the steam to escape while cooking. Optional:
Step 2 : Lightly Oli : If you want the skin to become extra crispy, rub a touch of olive oil on the surface Season: Add salt and pepper, or whatever spices you like (paprika, cinnamon, etc.).
Step 3:Air fryer Preheat Time: Preheat your air fryer to 400°F (200°C) for 3–5 minutes.
Step 4: Air Fry the Sweet Potatoes Place in the Basket: Put in air fryer basket. Ensure they are not overlapping or touching because they need to be cooked evenly. Cooking time: 25–35 minutes (depending on the size of the potatoes) Halfway Flip: After 15 minutes, turn the potatoes over to cook evenly.
Step 5: Check for DonenessFork test – insert a fork into the thickest part of the potato. If it goes in easily, it’s done! Adjust cooking time if necessary to cook for an additional 5-10 minutes.
Step 6: Serve and enjoy Let him cook down for a few minutes. Serve them with butter, cinnamon, honey, or your favorite dishes.
You Can Also Watch Video
Best Alternative Ways to Cook Sweet Potatoes
If you don’t have an air fryer, here’s some other easy way:
1. First, preheat your oven to 400°F (200°C). Place the sweet potatoes on a baking sheet. Bake for 45-60 minutes, flipping halfway. Take a potato and poke holes then wrap it in a moist paper towel.
2. Microwave for 5-8 minutes on the high setting, flipping halfway. Peel and chop the sweet potatoes.
3. Boil these in water for 15-20 minutes until soft.
4. Grilled Sweet Potatoes
Slice the potatoes into thin rounds or wedges. Grill on medium heat for 10–15 minutes, flipping occasionally.
Air-Fried Sweet Potatoes Tips:
Most ideal sizes are medium-sized potatoes for perfectly even cooking. Don’t overcrowd the basket to allow for free movement of air while cooking. Experiment with seasonings for delicious flavor like… garlic powder, chili powder, brown sugar etc. Use a liner and place a parchment paper liner in the basket to avoid mess.
Question 1. Can I cook multiple sweet potatoes at once?
It is possible to fry more than 1 at a time. But they need to be of a similar size and should not be touching each other in the basket.
Question 2 Do I need to peel the sweet potatoes?
No, the skin is edible and adds extra nutrients. Just wash it thoroughly.
Question 3. How do I store leftover sweet potatoes?
After cooling them, keep them in an airtight container and refrigerate for up to 3 days. Heat them in air fryer for 5 to 10 minutes.
Question 4 Can I cook frozen sweet potatoes in the air fryer?
Yes, cooking time will be 5-10 minutes more.
Using air fryer to cook sweet potatoes is a fast, easy, and healthy option.
Follow these steps for perfectly cooked sweet potatoes every time. No matter how you enjoy your sweet potatoes, they’re going to be a hit whether you enjoy them as a side dish or as a snack or as a main course!
Explore alternative cooking options to make variety by trying this technique today. Happy cooking! 😊
Let’s be real, cooking fish can feel like a whole thing, right? Especially weeknights when you’re tired. But guess what? You can make the most unbelievably tasty, healthy salmon right in yourtoaster oven. No fancy stuff needed. If you haven’t tried this yet, you are in for such a treat! It’s my little secret weapon for a fast, delicious meal. Wanna know how? Let’s do this!
Why I’m Obsessed with Toaster Oven Salmon
Okay, first off, toaster ovens are little kitchen superheroes. They heat up in a flash – way faster than your big oven – and honestly, they use way less energy. Cooking salmon this way is a total game-changer because it gets beautifully cooked and flaky without drying out. Seriously, it’s like a little flavor sauna for your fish! Plus, on a hot day, who wants to crank up the big oven? Not me!
And salmon itself? It’s just good for you. Full of all those amazing omega-3s that your brain and heart will thank you for, plus tons of protein. It’s brain food that tastes good. Making it this easymeans you can actually eat it more often. Win-win!
What You Need – The Super Simple List
Alright, ready to gather your goodies? It’s not much, I promise:
Some nice fresh salmon fillets (skin-on is my go-to for crispy bottoms, but skinless totally works!)
A little bit of olive oil (or whatever oil you usually grab)
Salt and pepper (the essentials!)
Maybe a lemon? (Adds such a bright, fresh pop!)
Any other little flavor boosters you like – maybe some garlic powder, a sprinkle of paprika, or some fresh dill if you have it.
A piece of foil or parchment paper (makes cleanup a breeze!)
This is so straightforward, you’ll barely believe it!
Step 1: Get That Toaster Oven Warm First things first, fire up your little oven. Set it to 375°F (that’s 190°C). While it’s getting nice and toasty inside, you prep the star of the show.
Step 2: Pat Your Salmon Dry (Trust Me!) Grab your salmon fillets and pat them really dry with a paper towel. This is a little pro tip – it helps everything stick better and can even give you a nicer texture on the outside. Lay them on a piece of foil or parchment paper that fits your toaster oventray.
Step 3: Time to Make it Yummy! Drizzle a tiny bit of olive oil over your fillets. Just enough to coat them. Now, be generous with the salt and pepper! Season both sides. This is where you can get fun – sprinkle on that garlic powder, that paprika, that dill! If you’re using lemon, give it a good squeeze over the fish, or even lay a thin slice or two right on top. It looks pretty and tastes amazing.
Step 4: Into the Toaster Oven! Okay, your oven should be ready. Carefully slide the tray with your seasoned salmon inside. If your toaster oven has racks, the middle one is usually perfect. Close the door and let it cook! It usually takes me about 12-15 minutes. The time really depends on how thick your particular piece of fish is. If it’s thick, maybe lean towards the 15 minutes or a tiny bit more.
Step 5: Is It Done? The Easy Check! Around the 12-minute mark, take a peek. The easiest way to tell if it’s done is to gently flake the thickest part with a fork. If it separates easily and the inside looks opaque (not shiny and raw-looking), you’ve nailed it! Pull it out! Seriously, be careful not to overcook – dry salmon makes me sad.
Step 6: Plate It Up & Enjoy! Carefully lift the tray out (use those oven mitts!). Let the salmon sit for just a minute. Then, serve it up with whatever you’re having on the side. Steamed green beans, some quick rice, or just a simple salad? Perfect partners!
My Little Pro Tips for Salmon Success:
Give ‘Em Space: Don’t crowd the pan if you’re cooking more than one piece. They need breathing room for the heat to work its magic.
The Temp Check: If you have a meat thermometer, the perfect temp is 145°F (63°C) in the thickest part. Game changer for getting it just right.
Play with Flavors! Don’t be scared to experiment! A little honey mustard? Some soy sauce and sesame? Get creative!
Keep an Eye On It:Toaster ovens are powerful! Check your fish a minute or two earlier than you think you need to, just in case.
Why Kids Can Totally Make This (with a little help!)
This recipeis awesome for getting little ones involved! It’s quick, the steps are simple, and there aren’t too many ingredients to mess with. They can help pat the fish dry, sprinkle seasonings (supervised, of course!), or squeeze the lemon. It teaches them basic cooking skills and hey, eating healthy food you helped make always tastes better! Pair it with mashed sweet potatoesor some roasted broccoliflorets they helped toss.
You Can Watch Video Related Salmon Recipes In Toaster Oven
Why This is Like a Hug for Your Body
We already talked about the omega-3s – think happy brain, strong heart! Salmon is also protein-packed, which keeps you full and helps your muscles. Eating it regularly is just good vibes for your health. And cooking it this way keeps all those good nutrients right there in the fish, where they belong.
Final Thoughts: You Got This!
Honestly, cooking salmon in your toaster oven is one of the easiest ways to get a healthy, incredibly tasty meal on the table fast. With these simple steps, you’ll look and feel like a total kitchen pro. Whether it’s just for you or your whole crew, this method is a winner.
Seriously, give it a shot this week. You’ll be amazed how something so simple can taste so darn good. Happy cooking, friend!
Forget kitchen marathons! Your humble ricecooker is a secret weapon for incredibly easyand delicious chicken. Perfect for beginners or busy weeknights, this method delivers juicy, flavorful results with minimal effort. Let’s dive into how quick it is, the super-simple steps, and a few tricks for an extra tasty meal. Prepare to be amazed by your new favorite dinner hack!
Why I Am Genuinely Obsessed with Rice Cooker Chicken (And Why You Will Be Too!)
Okay, let’s get real. Life is busy! And sometimes, the thought of a complicated dinner is just… nope. That’s where your ricecooker swoops in like a superhero. It’s not just a one-trick pony for rice. it’s actually amazing at steaming, boiling, and yeah, even getting chicken perfectly cooked. Here’s why I can’t stop talking about it:
It’s SO Stupid Simple: Seriously, if you can push a button, you can make this. You literally just put stuff in, close the lid, and walk away. No hovering, no constant stirring. Ahh, freedom!
Dinner in a Flash (and Less Mess!): You know those nights when you’re starving but dreading the pile of dishes? This is your answer! You can often cook your chickenand a side (like rice or veggies) all at the same time. Maximum dinner, minimum cleanup. Yes, please!
Healthy Eats Made Easy: Steaming or gently cooking chicken in the ricecooker is way healthierthan frying. It locks in moisture and flavor without needing a ton of added fat. Good for you, and totally delicious!
Okay, Okay, How Long Will This Actually Take? (The Timeline You Need!)
Alright, the burning question! How long until you’re digging into that delicious chicken? It depends a little on what cut you’re using, but here’s a quick cheat sheet for the standard “Cook” or “Steam” setting on most ricecookers (because who has time for the slow cook setting on a Tuesday?):
Boneless, Skinless Chicken Breasts: These cook up pretty fast! Think around 20–25 minutes.
Chicken Thighs or Drumsticks: Give these guys a little extra love, more like 25–30 minutes. The bone and bit more fat need a touch longer to get perfectly tender.
Whole Chicken Pieces (bone-in): For bone-in cuts, you’re probably looking at roughly 30–35 minutes.
Just remember, if your ricecooker has fancy settings like “Slow Cook” or just “Keep Warm,” that’s a totally different thing and will take way, way longer. We’re focusing on the quick weeknight magic here!
My Foolproof, Anyone-Can-Do-It Guide to Rice Cooker Chicken!
Ready to see how easythis is? Grab your chicken, grab your ricecooker, and let’s do this!
Step 1: Prep Your Chicken (It’s Not Rocket Science, I Promise!)
Quick Rinse & Pat: Just like you usually would, give your chicken pieces a rinse under cool water and then pat them nice and dry with a paper towel. This helps seasonings stick!
Sprinkle on the Goodness: Now for the fun part! Load up your chicken with your favorite seasonings. Salt, pepper, garlic powder, onion powder, a little paprika – go wild! Feeling ambitious? A quick 30-minute marinade before this step takes the flavor to the next level!
Step 2: Liquid Magic Goes In!
Water or Broth? Dealer’s Choice! Pour about 1–2 cups of water or chicken broth into the very bottom of your ricecooker pot. This is going to create all that wonderful steam that cooks your chicken so beautifully and keeps it from drying out. Broth adds extra flavor, just sayin’.
Veggies? Heck Yes! Want to make it a complete mealin one go? Chop up some hearty veggies like carrots, broccoli stems, potatoes, or bell peppers and toss them right into the liquid. They’ll cook up perfectly tender alongside the chicken.
Step 3: Tuck the Chicken In
Single Layer is Key: Arrange your seasoned chicken pieces in a single layer in the pot. If you’re being a kitchen ninja and cooking rice at the same time, put your rice and water in first according to the rice instructions, then lay the chicken pieces right on top of the uncooked rice. Yep, it works!
Close That Lid! Make sure it’s sealed up tight so all that precious steam stays inside where it needs to be.
Step 4: Press the Magic Button!
Go Time! Hit the “Cook” or “Steam” button on your ricecooker.
Hands Off (Seriously!): This is the hardest part for me! Try really hard not to lift the lid every two minutes. Every time you do, you let out heat and steam, and it makes the cooking take longer. Just trust the process!
Step 5: The Moment of Truth – Is It Done?
Your Thermometer is Your BFF: Okay, safety first! The best way to know your chicken is perfectly cooker and safe to eat is to use a meat thermometer. Carefully open the lid (watch out for steam!), and stick the thermometer into the thickest part of the largest piece of chicken. You’re looking for it to read 165°F (74°C).
No Thermometer? You Can Still Check! If you don’t have a thermometer, carefully take out the largest piece of chickenand cut into the very thickest part. The meat should be totally white all the way through (no pink!), and when you cut it, the juices should run clear, not cloudy or pink.
Step 6: Dinner is SERVED!
Woohoo! Carefully lift the chicken out of the ricecooker. Now comes the reward! Serve it up with that perfectly cooked rice, those tender veggies, maybe a quick side salad. You did it!
Follow the Steps in Video Below
My Little “Make It Even Better” Rice Cooker Chicken Tips!
Want to go from yummy to “OMG, you have to try this!”? Here are a few things I do:
Liquid Balance: Don’t drown your chicken, but don’t leave it high and dry! That 1-2 cups of liquid is usually just right to create enough steam without making things soggy.
Flavor Adventures: Don’t be afraid to play! A little lemon slice, some fresh herbs tossed in, a drizzle of teriyaki sauce before cooking – seriously, get creative and find your favorite flavor combos!
The Rice & Chicken Combo: I mean, why dirty two things? Cooking them together is pure genius for busy nights.
Give ‘Em Room: Don’t stack the chicken pieces too high. A single layer helps ensure they all cook at the same rate.
The Crucial Rest Step: This is key! Once the chicken is cooked, take it out and let it rest for just 5-10 minutes, loosely tented with foil. This lets the juices settle back into the meat, making it unbelievably tender and juicy. Don’t skip this!
Your Quick Q&A (Because We All Have Questions!)
1. Can I just toss in frozen chicken?
You can, but it’s going to take significantly longer – figure around 40-45 minutes, and you really need that thermometer to be sure it’s cooked through. I honestly prefer thawing it first for the best texture and more consistent cooking time, but in a pinch, frozenworks!
2. Can I cook other stuff besides chicken?
Absolutely! Your ricecooker is secretly powerful. You can cook things like sausages, meatballs, fish fillets, or even steam veggies on their own. Get experimental!
3. Is this actually safe?
Totally safe, as long as that chicken reaches 165°F (74°C) internal temperature. That’s your magic number for food safety!
4. Can I seriously make a whole meal in here?
Heck yeah! Chicken , rice, veggies – all in one pot (well, one appliance). It’s the ultimate lazy-but-smart way to get dinner done.
The Bottom Line: Go Try This!
Seriously, cooking chicken in your ricecooker is one of those simple kitchen tricks that feels almost too easy to be true, but it works. It’s healthy, saves you time, and produces perfectly cooked chicken with hardly any effort. Whether you’re a total beginner or just having a night where cooking feels like a monumental task, this method is going to become your new best friend.
So please, the next time you’re wondering what to make and eyeing your ricecooker , just go for it! Give this chicken method a whirl. I have a feeling you’re going to be just as obsessed as I am. Happy cooking (the easy way)!